2018 Yamaha FJR1300
|
Updated content on 11-1-2021 I sold my Yamaha FJR1300 in November 2021. I bought a new 2018 Yamaha FJR1300 after I was recovered enough from my accident to start riding again. I was lucky to find a new left over 2018 FJR1300 A model at Big St. Charles Motorsports in St. Louis, MO. I made the deal over text messages and then rented a car and drove out to St. Louis with my riding gear. I picked up the FJR the next morning and rode it back home to my house in western North Carolina. It was my first ride since the accident and I was not sure if I was going to make it home in one day as it was a 600 mile ride. I have my FJR tricked out and a lot of people ask me what the hell! I tell them that I like to ride everywhere including Alaska, Canada and Mexico and having all of the farkles on my FJR make that riding safer and easier. I also compete in long distance endurance rallies and long distance rides that having things like satellite tracking device, multiple GPS's and auxiliary lights really help. I will be riding my new FJR in the western North Carolina mountains and long distance riding and rallies. I may even make it down to the Panama Canal with the FJR. I have a little over 29,000 miles in the first eight months riding around the southeast and including five BBG's ( 1500+ miles in less than 24 hours ). I have added more information about my rear tire testing below. I also added some photos and information on my new SW-Motech mirror extensions and Dasen one inch handlebar risers that I mounted on top of my Helibar risers. I have some good photos and information about my farkles installed on the FJR below. You can click on many of the photos to see a full size image. |
|
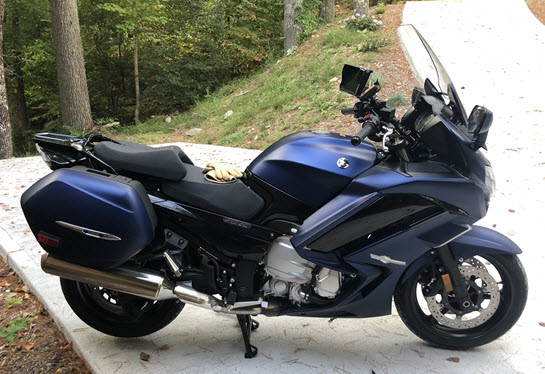
Arrived home from St. Louis
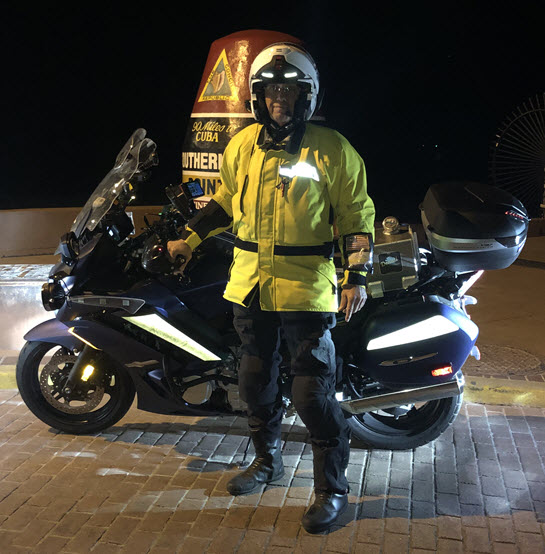
First ride to Key West on the FJR
Pelican Box & Daytime Running Lights - Click For Large Image
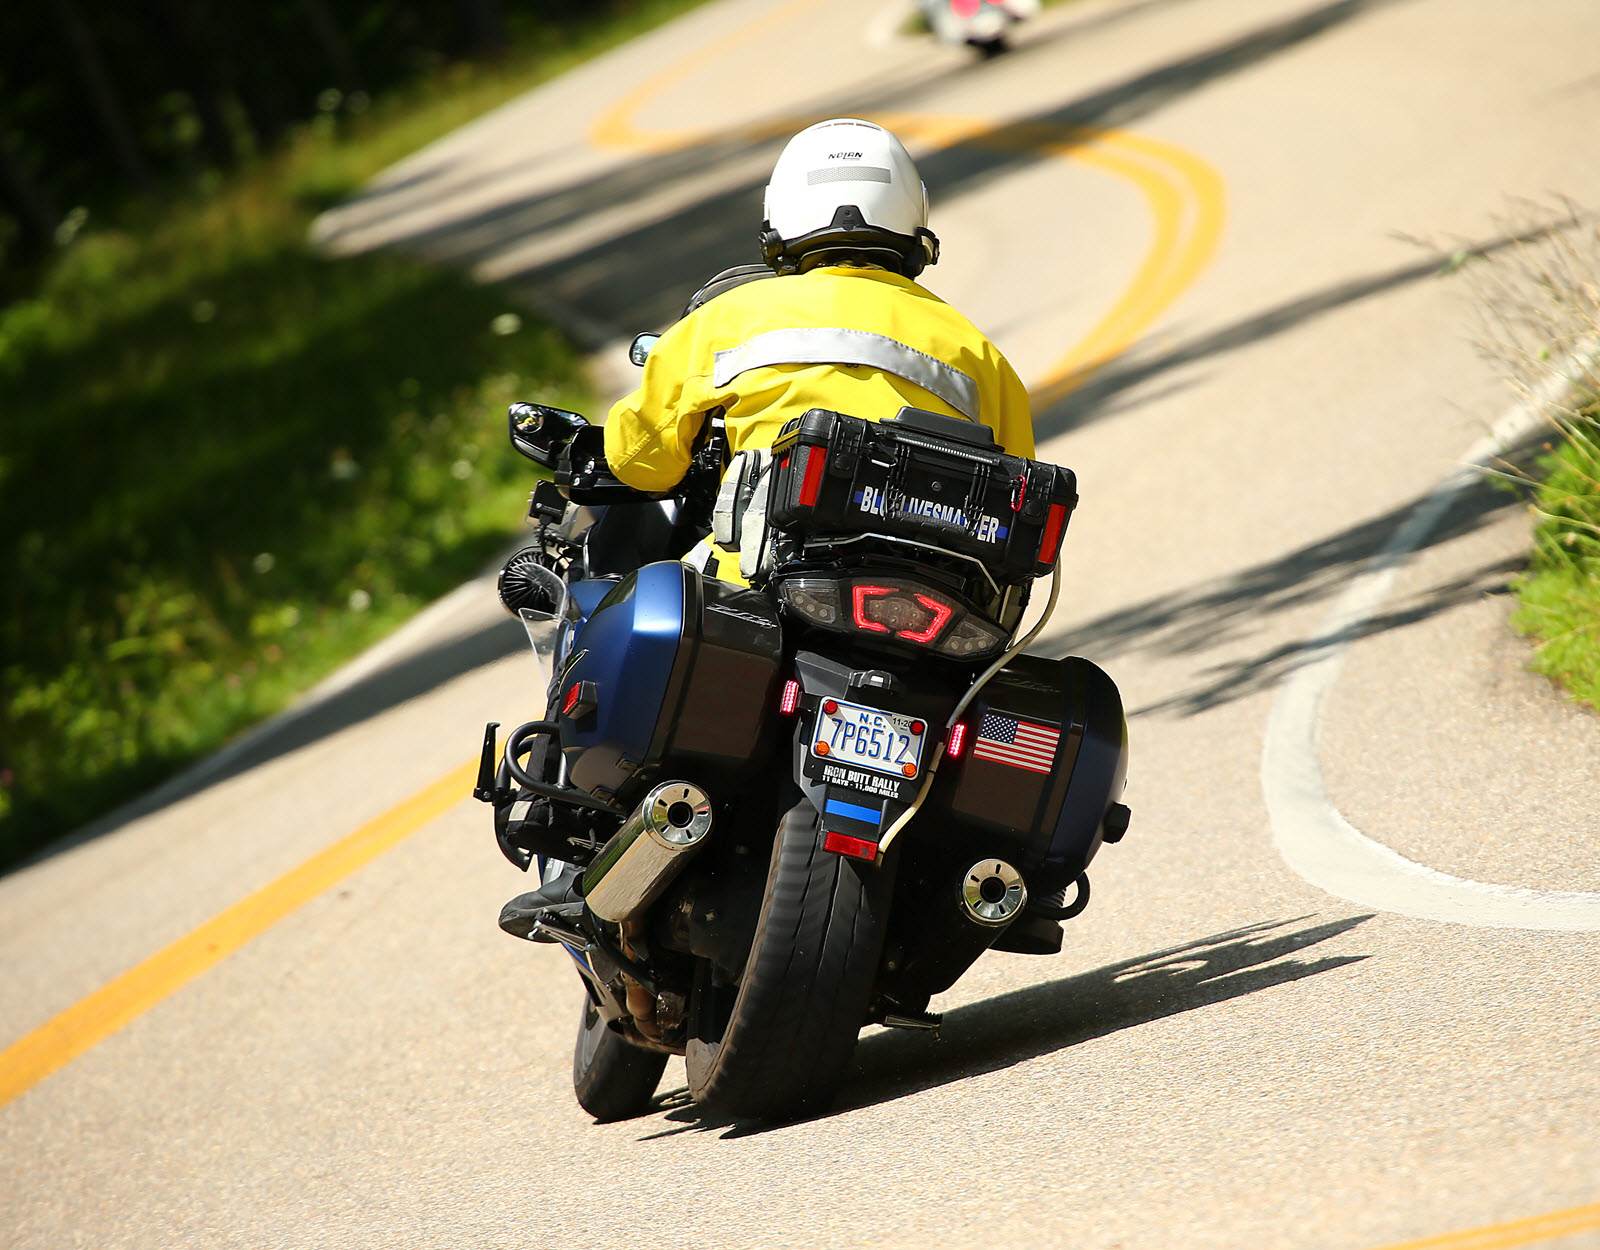
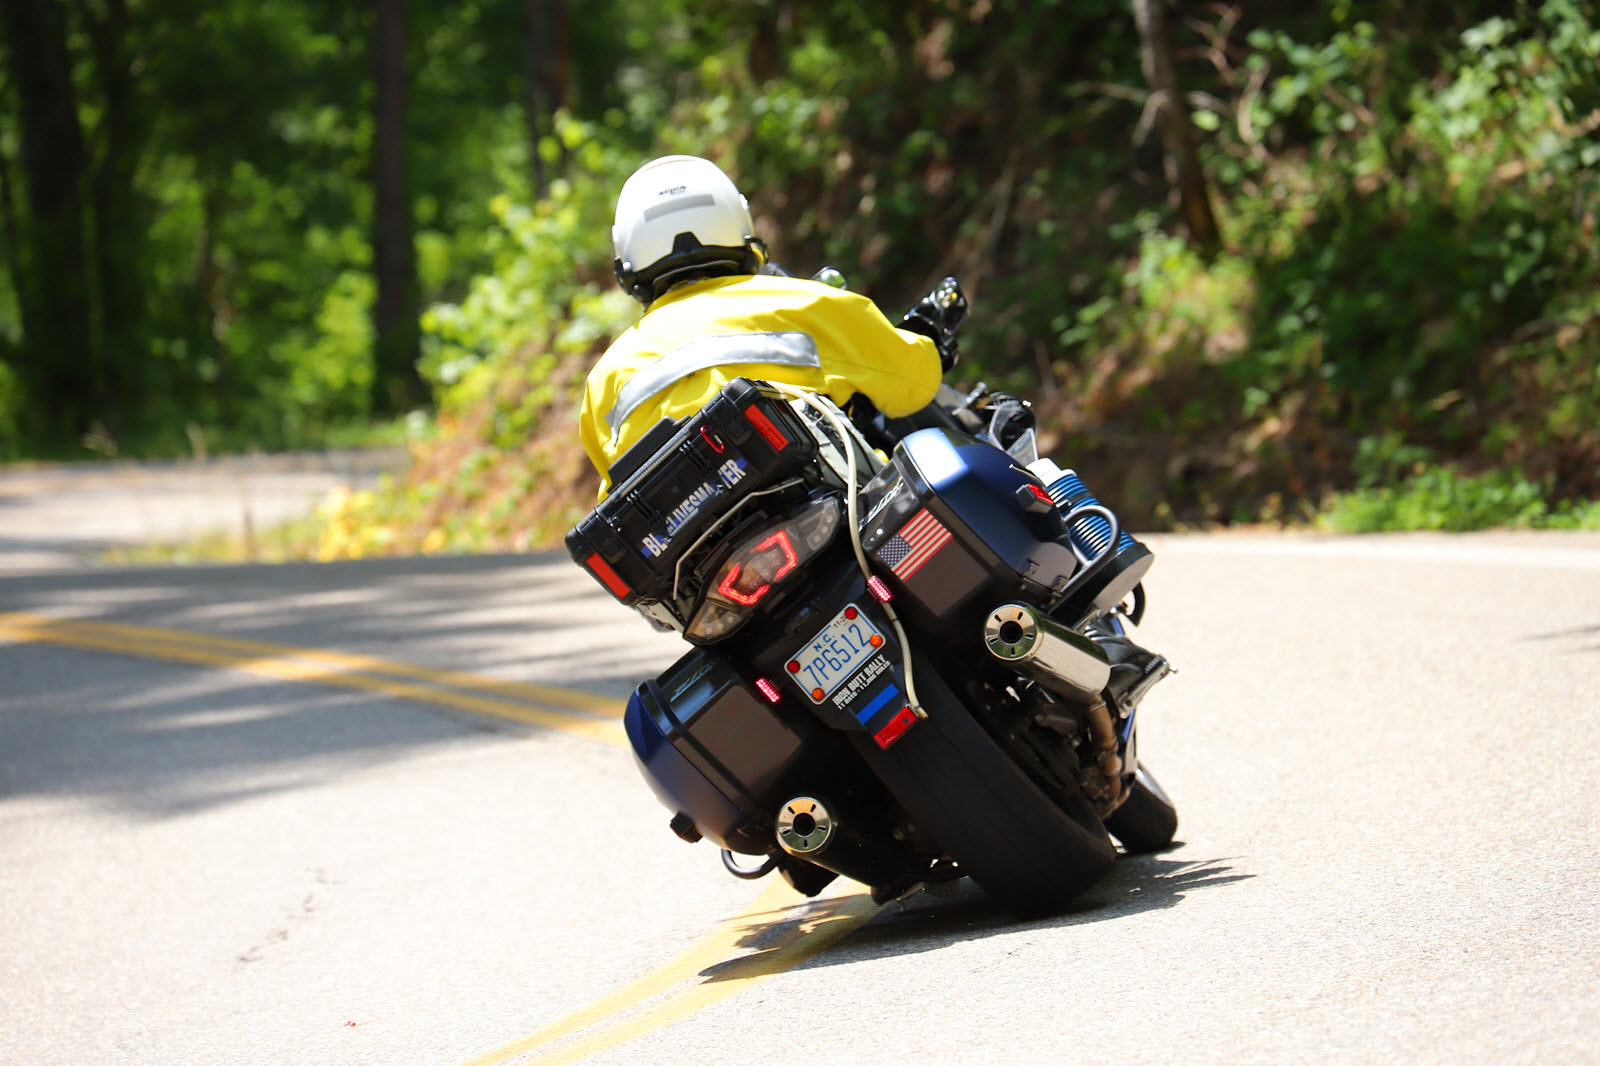
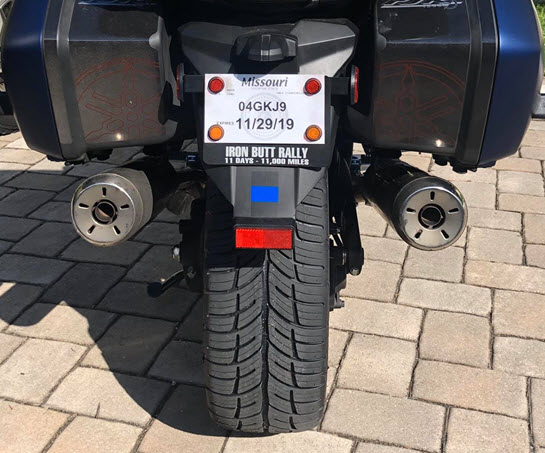
FJR With Rear Car Tire On The Dragon - Click For Large Image
Some Thoughts
Some of my initial thoughts on the FJR is that it is a really well made motorcycle. I have found the FJR easy to ride and very nimble compared to many of my previous motorcycles.
The FJR is a very reliable motorcycle and I feel comfortable riding the FJR anywhere.
I have spent a couple months adding farkles that I like and that help me stay safe on the road. Many of the farkles I have added are really safety features for me and installed in positions so that I can see them directly in front of me or in my peripheral vision. This allow me to keep my eyes on the road and the surroundings.
The Good
-
Wow - Great power
-
Traction Control
-
Ride Modes
-
Electric Windscreen
-
Better gas mileage than previous Gold Wing or BMW RT
-
More luggage space than 2018 Gold Wing with the Givi V47 Top Box
-
Lots of Farkles available
Not So Good
-
Engine is louder than previous Gold Wing's – I like motorcycles that are quiet.
-
The ergos are not good for me and I am working on making some changes.
-
There is more heat from the engine on my legs than my previous motorcycles.
I am starting to get farkles installed on my new Yamaha FJR and this webpage is where I will try and provide the how and why I did what I did.
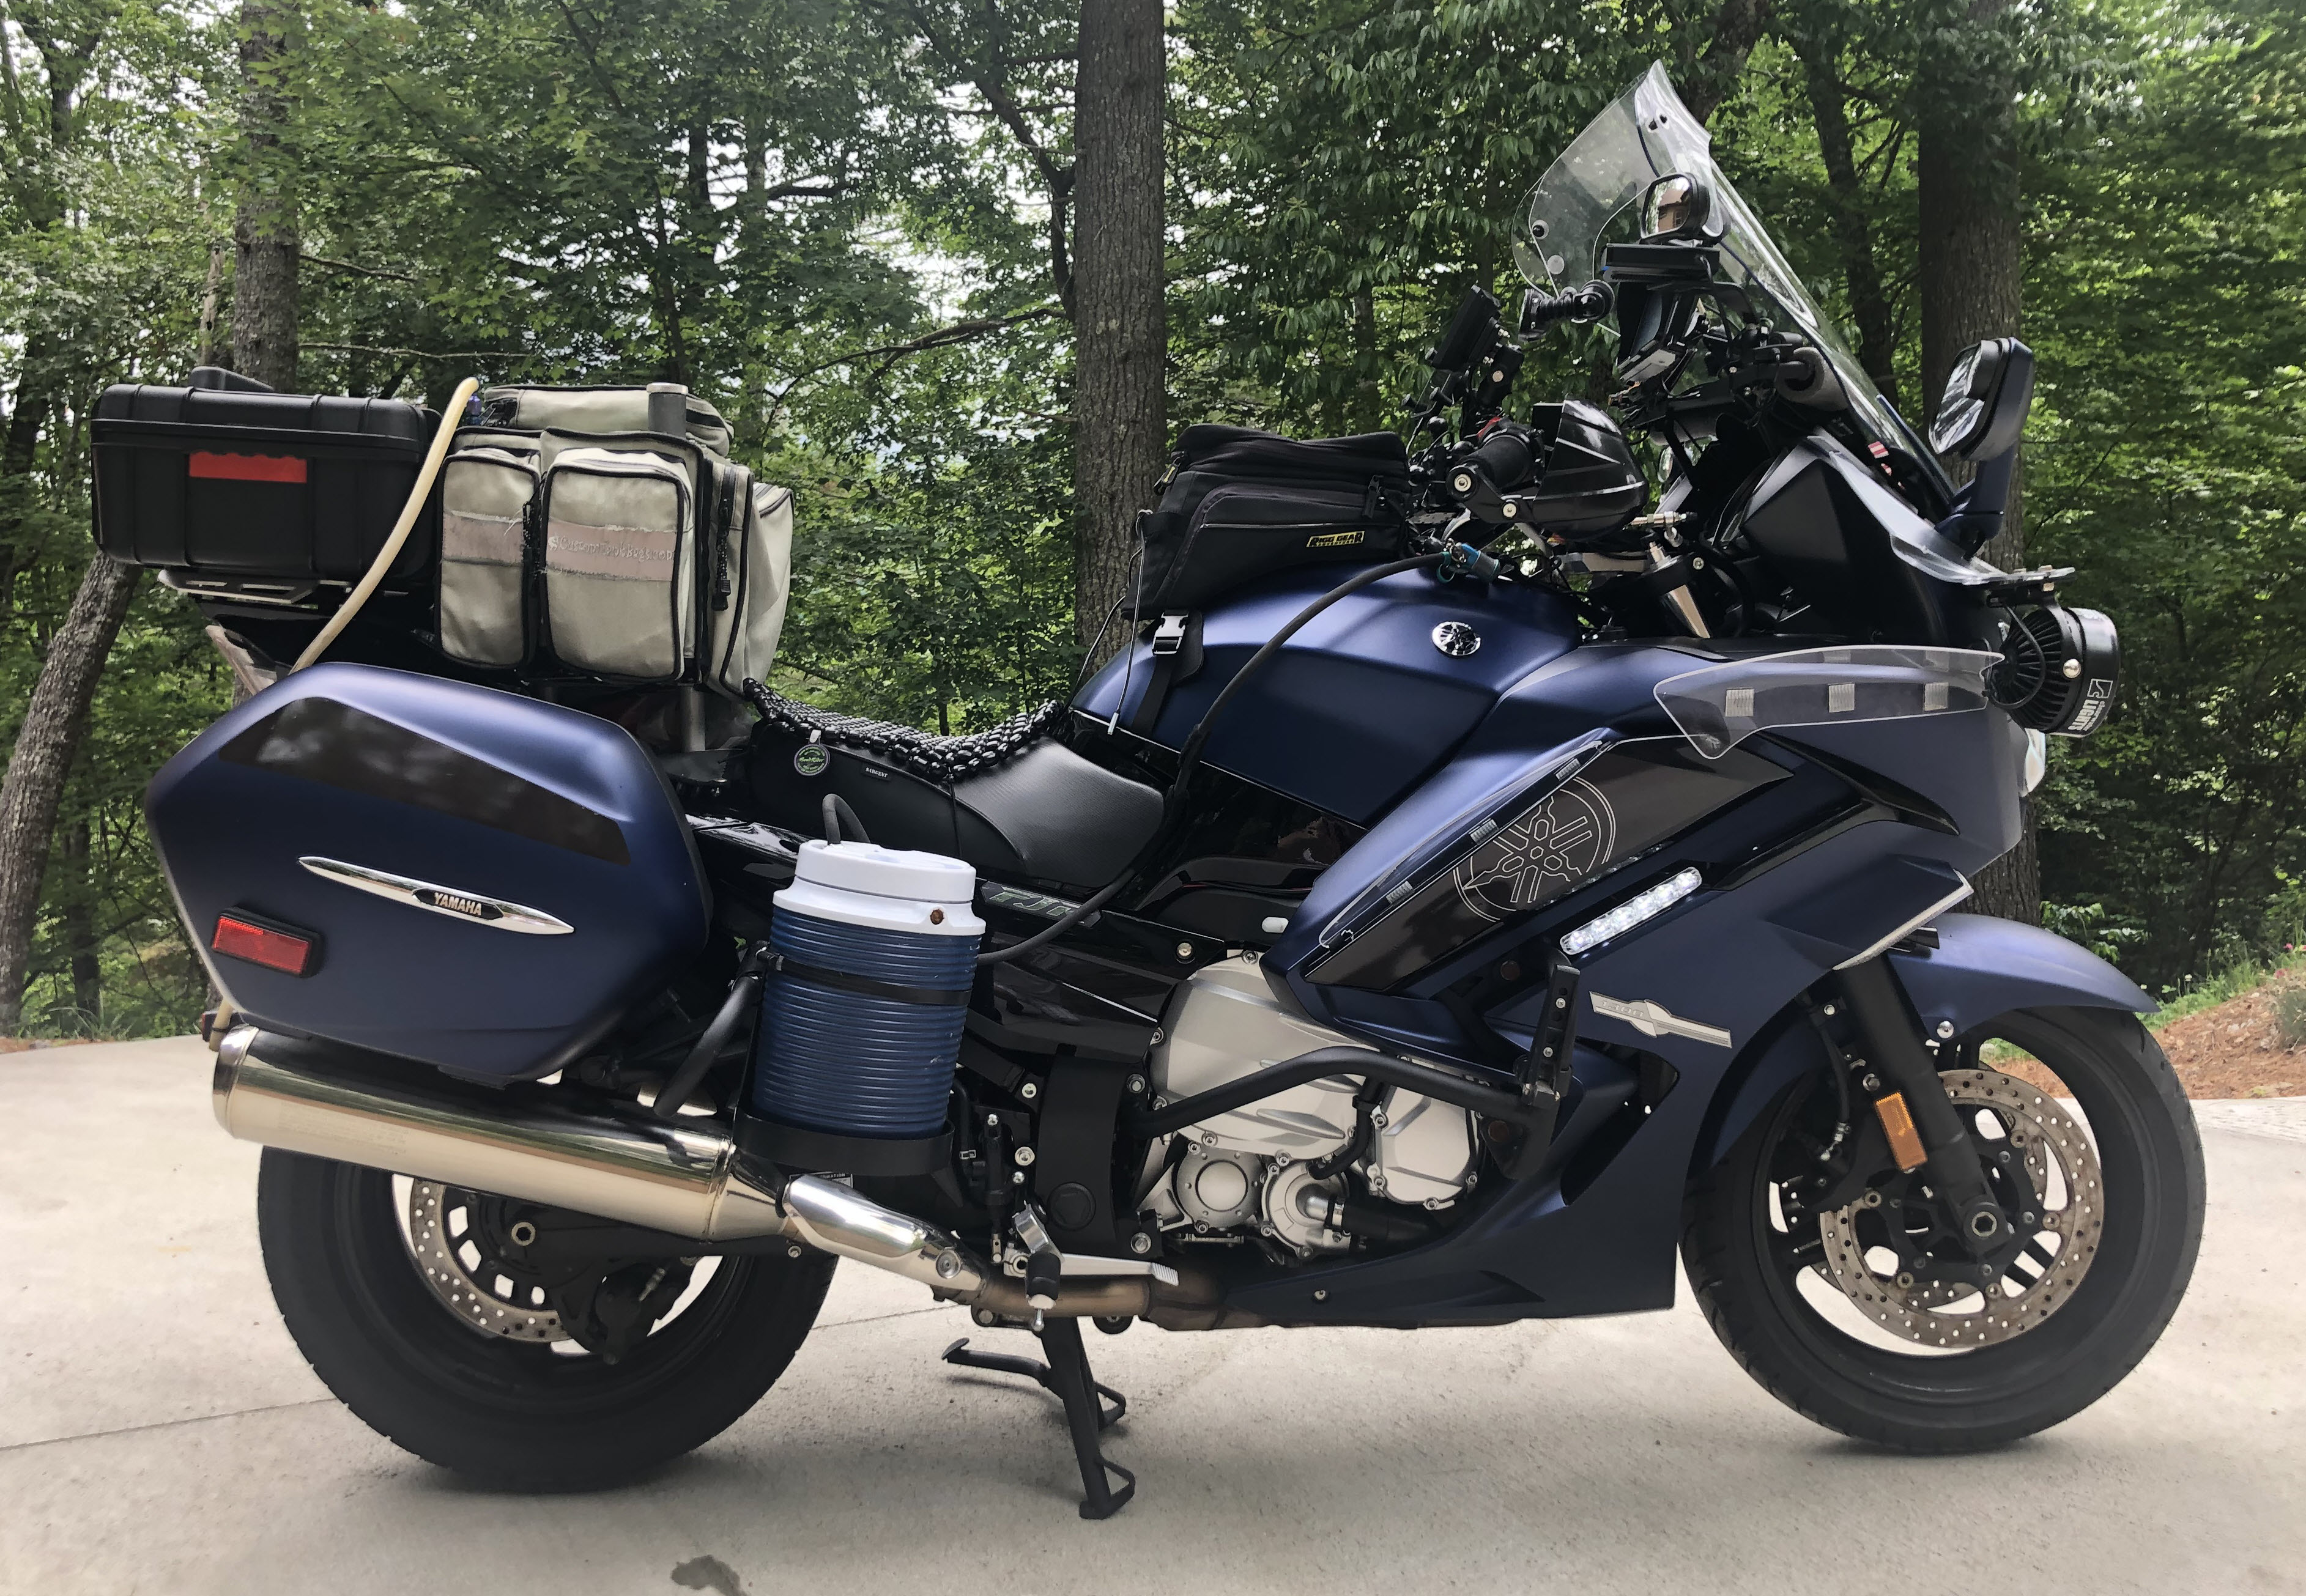
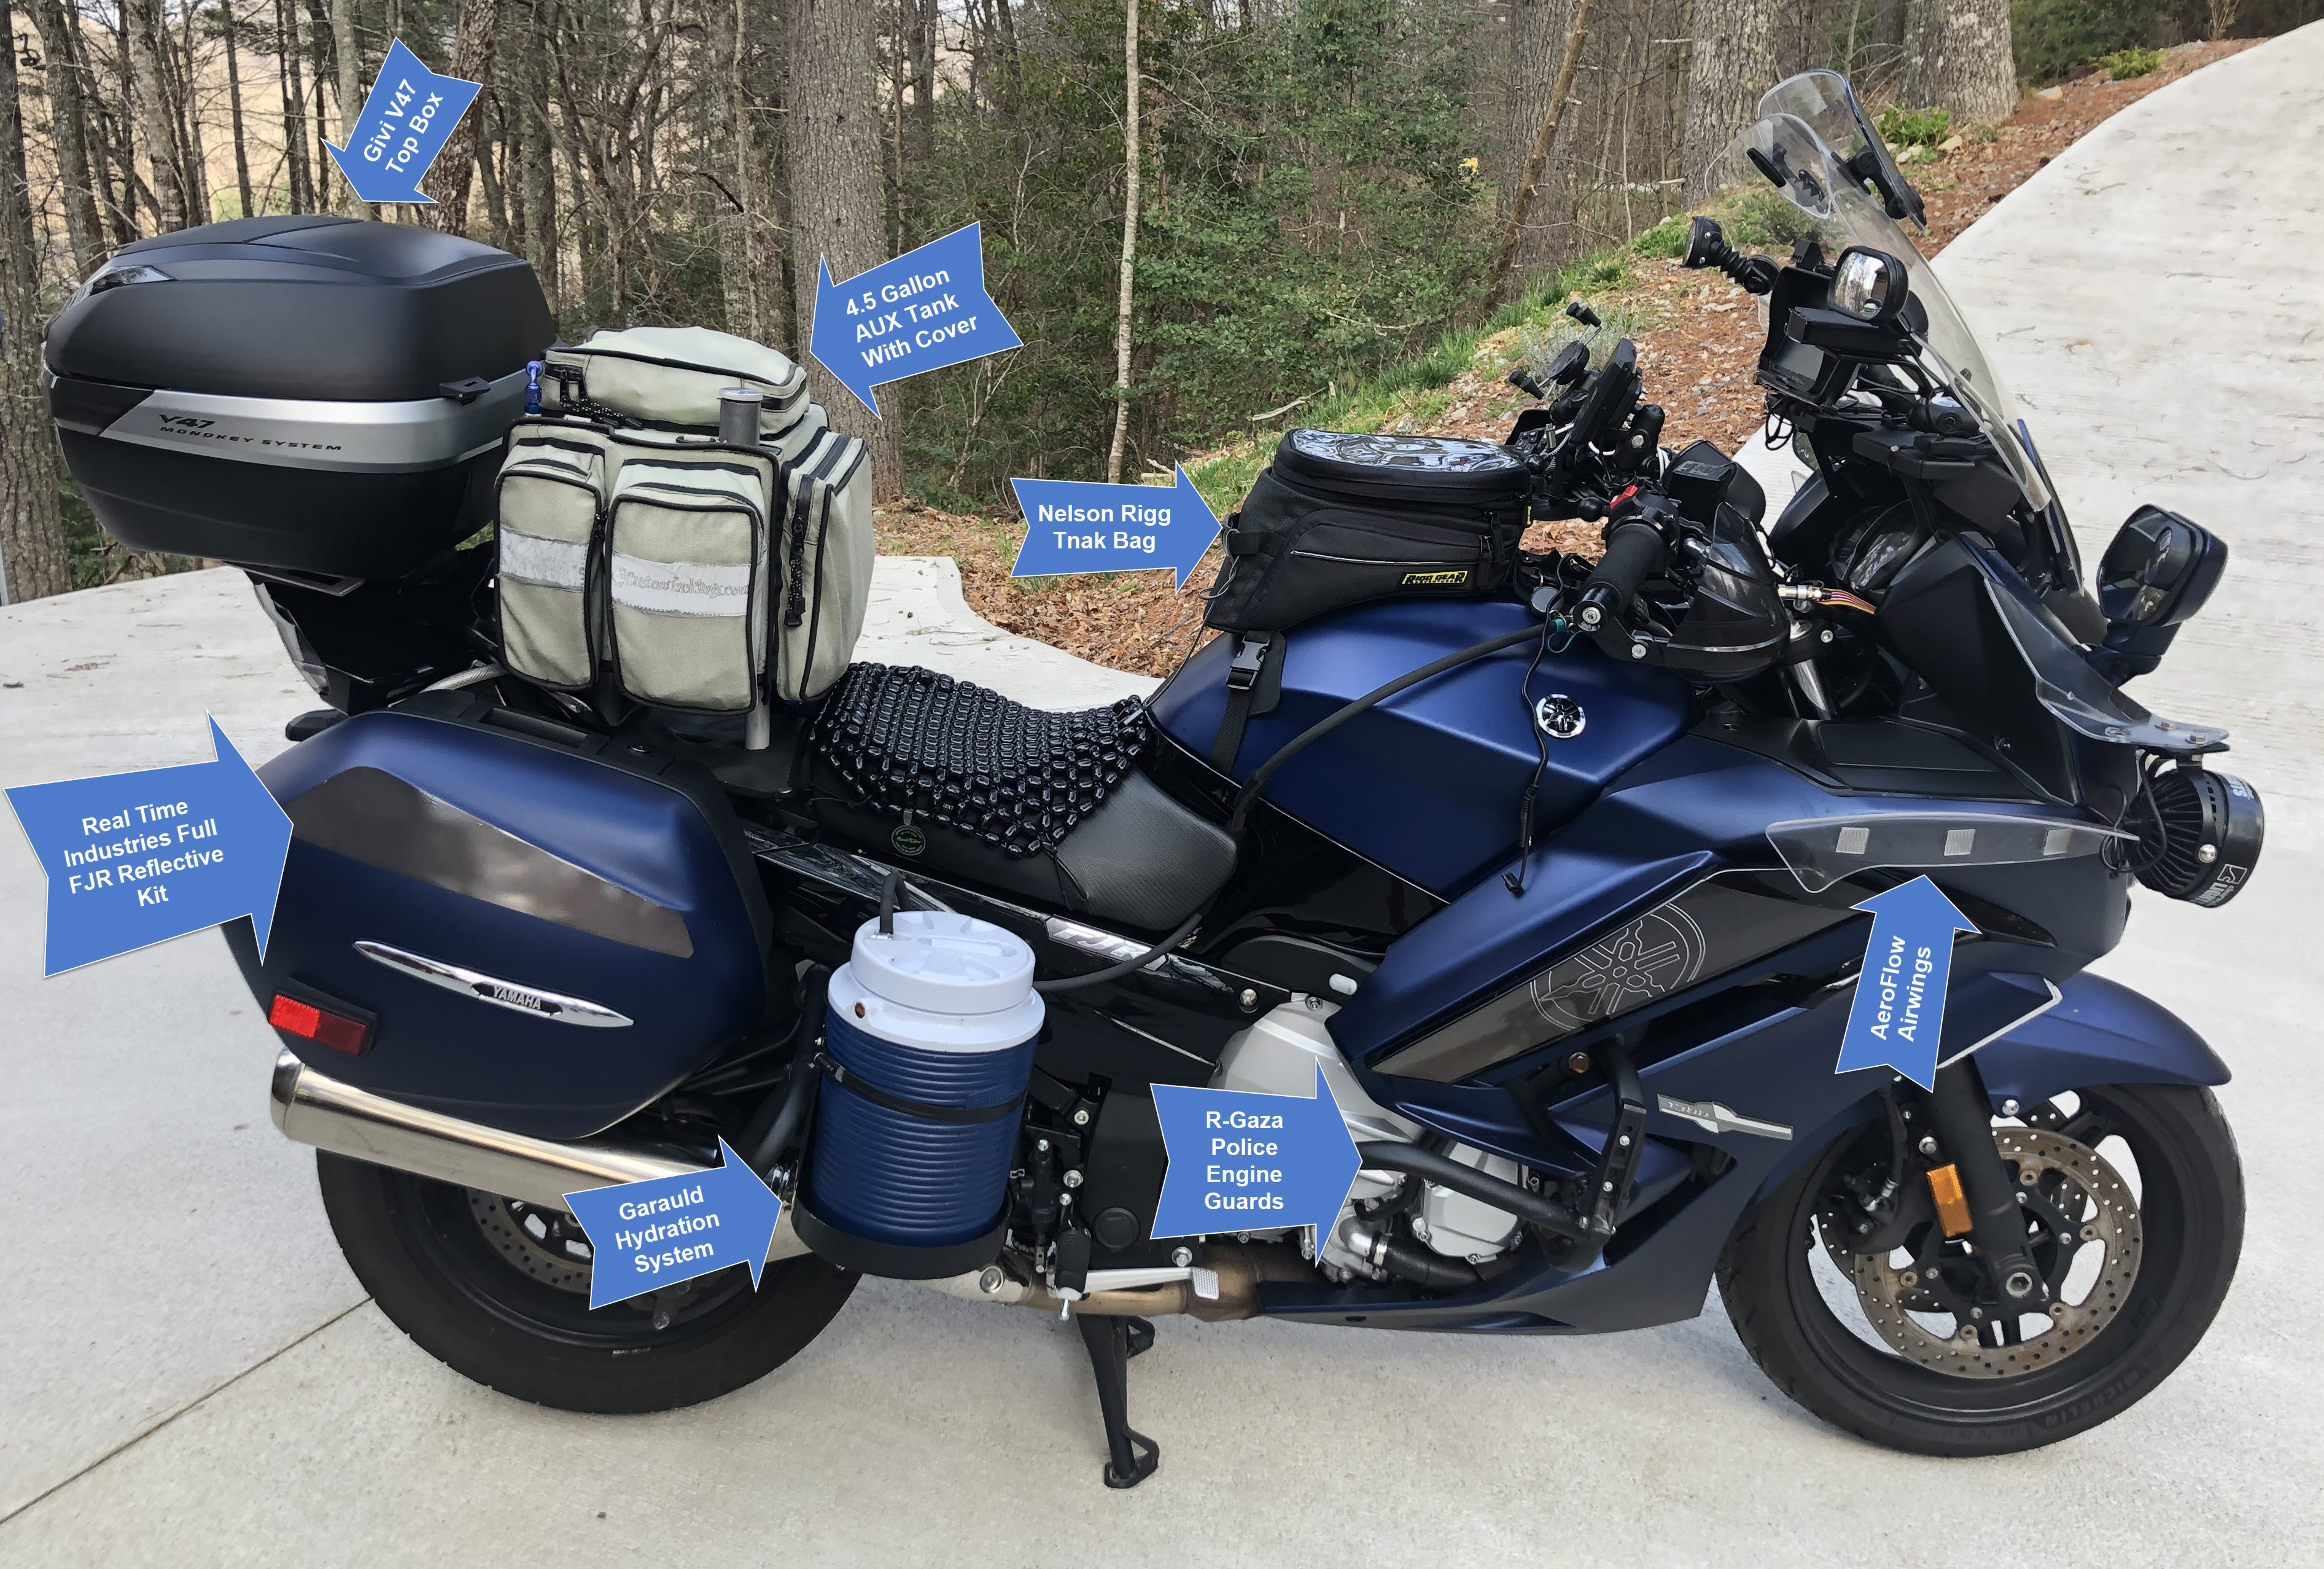
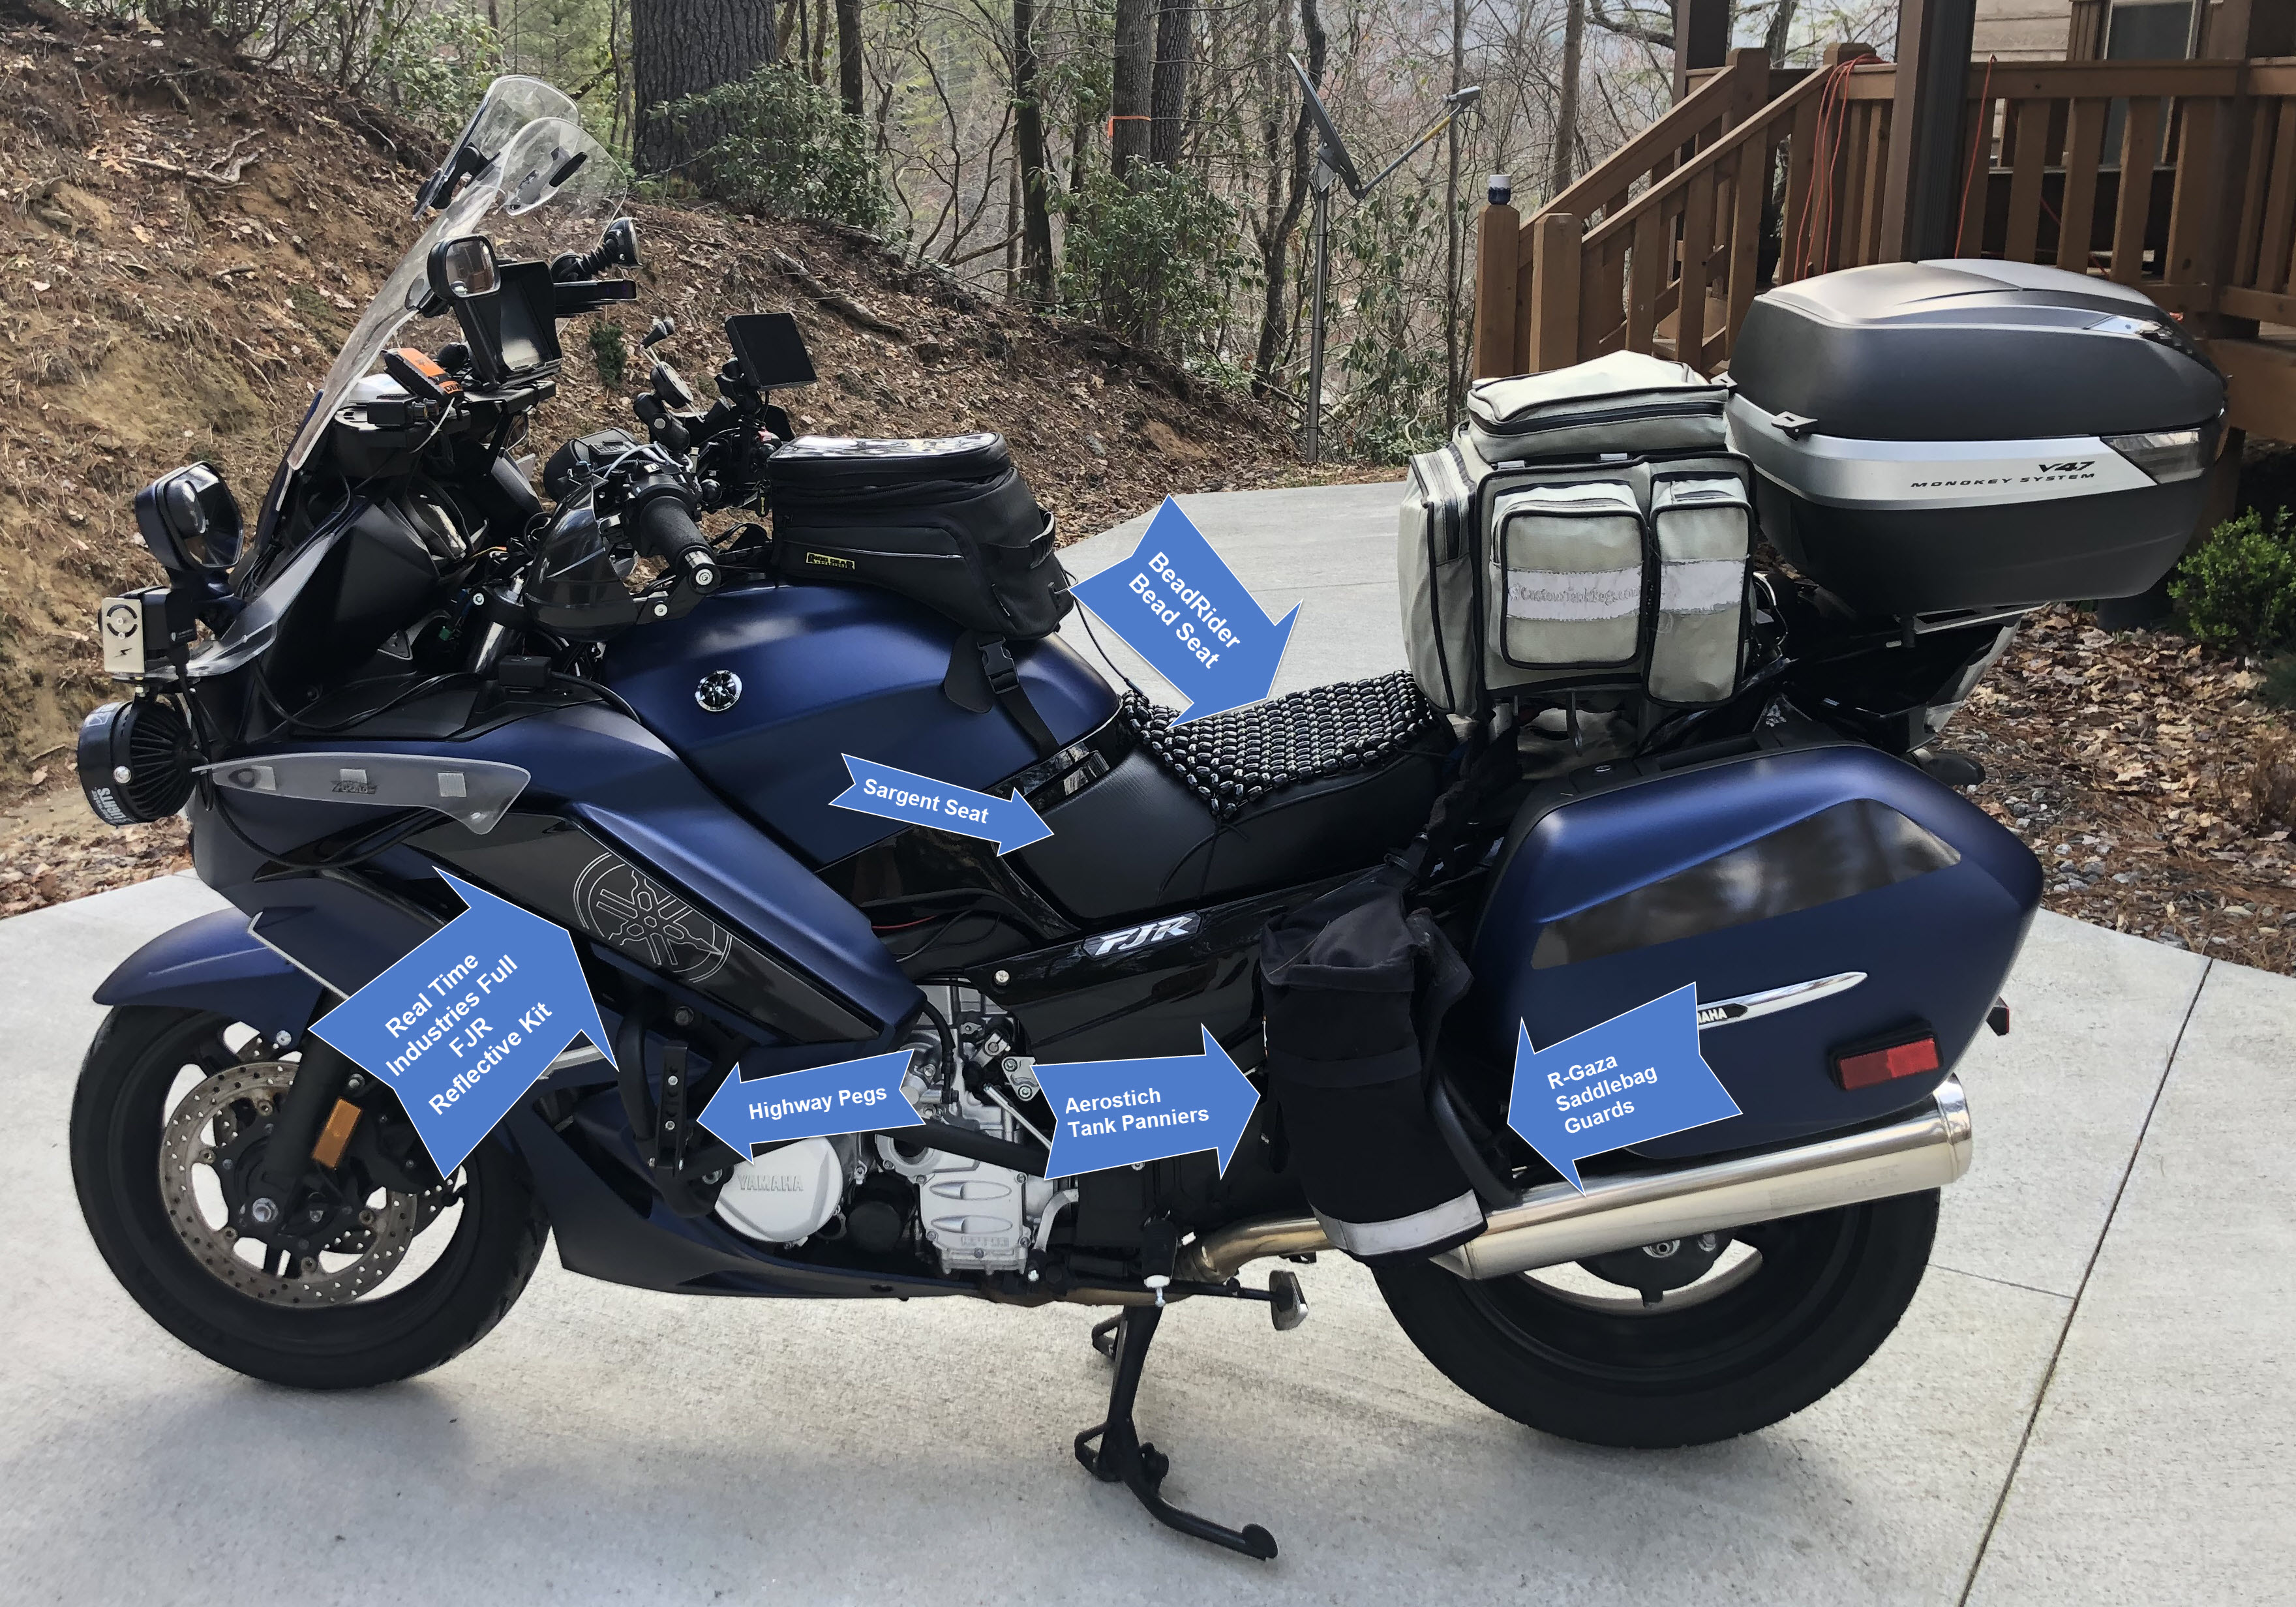
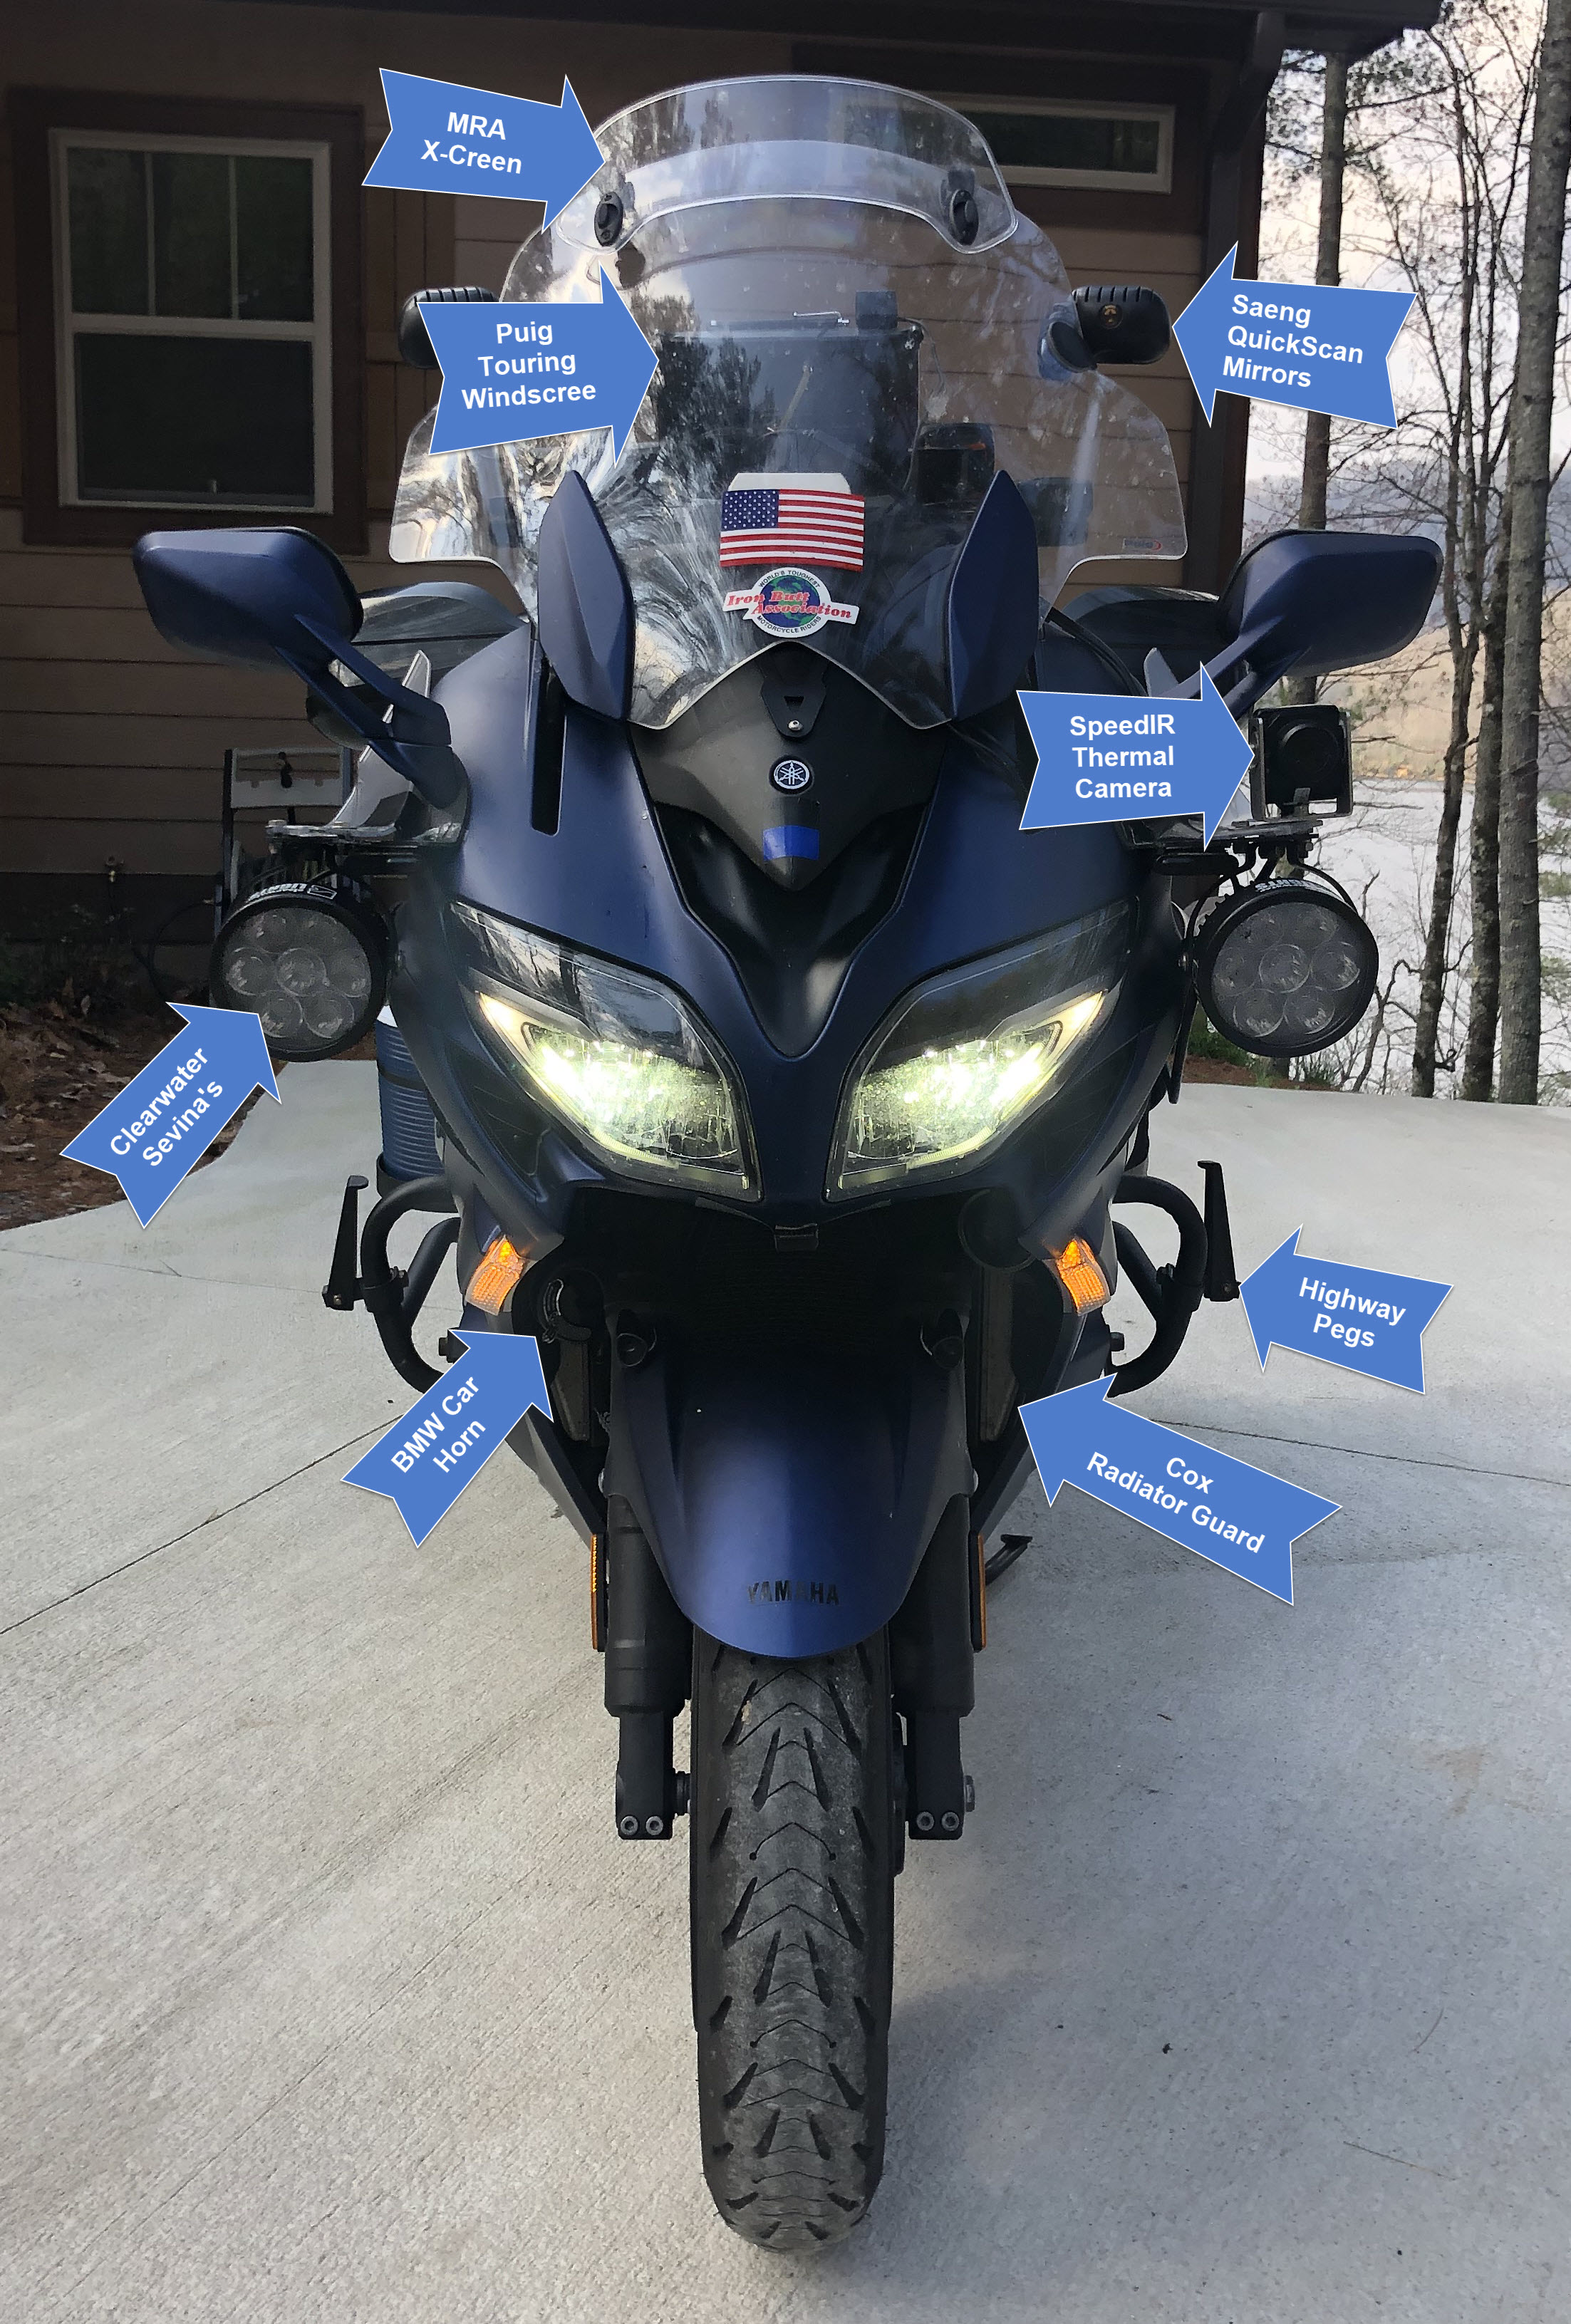
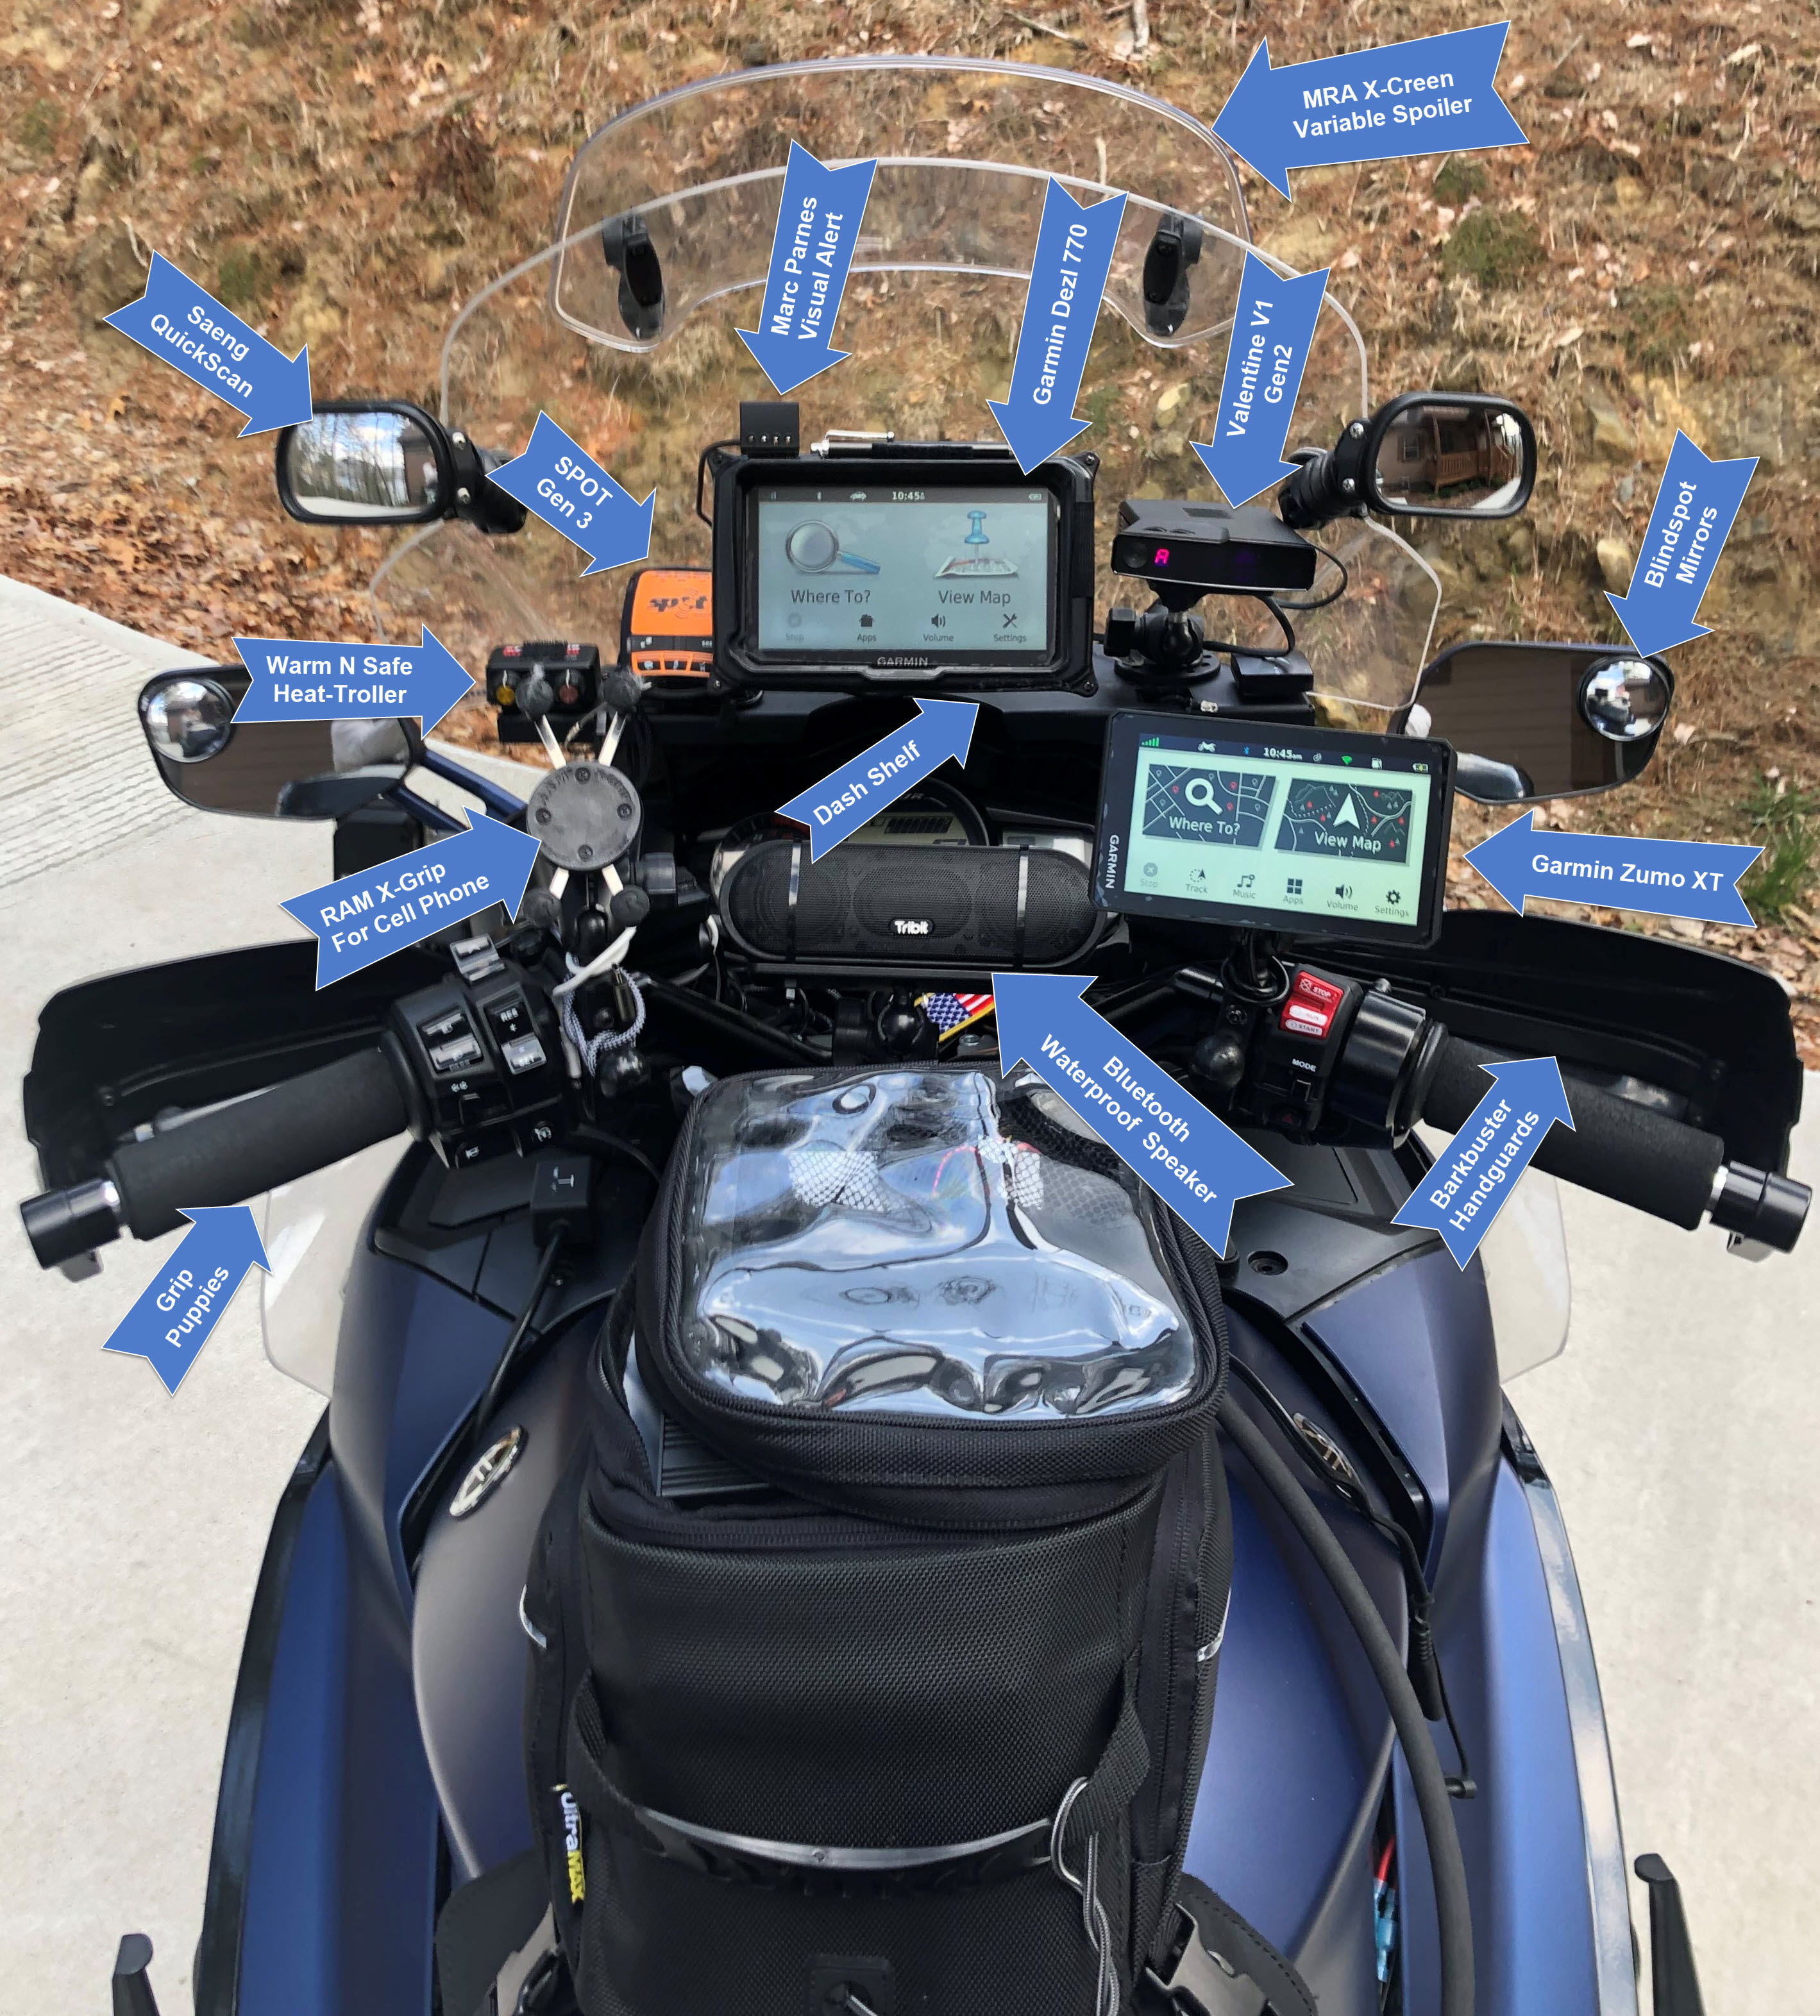
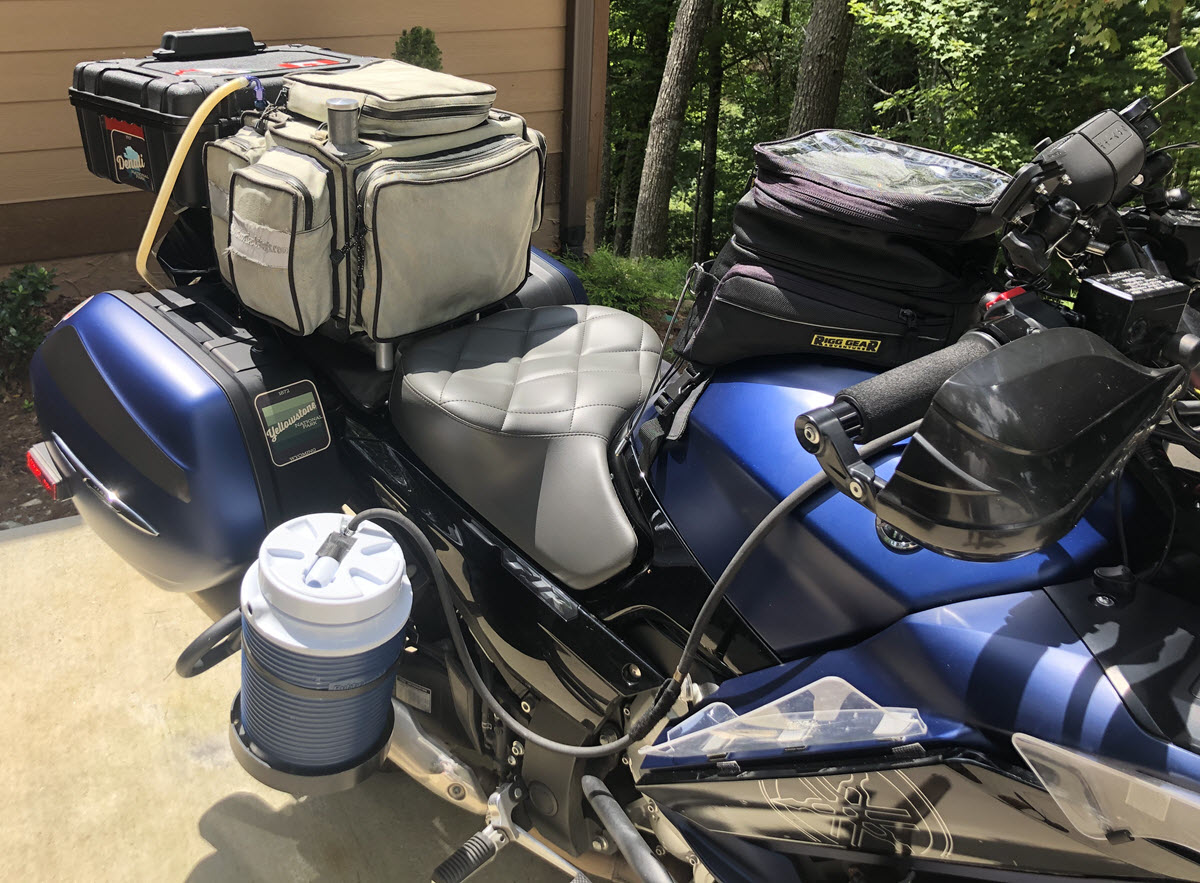
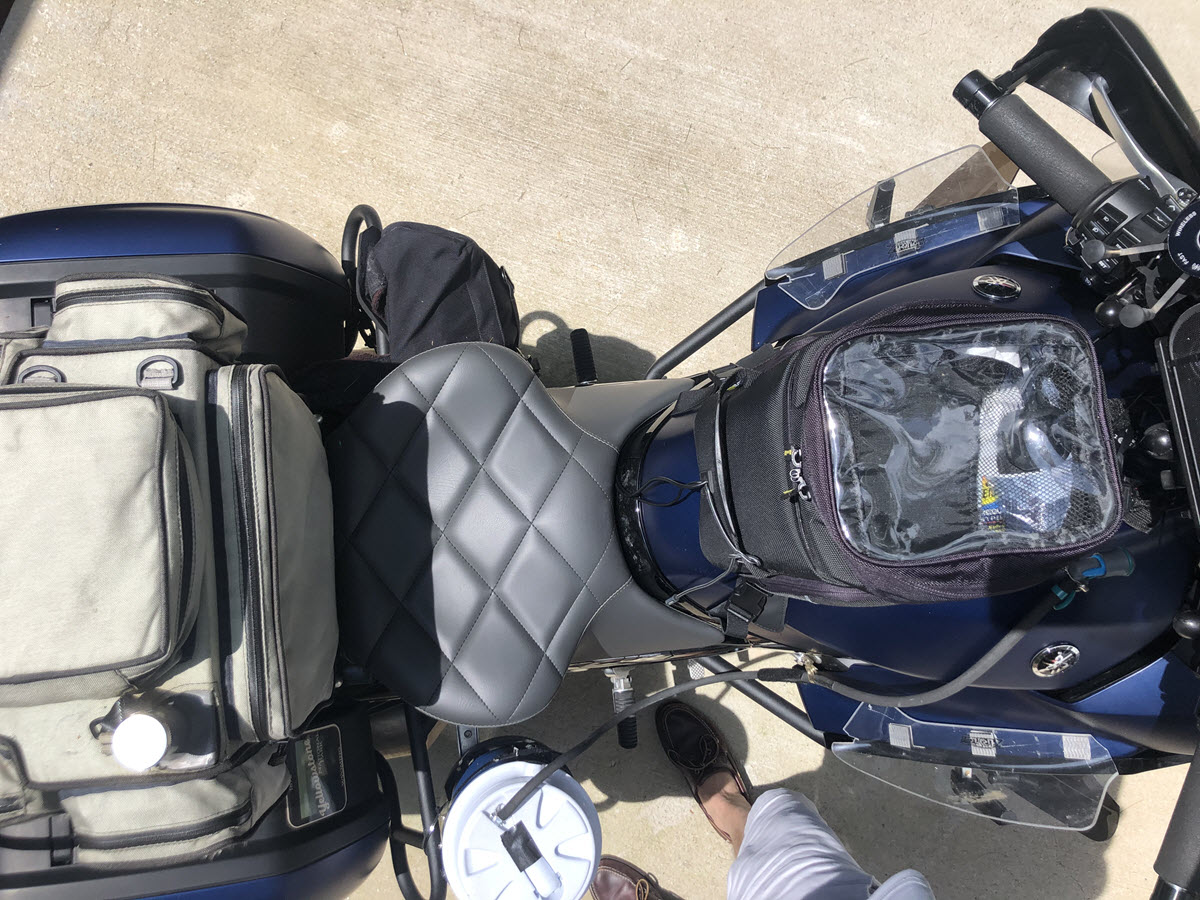
FJR Farkled Out Ready To Rock!
Click on the below photos for large images.
Click For Larger Image
Click For Larger Image
Click For Larger Image
Click For Larger Image

Click For Larger Image
Farkles List
- Clearwater Sevina AUX Lights
- Cox Racing Radiator Guard
- Russell Seat
- HeliBar Risers
- Dasen One Inch Handlebar Risers
- Grip Puppies
- Bryden Scot Dash Shelf
- R-Gaza Police Engine guards
- R-Gaza Saddlebag guards
- Baker Built Lower Leg Air Deflectors
- Saeng QuickScan Mirrors
- Blind Spot Mirrors
- Michelin Road 5 GT Front Tire
- Bridgestone T31 GT Front Tire
- 205/50ZR-17 BFGOODRICH G-FORCE COMP-2 A/S XL Rear Tire
- 90 degree Metal valve stems
- SYKIK Rider SRTP300 Wireless TPMS
- AeroFlow BMW RT airwings to fit FJR
- Barkbuster Handguards
- Givi V47 Top Box And Givi Rack
- Admore Lighting Givi V47 light kit
- Hyperlights
- Puig Touring Windscreen
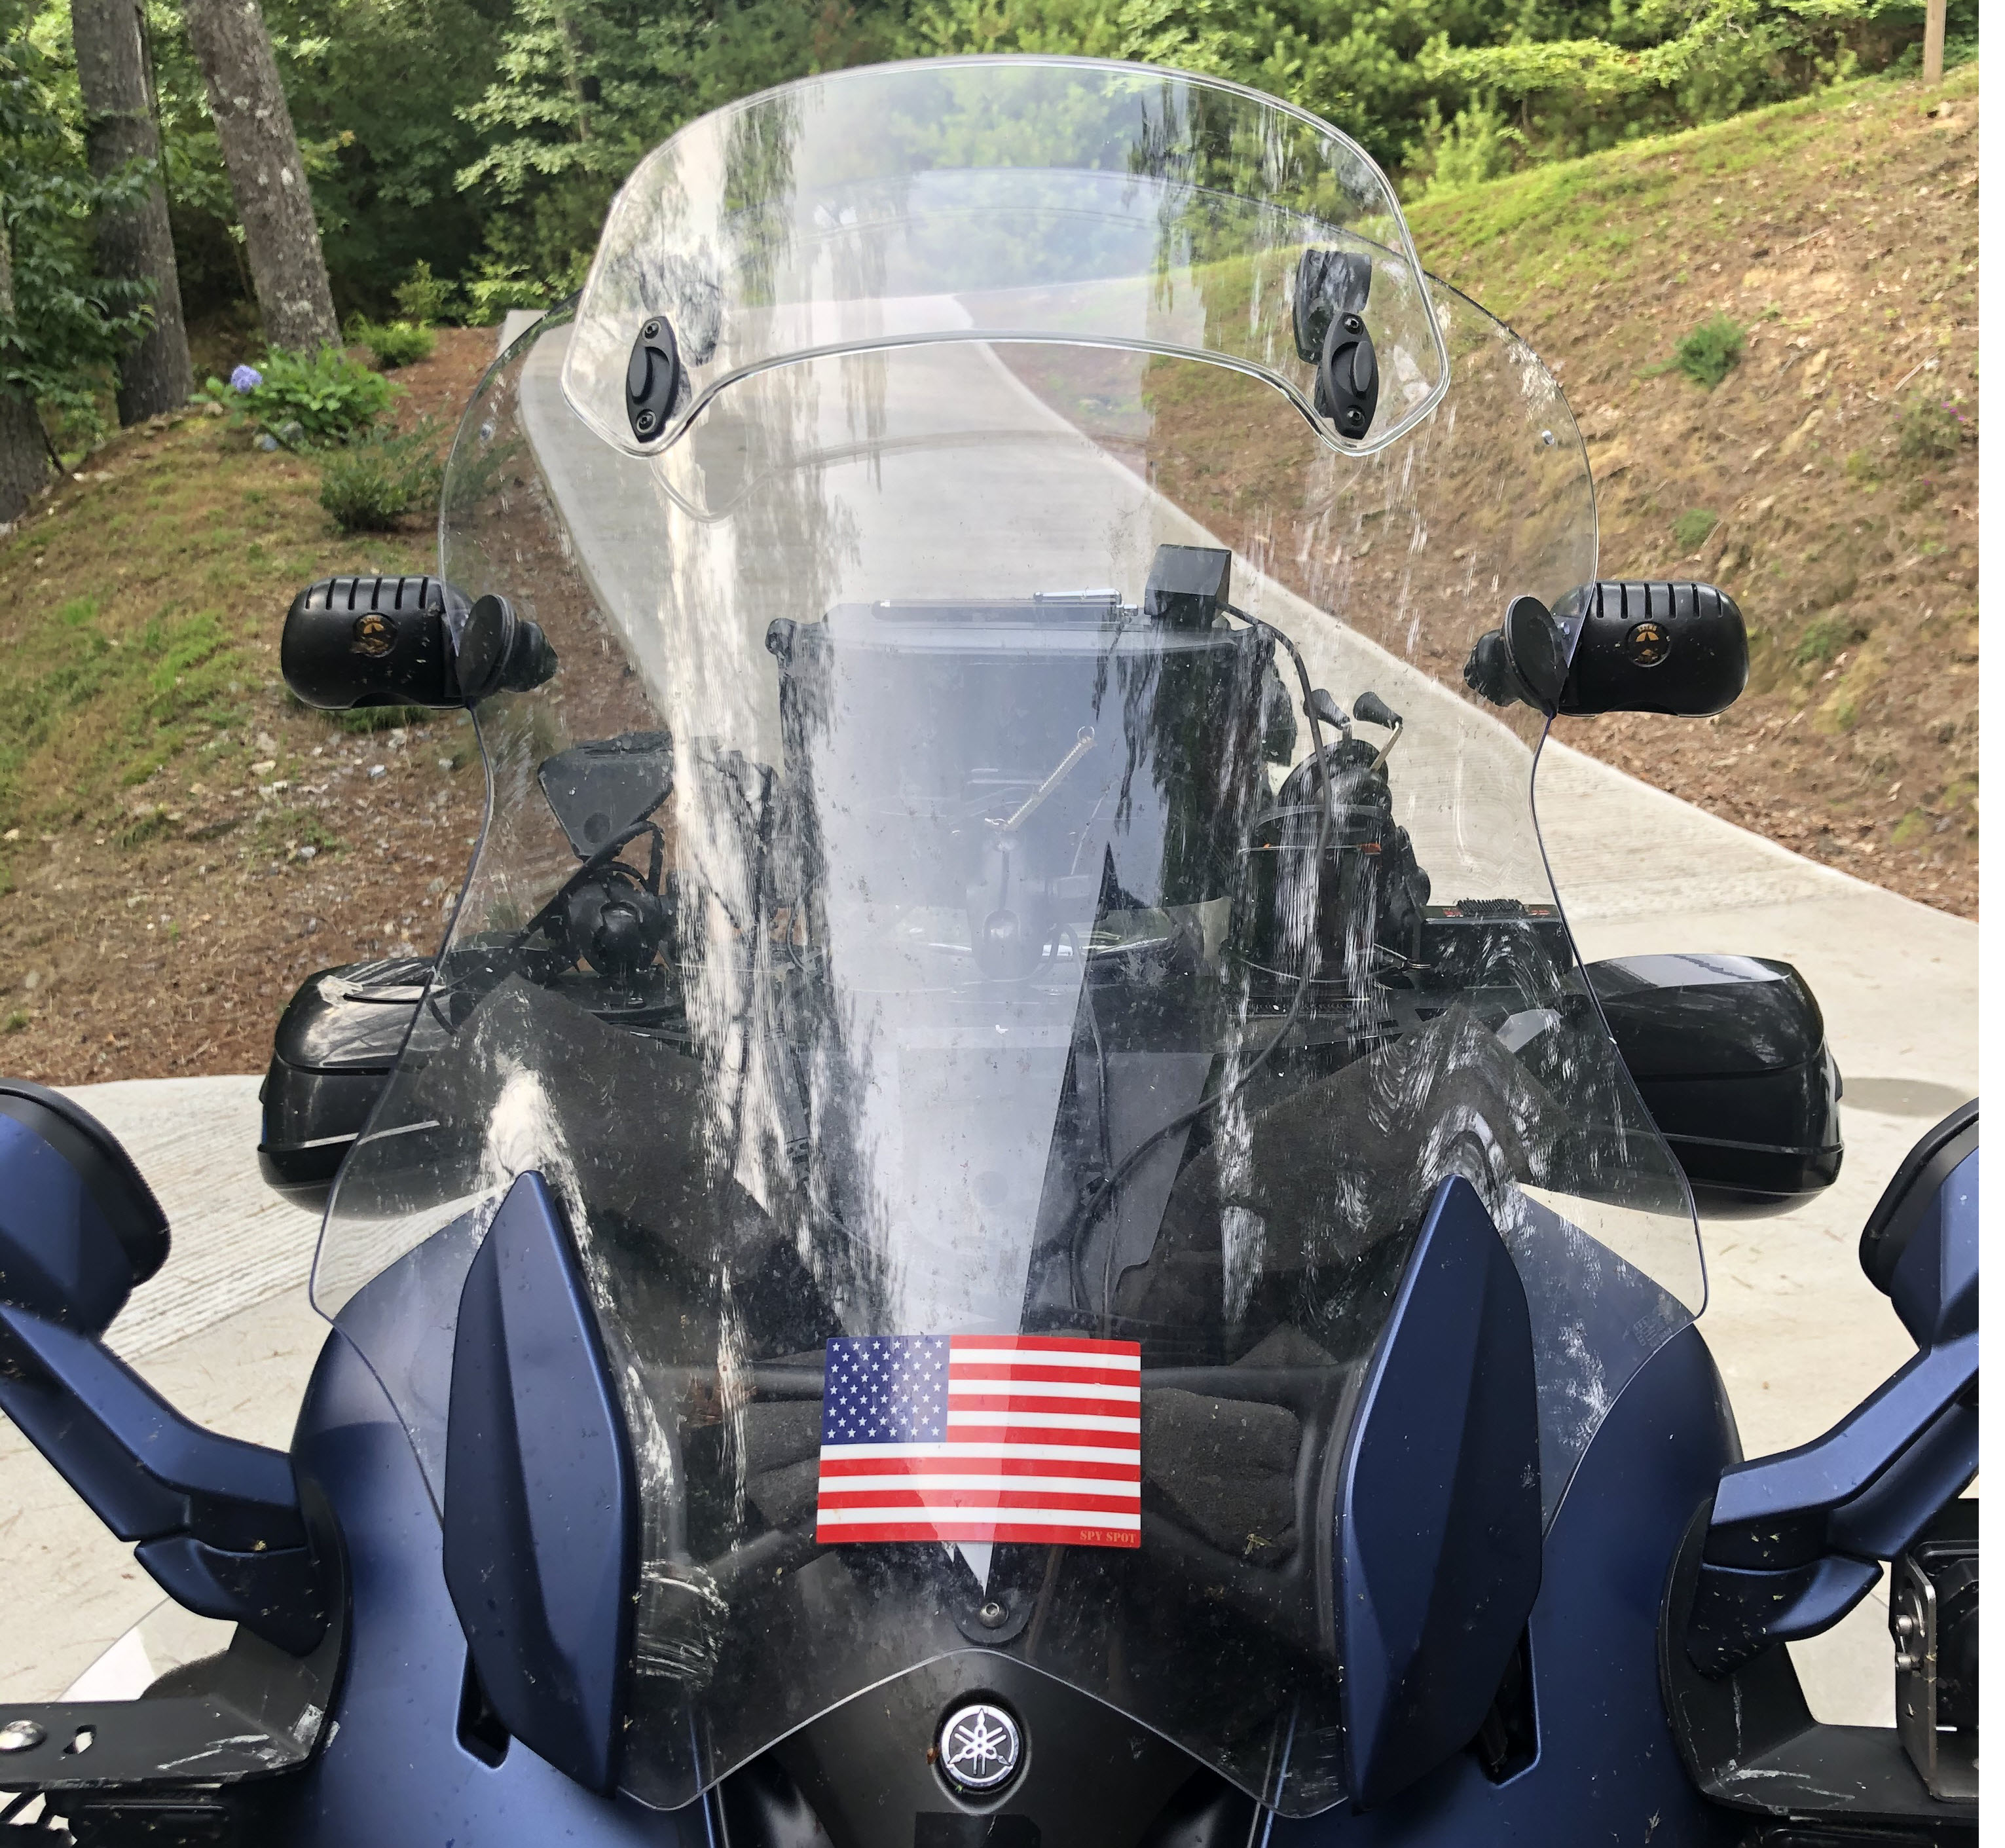
- Vstream Tall Windscreen
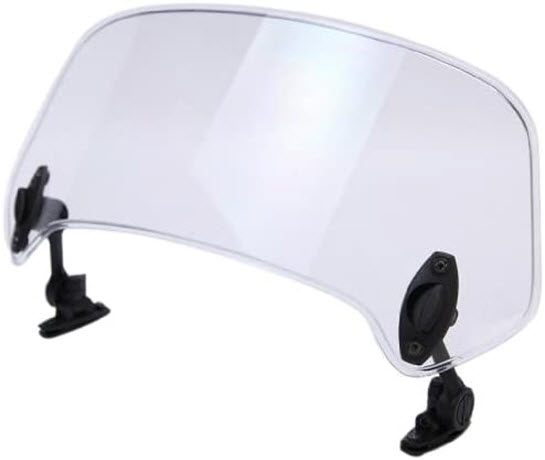
- MRA X-Creen Clear Bolt-On/Add-On Variable Windscreen Spoiler Blade
- SW-Motech Mirror Extensions
- SpeedIR Thermal Camera
- Garmin Zumo XT GPS
- Garmin Dezl 770 GPS
- Valentine V1 Gen2
- ALP Laser Jammers
- Bluetooth Waterproof Speaker
- 4.5 Gallon Aux Tank
- BMW Car Horn
- Spot Gen 3
- Warm N Safe Wireless Heat-Troller
- Nelson Rigg Trails End Adventure Tank Bag
- Garauld FJR Stiffy Kit
- Garauld Hydration System
- Real Time Industries Full FJR Reflective Kit
-
Smart Turn System Self Canceling Turn SignalsAPL Laser
Powering The Electronics
I have a lot of electronics on my FJR that need electrical power. I have a FuzeBlock under the seat that is powered by a switched power source with a relay. The FuzeBlock powers my two GPS's, radar detector, laser jammers, SpeedIR thermal camera and a Mix-It 2 that is in the tank bag.
I am also using the 12 volt cigarette plug in the left front pocket. I use this to power my 4 port USB power adapter. This USB power port provides power to my Spot Gen 3 satellite tracking device, cell phone, backup cell phone power cord and one left over to power my TPMS display.
I have two power tender cords from battery to hookup a battery charger and to power my heated gear. I have tow because if one is good two is better and I can switch quickly if one fails.
Touring Windscreen And Spoiler
One of the most important changes I make to a new motorcycle is to swap out the windscreen for a larger windscreen. I like to have the most wind / weather protection I can. I do not mind the heat and do not need a lot of air flow to keep me comfortable.
I bought a Puig touring windscreen the day I bought the FJR as it was the widest windscreen I could find. I also ordered a MRA X-Creen variable windscreen spoiler as I had one on my BMW GSA and really liked how it help deflect the air over my head.
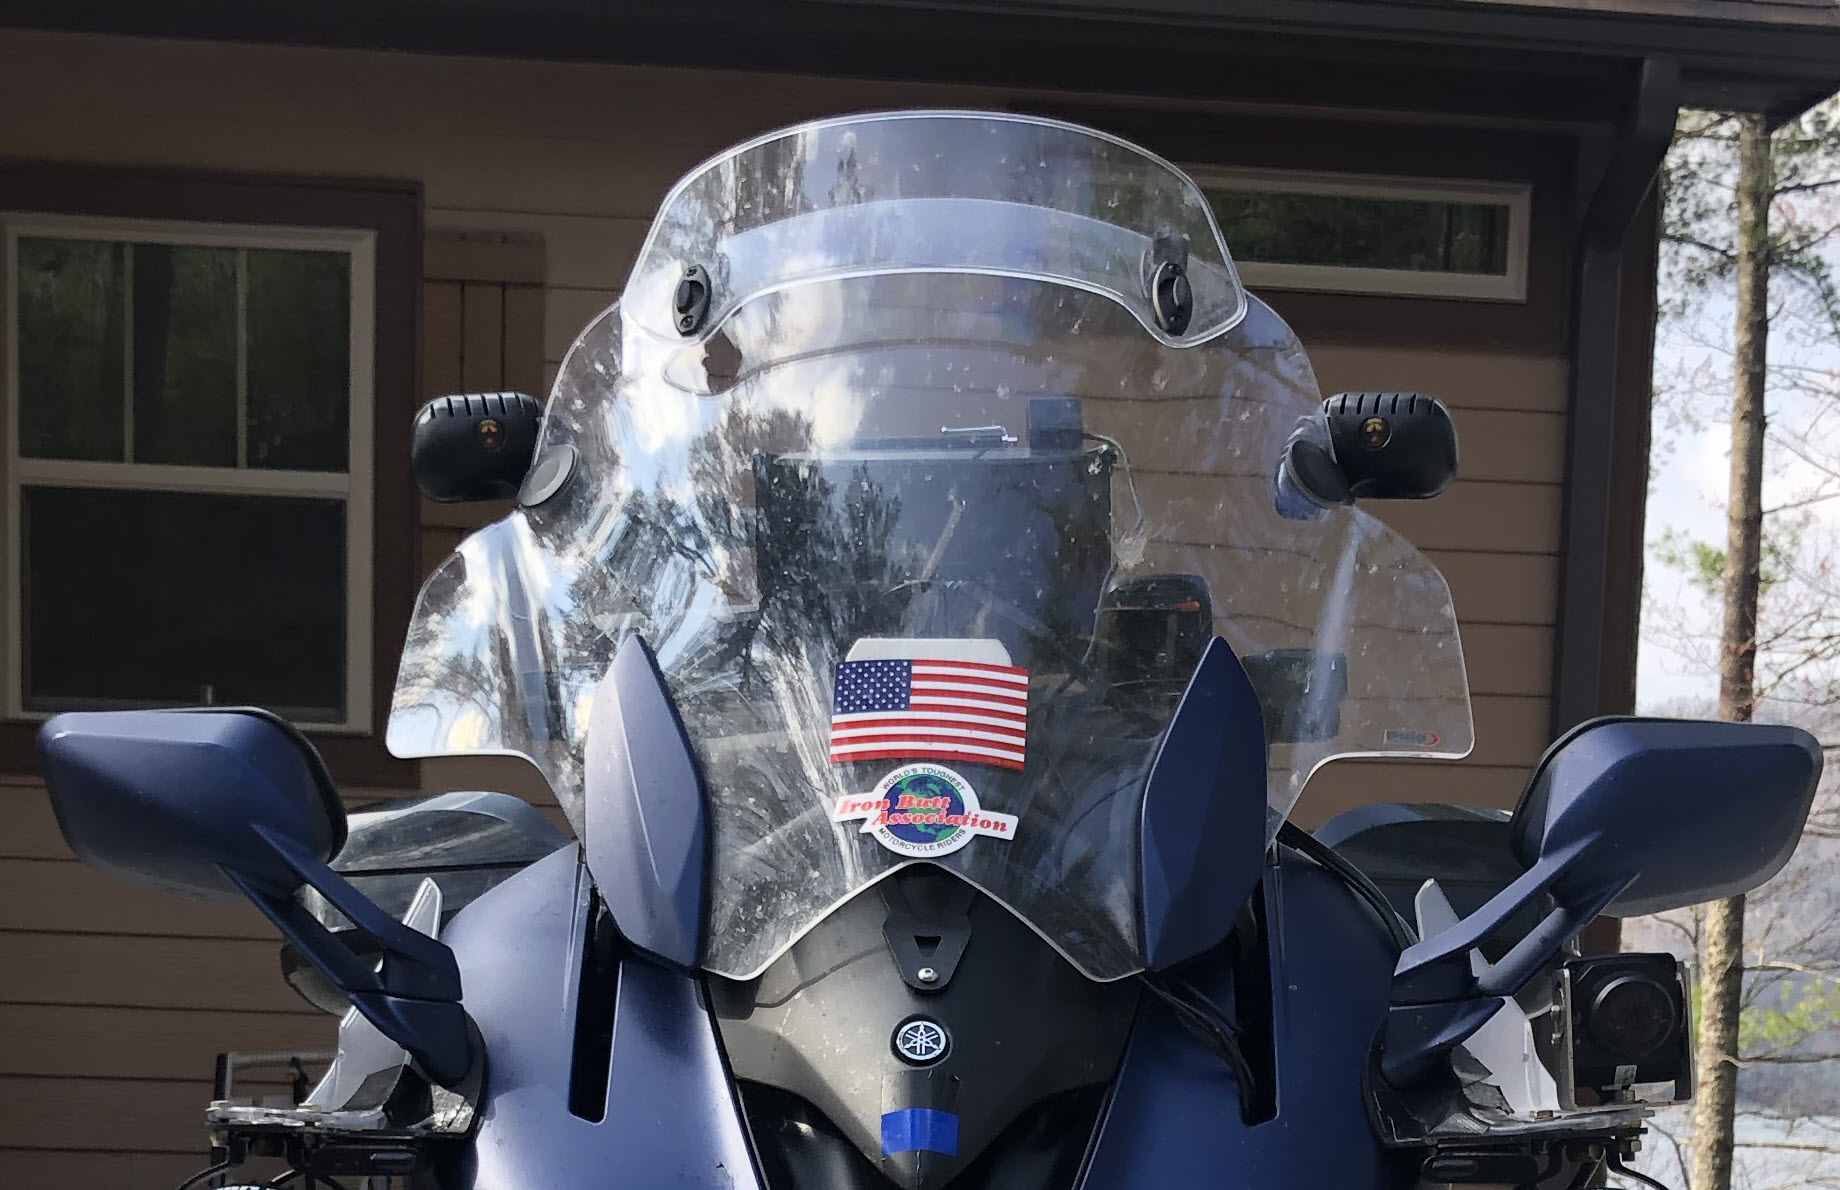
I rode about 15,000 miles with the Puig touring windscreen and I like it but I was still looking for more wind and weather protection. I decided to order a Vstream Tall windscreen and try it to see if it offered more wind and weather protection. I mounted the new Vstream windscreen and I have been riding with it now for about 6,000 miles. Here are some photos of the Vstream tall windscreen with some comparison photos with the Puig windscreen. You can click the images for a larger size.
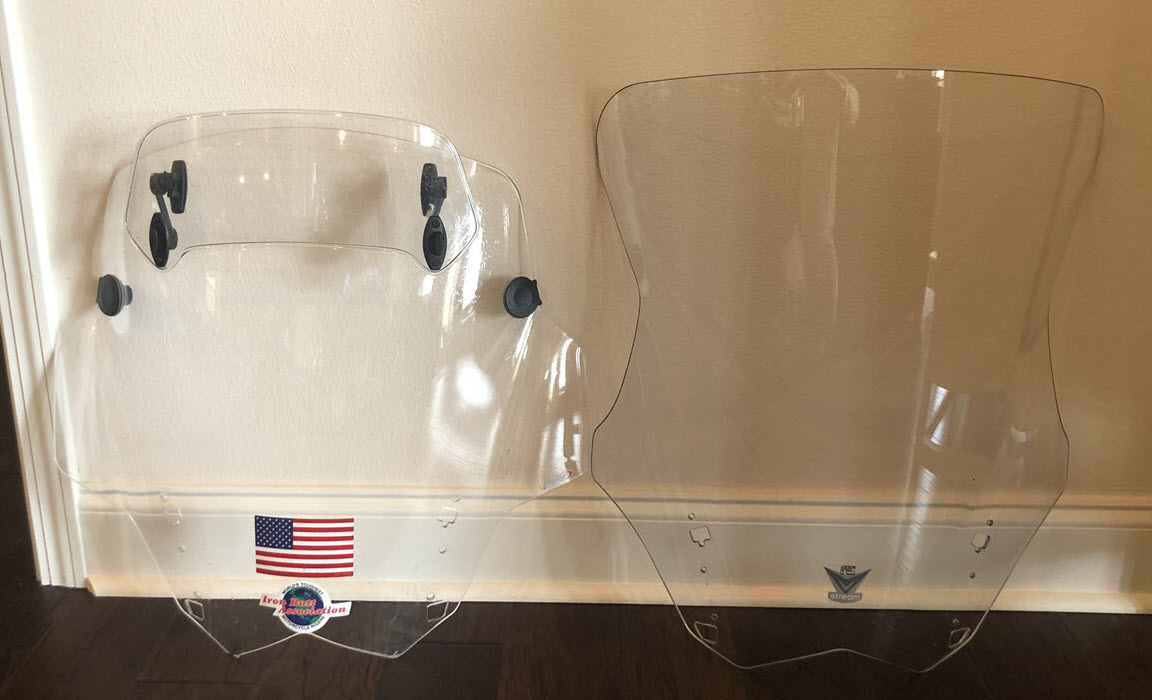
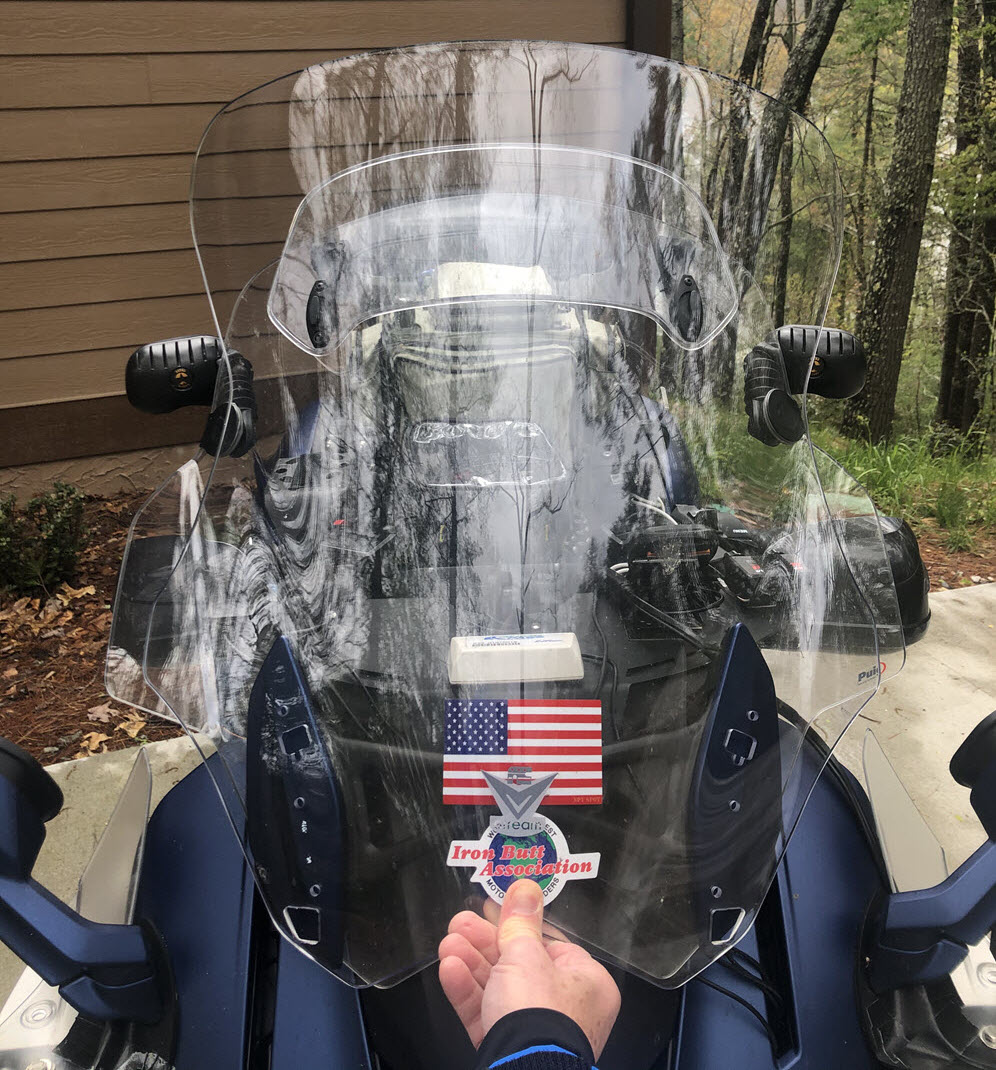
Puig touring Windscreen
Click For Larger Image
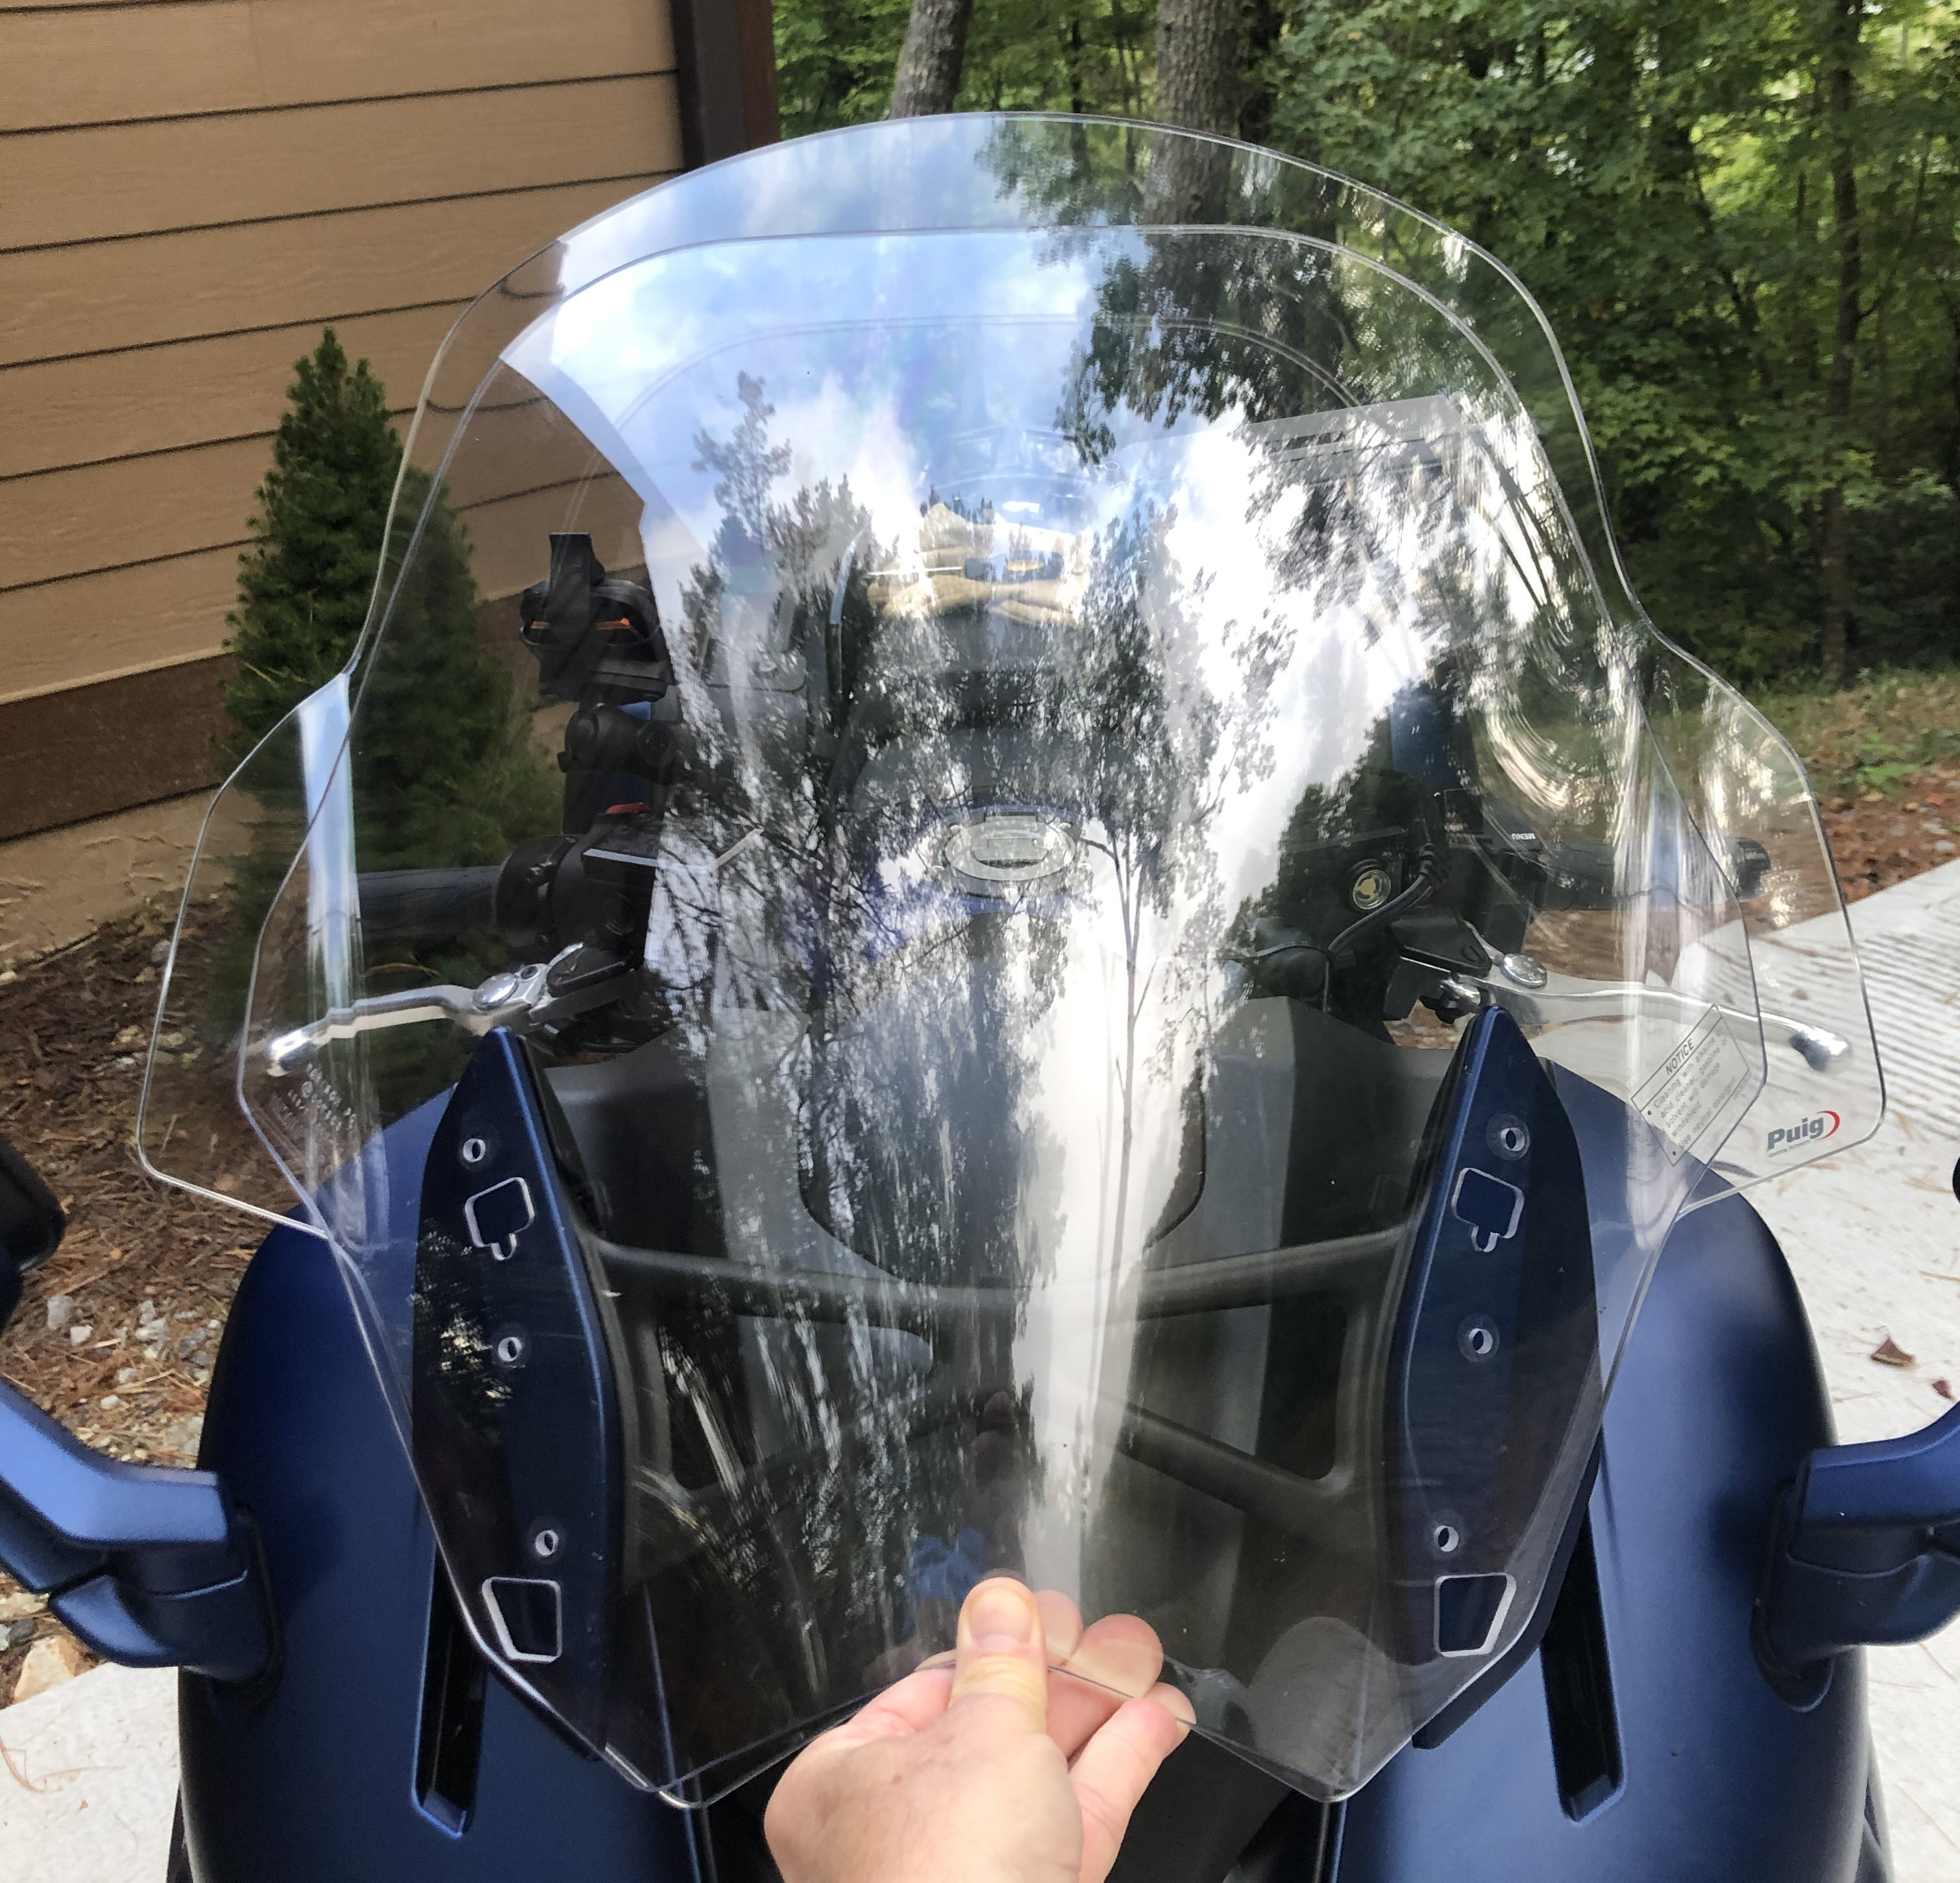
Click For Larger Image - You Can See Puig Overlaid Stock
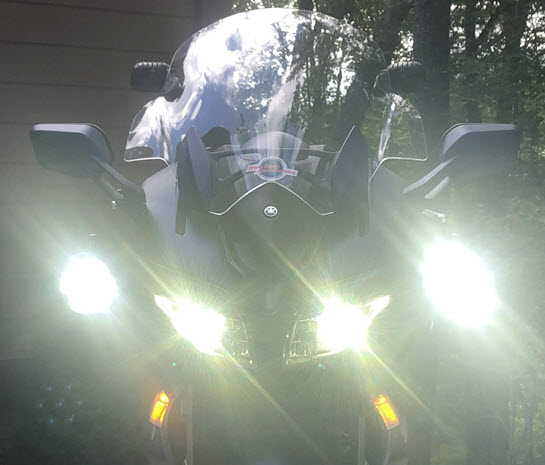
Clearwater Sevina AUX Lights
I have Clearwater Sevina AUX lights mounted on my FJR I can tell you they are the cats ass when it comes to auxiliary lights. Clearwater has a FJR specific power adapter harness that is plug and play for the FJR. Clearwater also makes the Sevina light brackets that are specific to the FJR.
Thermal Imaging Camera
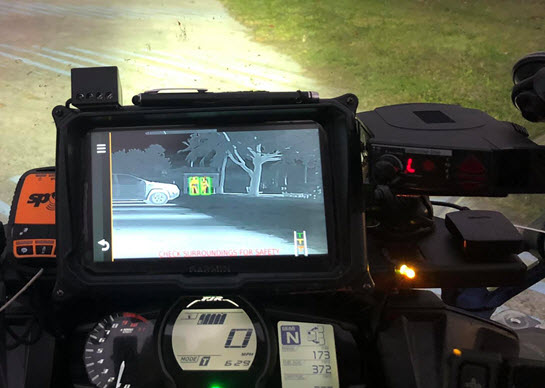
I bought and installed a SpeedIR thermal imaging camera so I can see better in the dark on those long lonely dark roads. The thermal camera allows me to see things in the dark that you would not be able to see. It highlights people, animals and other things along the road including vehicles from a long distance. I have the output of the thermal camera input into my Garmin Dezl 770 GPS which has a backup camera or any camera input. Once the camera is active there is a button on the GPS screen that you can use to select the video screen on the GPS.
The thermal camera highlights hot spots based on how close they are to the camera. The colors are Green, Yellow and Red. As you can see in the below image there is two green boxes highlighting two people in the distance.
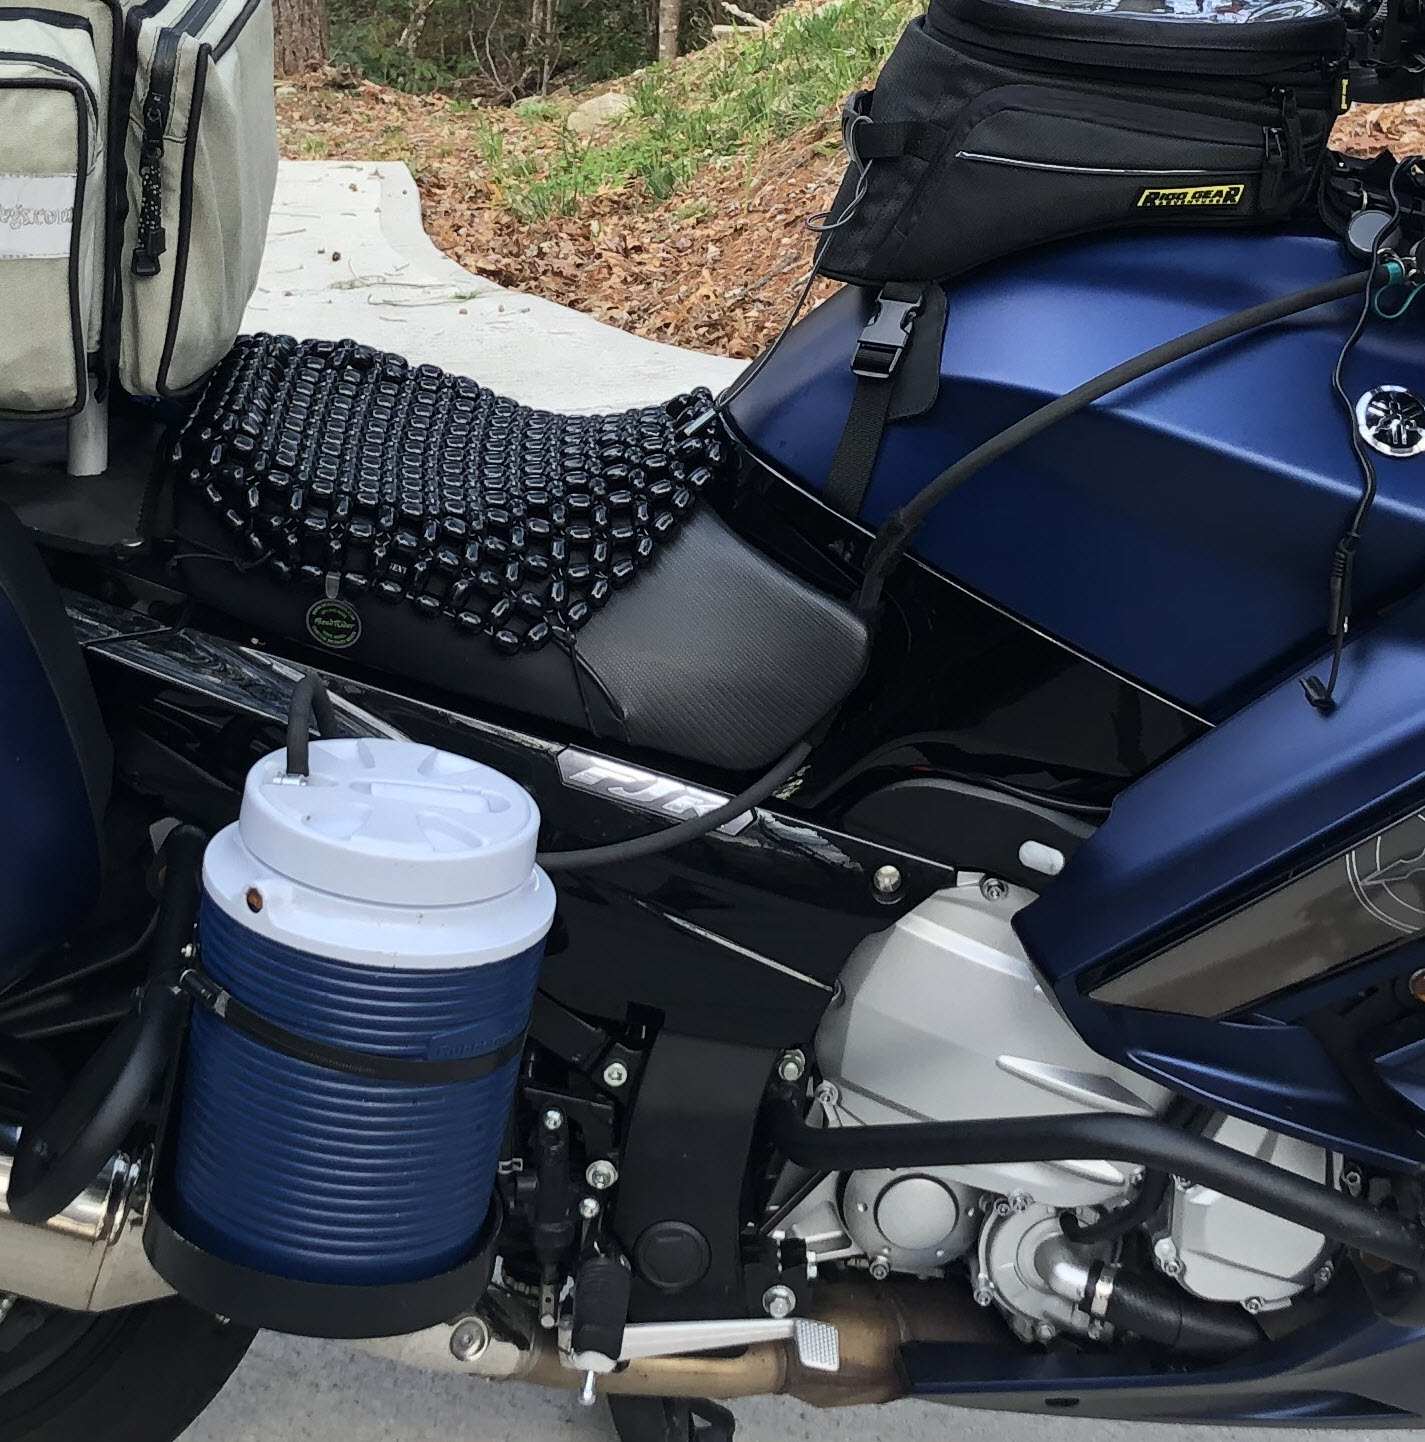
AUX Tank Setup
I have installed a 4.3 gallon AUX tank to give me a little more range for those long rides and rallies. I did not want to have to drill a hole in my nice new FJR gas tank so I decided to try the process I used on my BMW GSA to plumb the AUX tank to the main tank which worked great.
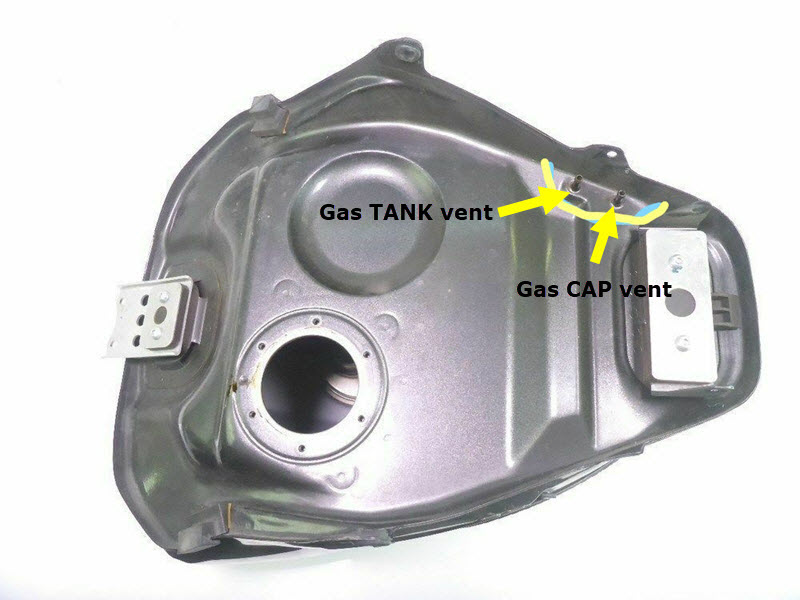
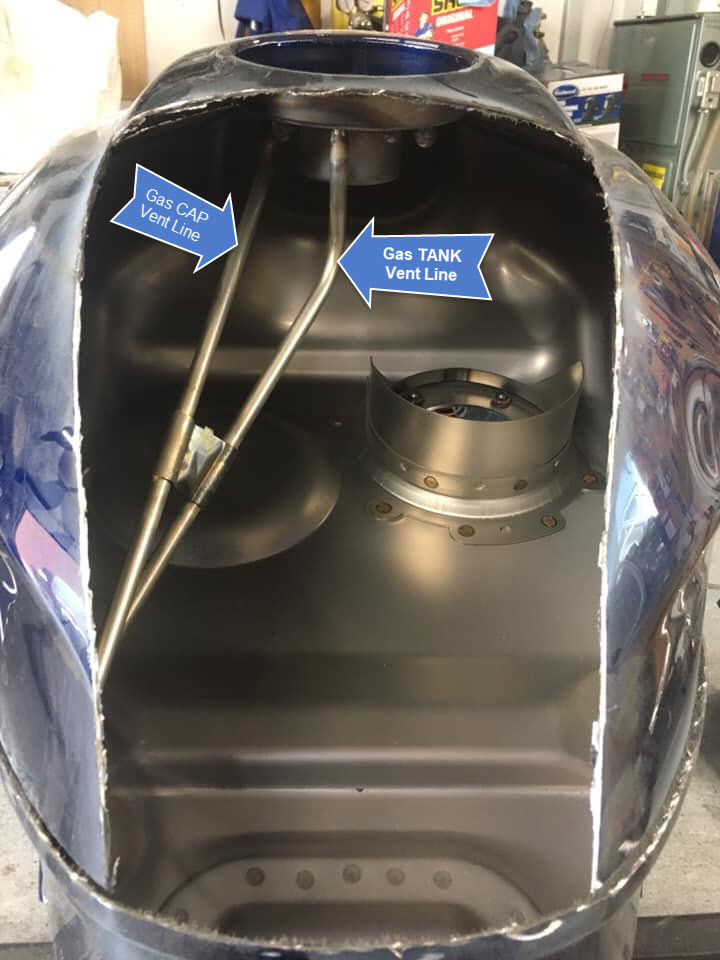
The way to plumb in a AUX tank without drilling the main tank is to use the main tank vent line to suck gas from the AUX tank. The AUX tank then becomes the vent for the main tank. This process has been working great on BMW's for many years and after doing a little research I found that the FJR has the same type of fuels system as the BMW's.
This works by removing the main tank and taking off the vent line ( see below photos ) and attaching the fuel line from the AUX tank. As fuel is pulled from the main tank by the fuel pump it pulls in fuel from the AUX tank. The fuel gauge stays pretty much the same until the AUX tank is empty.
I have ridden over 23,000 miles with this setup and it has worked great. There was only one time that the fuel flow was slowed and it was 98 degrees and I was running in the mid 90's. the fuel eventually transfer to the main tank but it had me watching it closely.
Click For Larger Image
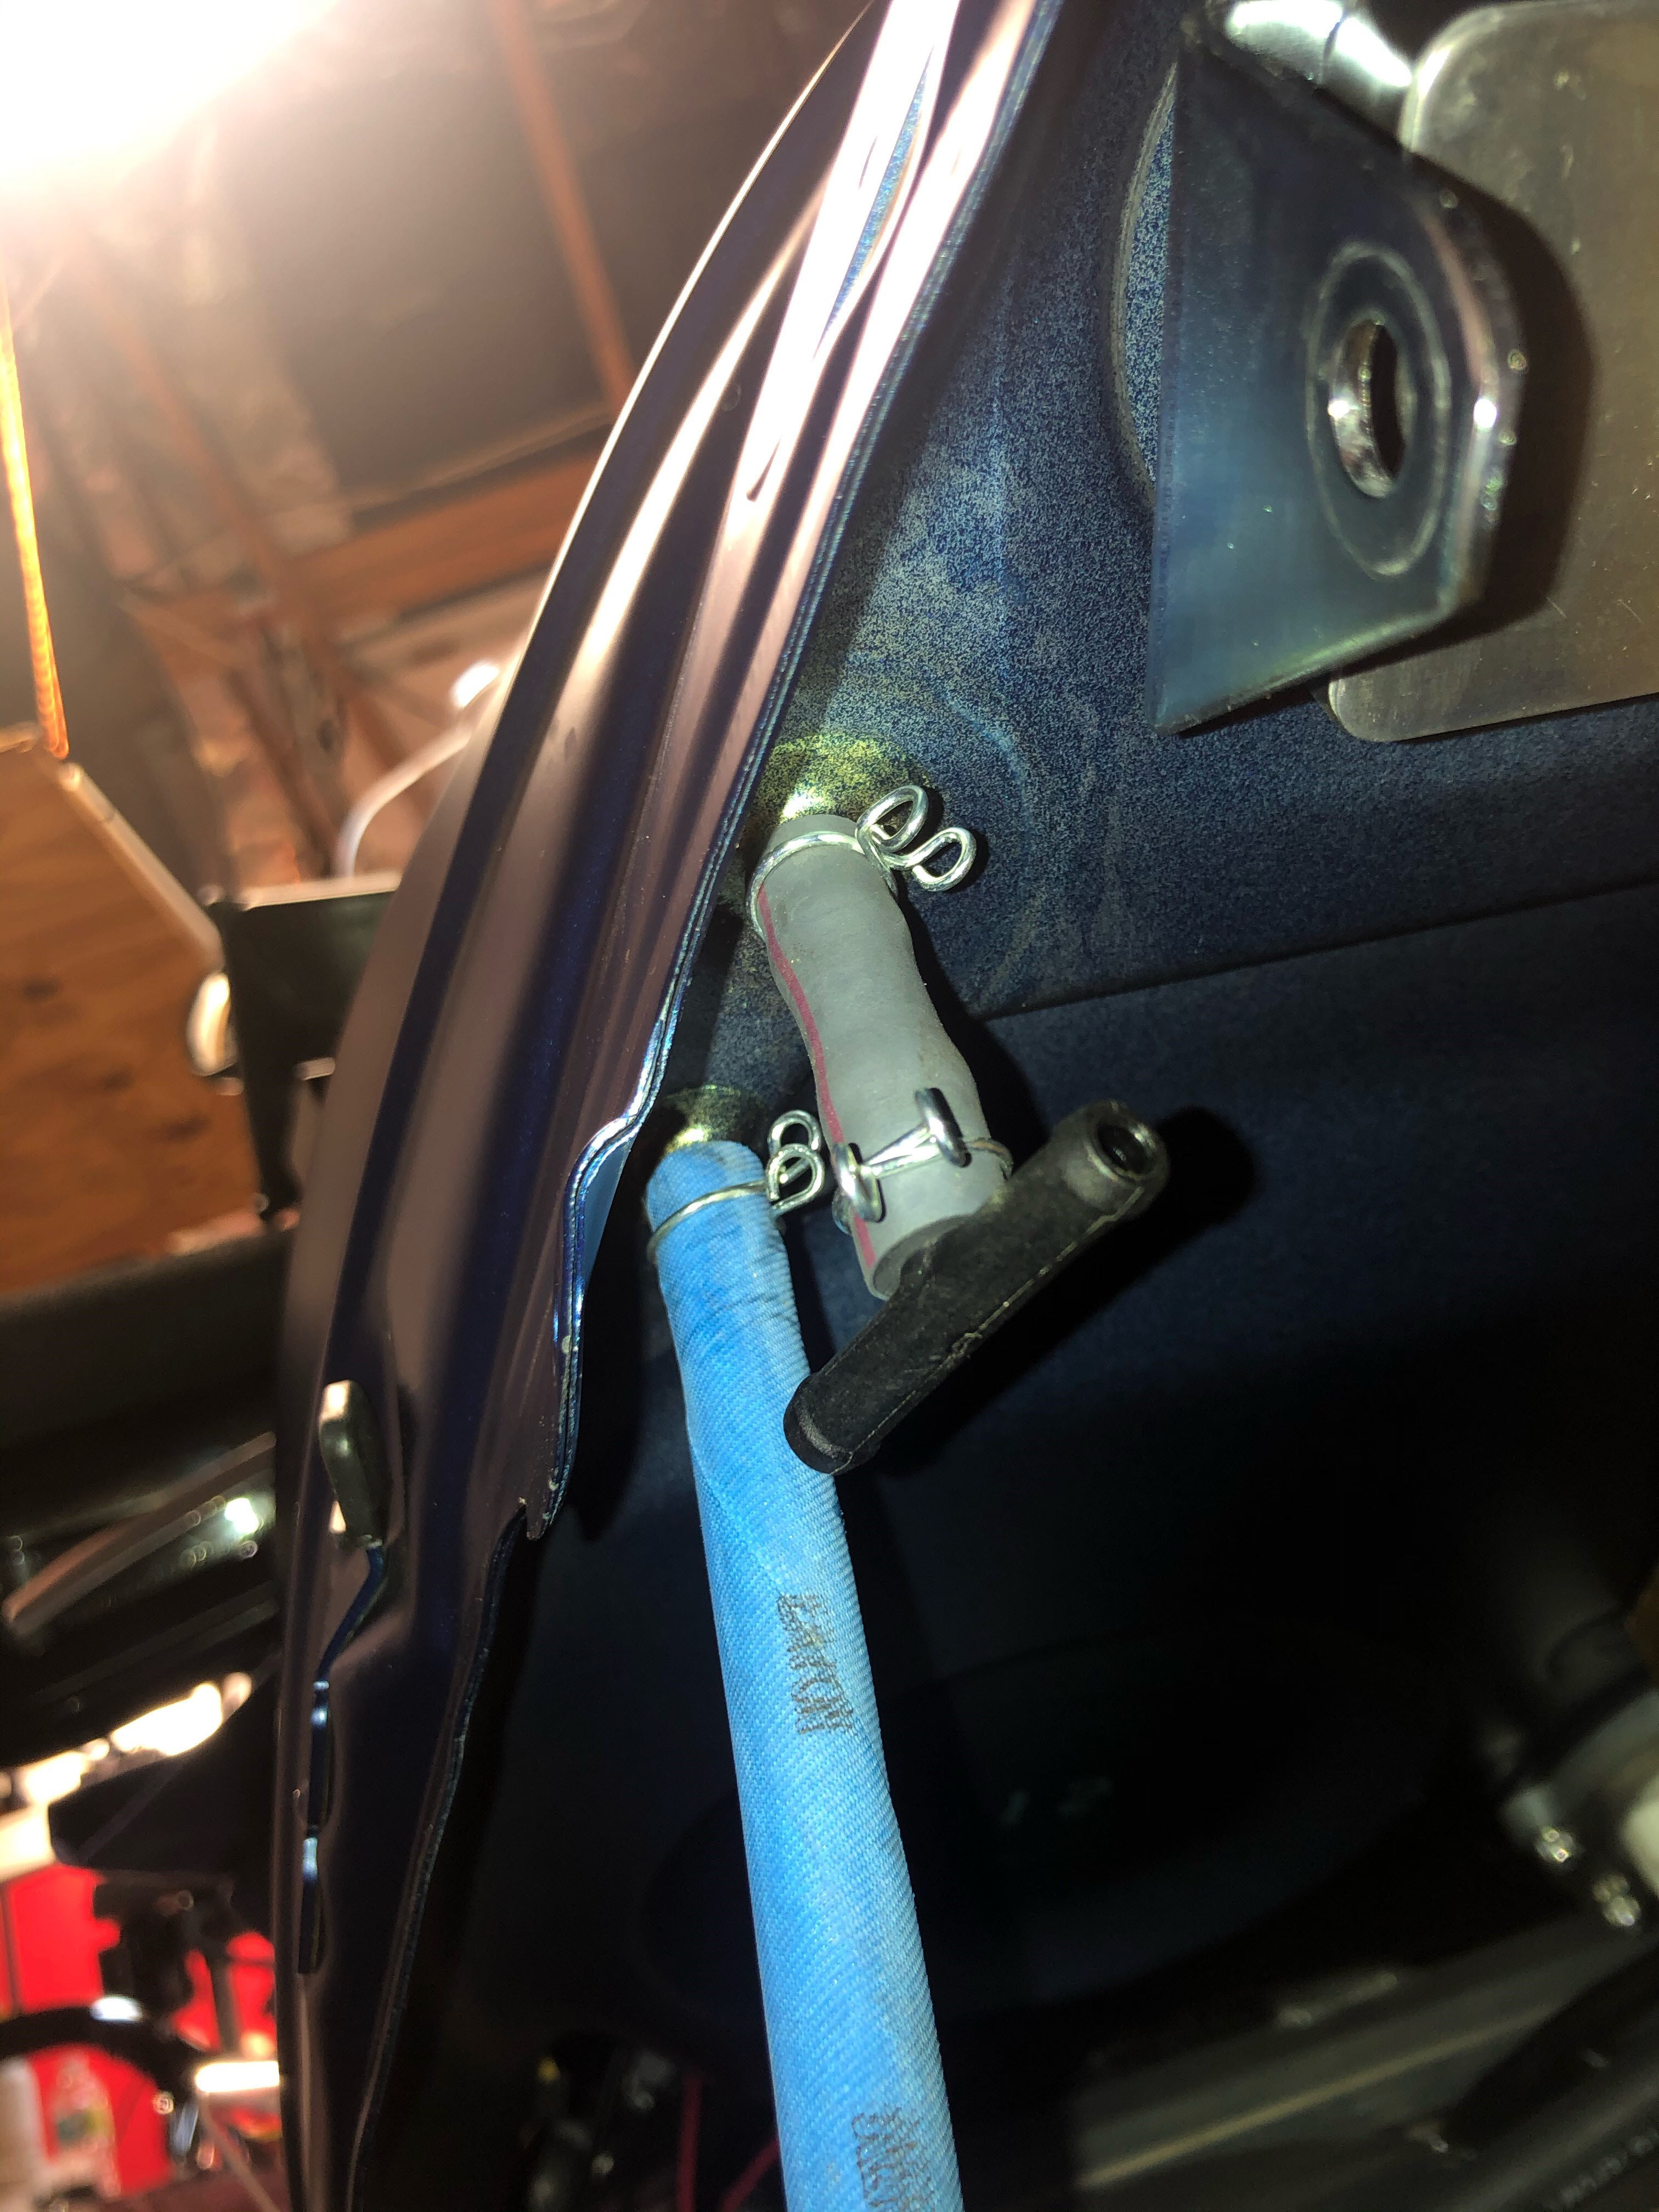
Blue Fuel Line Is AUX Tank - Click For Larger Image
Click For Larger Image
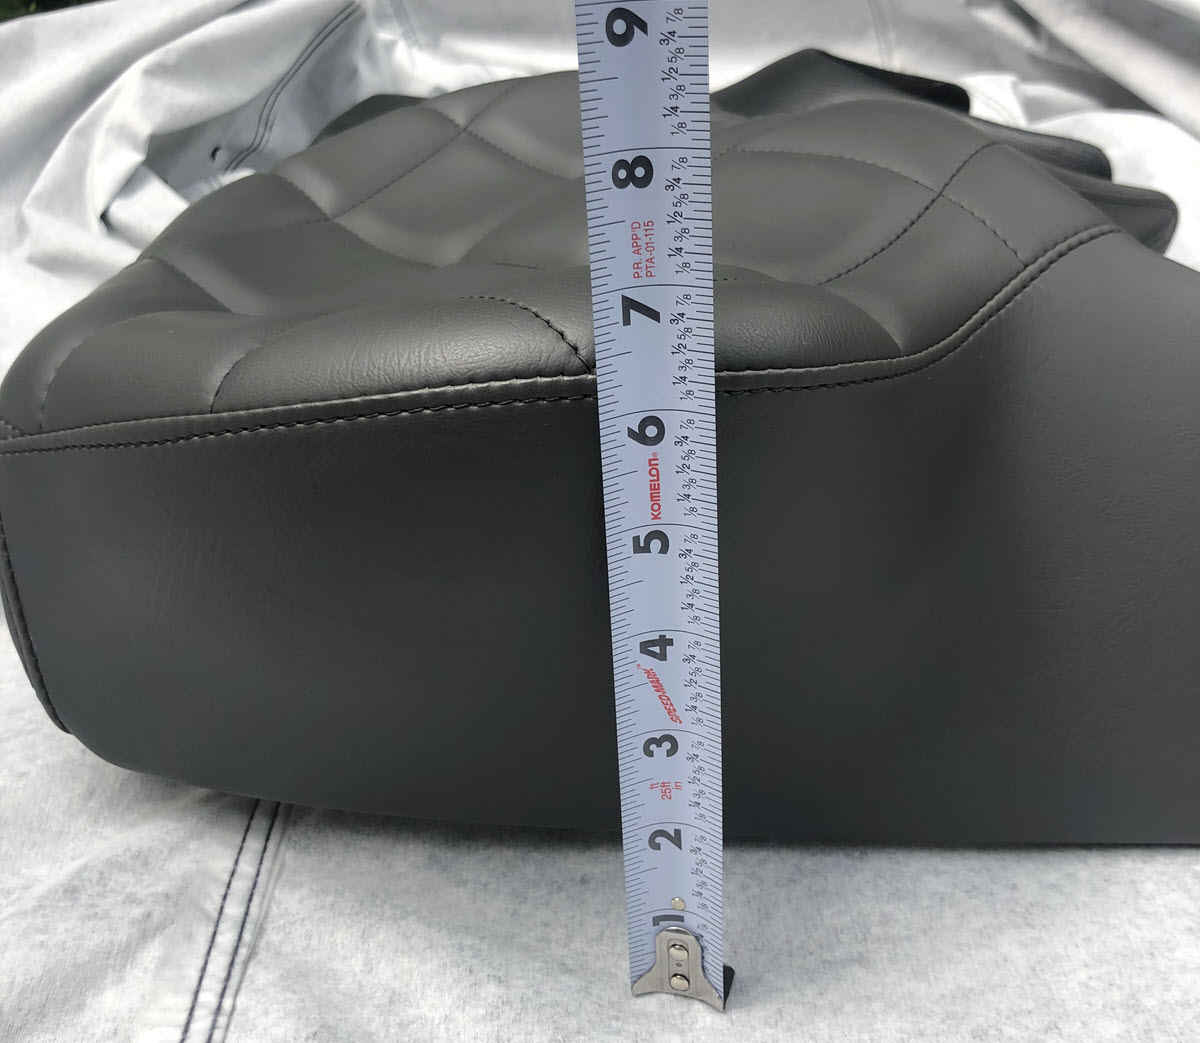
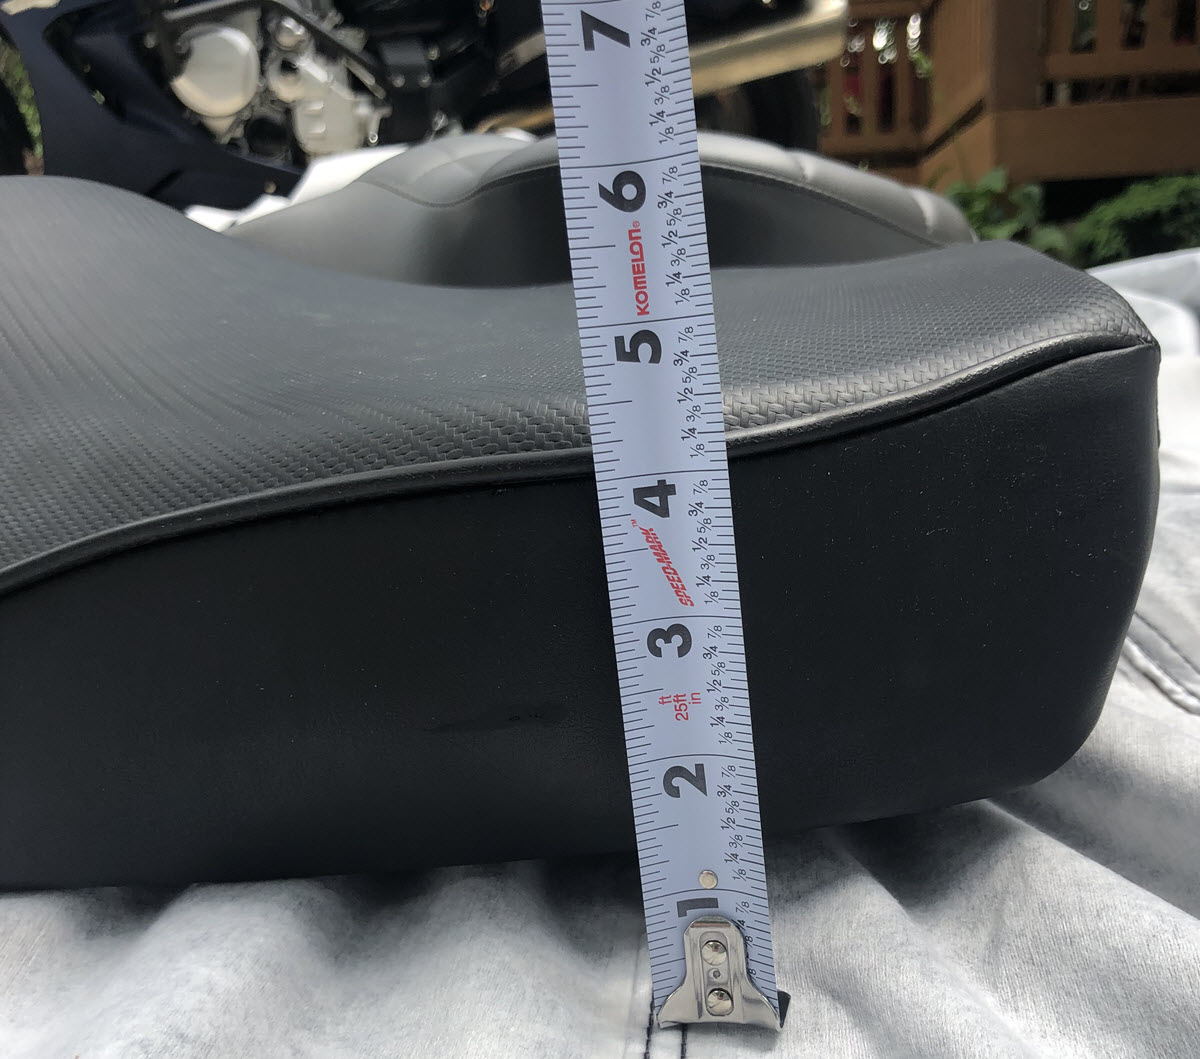
Russell Seat
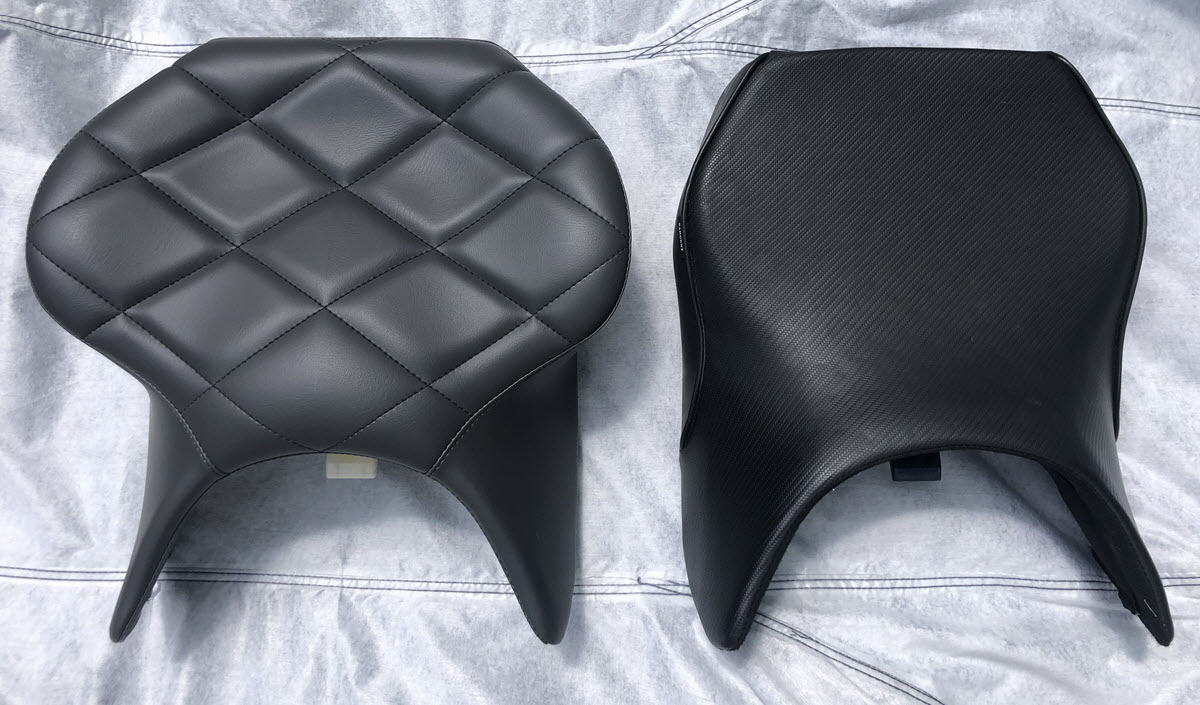
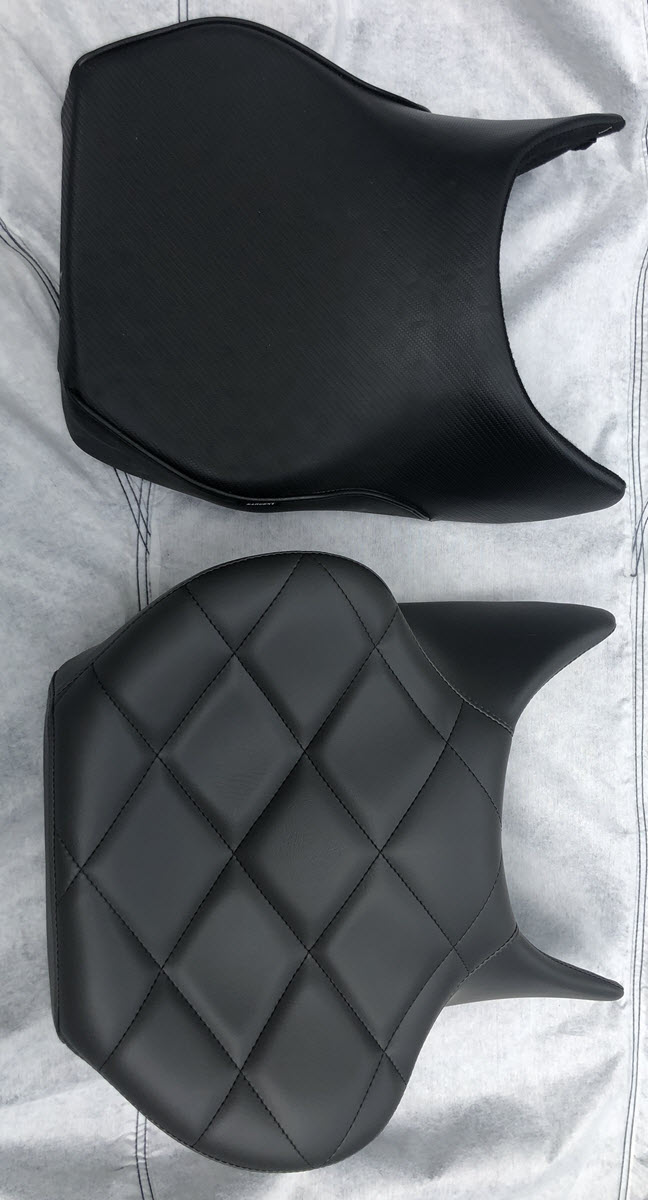
I finally broke down and ordered a Russell seat for my FJR. I have had many motorcycles over the years and ridden over 700,000 miles and I have never owned a Russell seat. I had a Sargent seat on my BMW RT and my BMW GSA and the Sargent seat worked great on those two motorcycles.
When I bought the FJR I quickly ordered a Sargent seat and it arrived in 3 days. I have ridden he FJR with the Sargent seat for over 24,000 miles and found it was fine for rides up to 800 miles but when I rode 1500+ mile days it was not so fine.
I decided it was time for a Russell seat based on all of the comments over the many years. I think the reason it took me so long to order a Russell seat is the time it takes to get it. I do not really understand the 8+ weeks timeline.
Here are some photos of the new Russell seat compared to my Sargent seat. I ordered a gray color with a diamond pattern. I like gray because it does not get so hot in the direct sunlight. You can click on the photos for a larger size.
Dash Shelf
I installed the Bryden Scot Dash Shelf and it works great. It is a good place to mount farkles like radar detectors, SPOT tracking device and Warm-n-Safe Heat-Troller. It was pretty easy to install and it took about an hour.
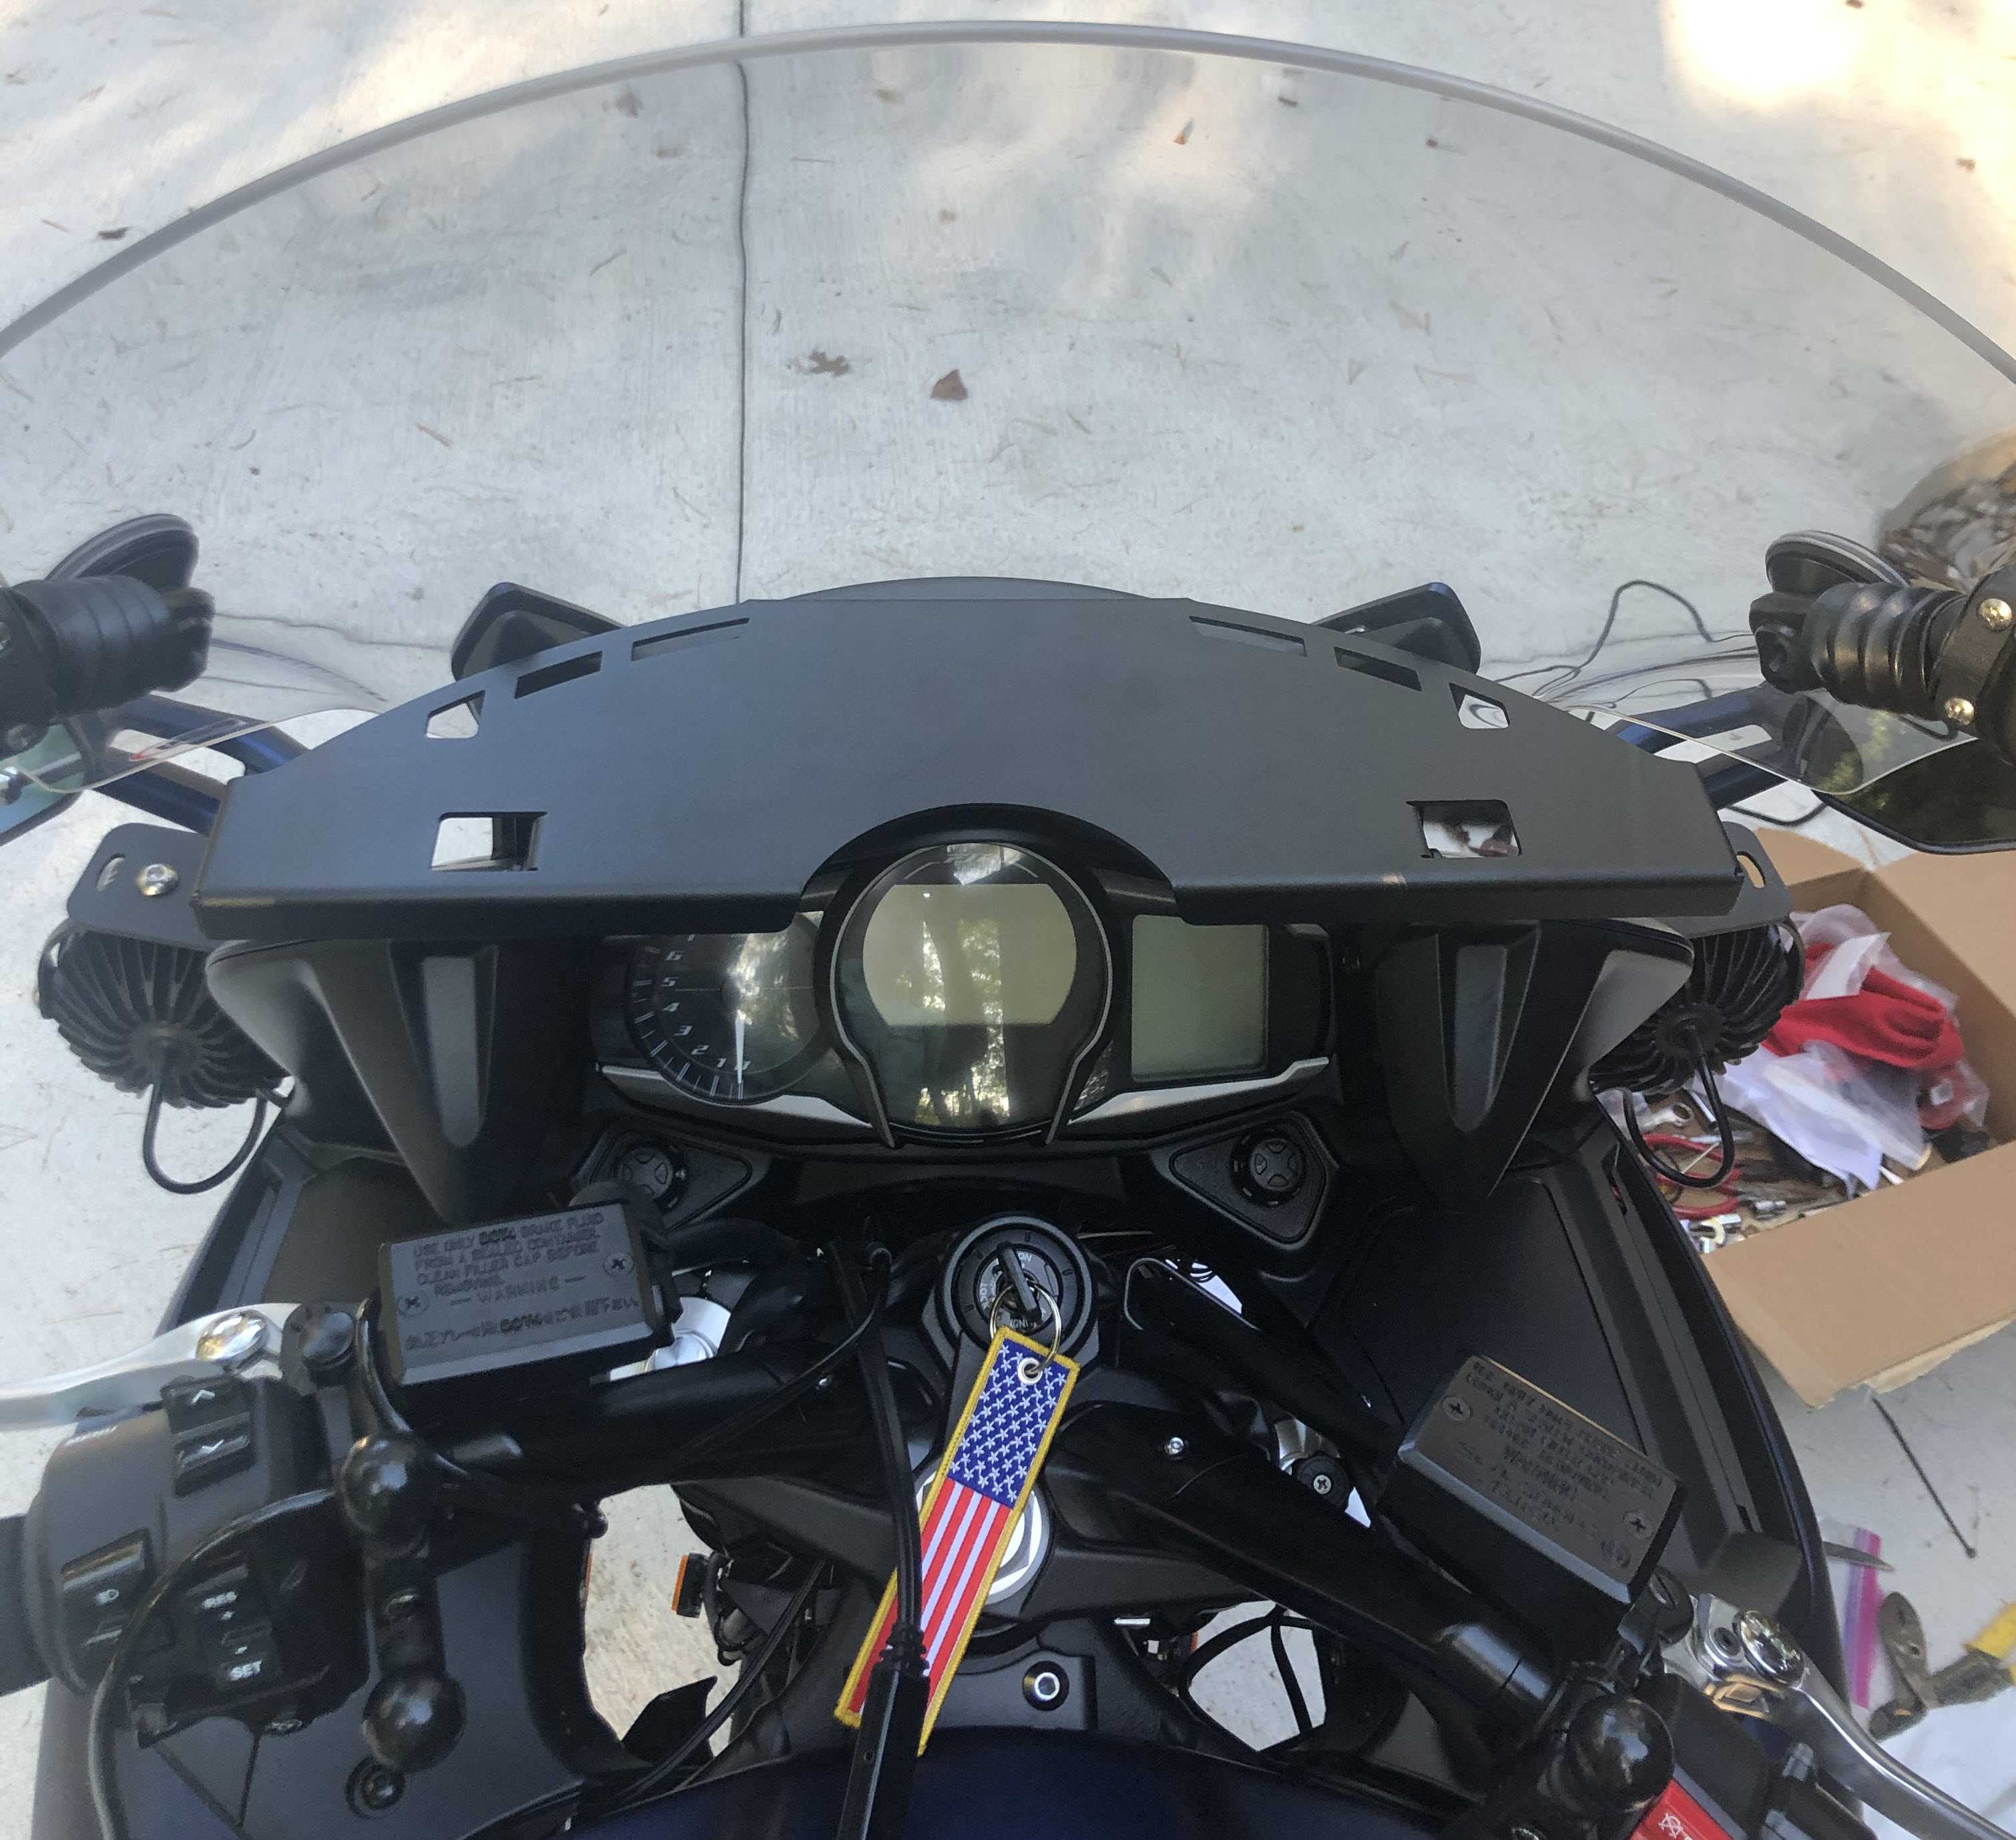
Click For Larger Image
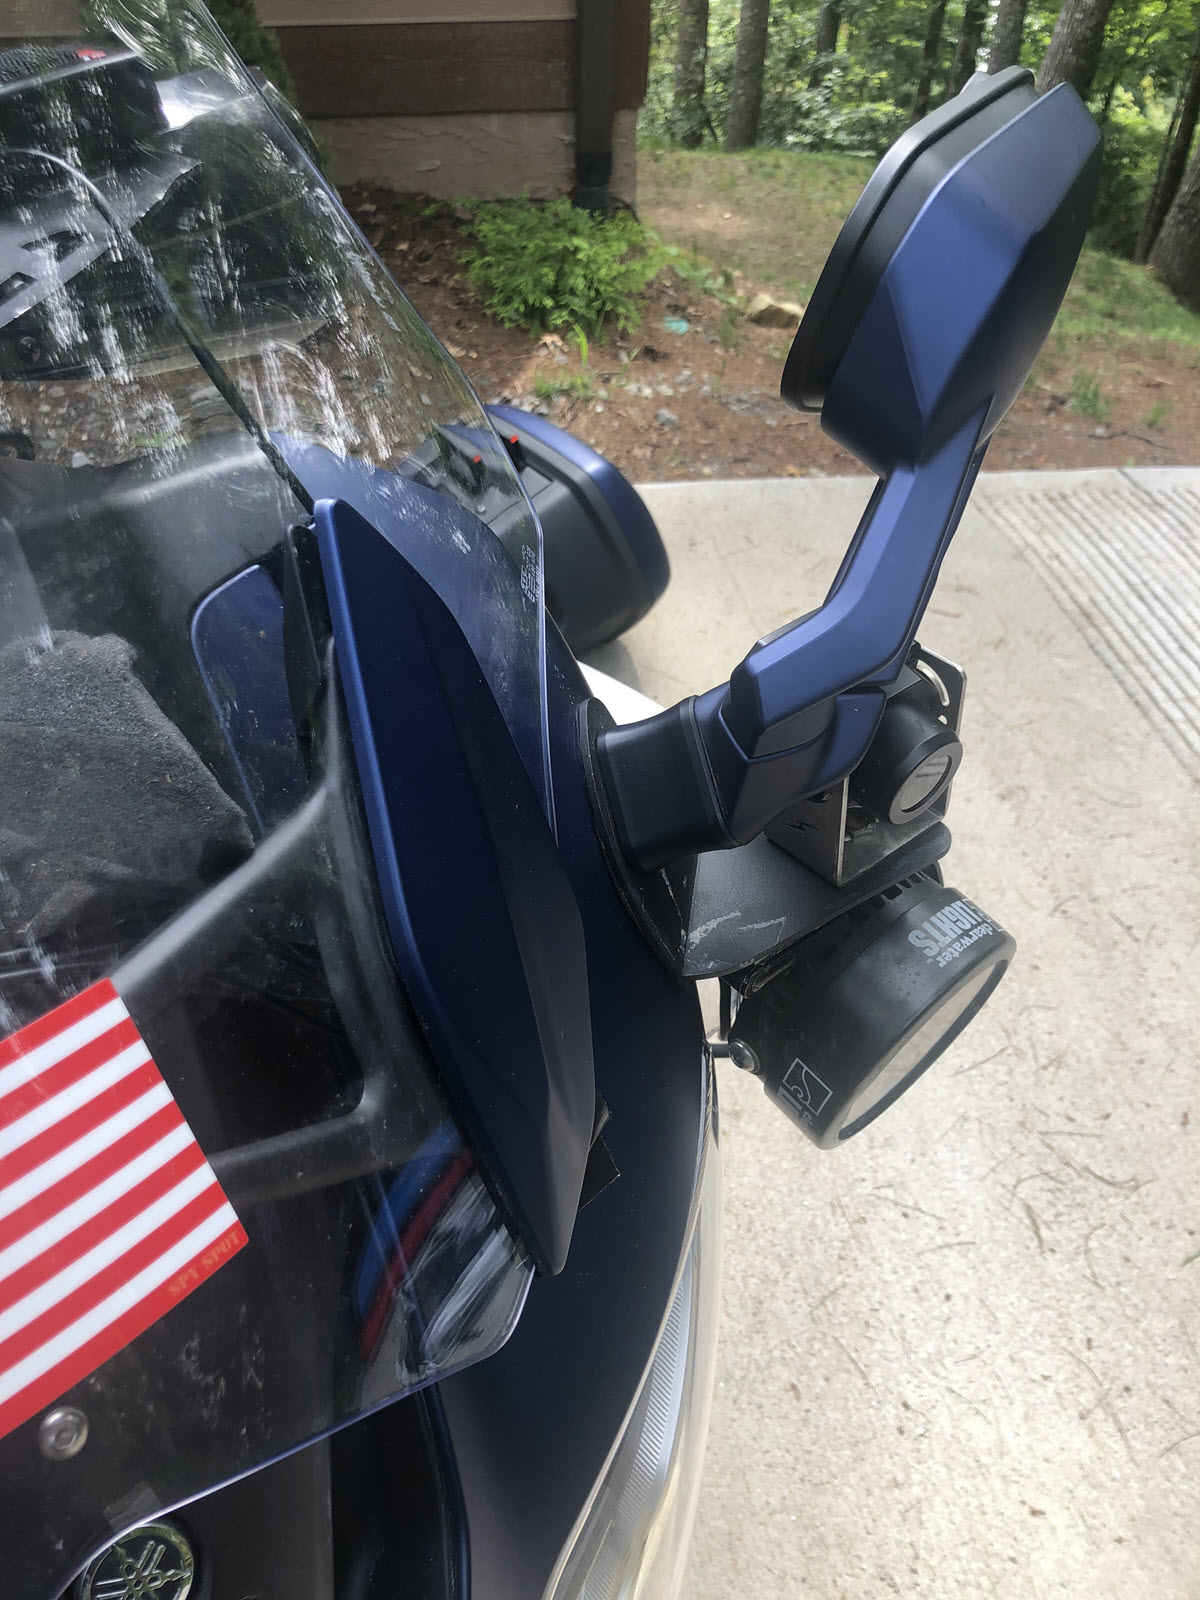
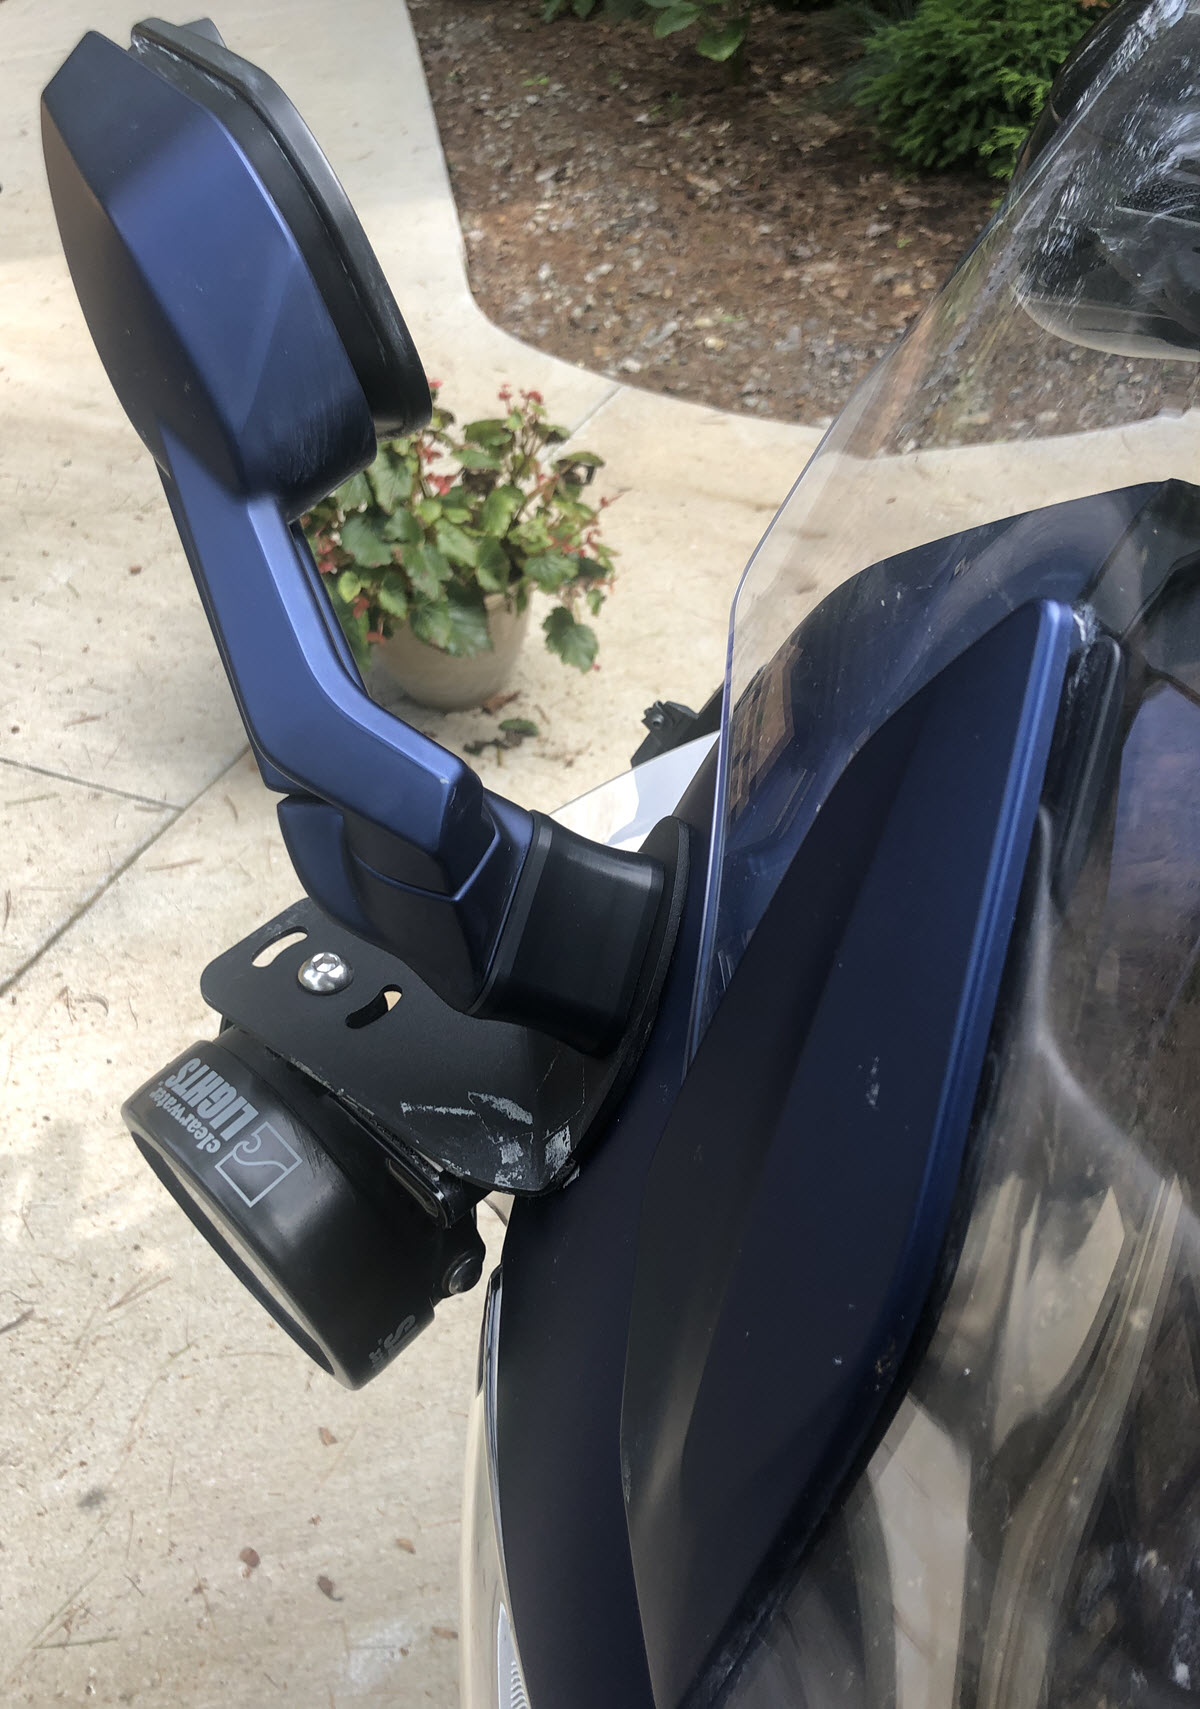
SW-Motech Mirror Extensions
The FJR mirrors really suck to see what is behind you while riding. I personally think this is a safety hazard and I am surprised that DOT passed the FJR mirrors. Many FJR riders buy the Yamaha FZ mirrors to replace the FJR mirrors and like how they provide a better view behind. I had already installed Saeng QuickScan mirrors to help me see what is behind me but it was not enough. So I bought a set of SW-Motech mirror extensions and installed them. It was a pretty easy install, you do have to remove the dash plastic to install these mirror extensions.
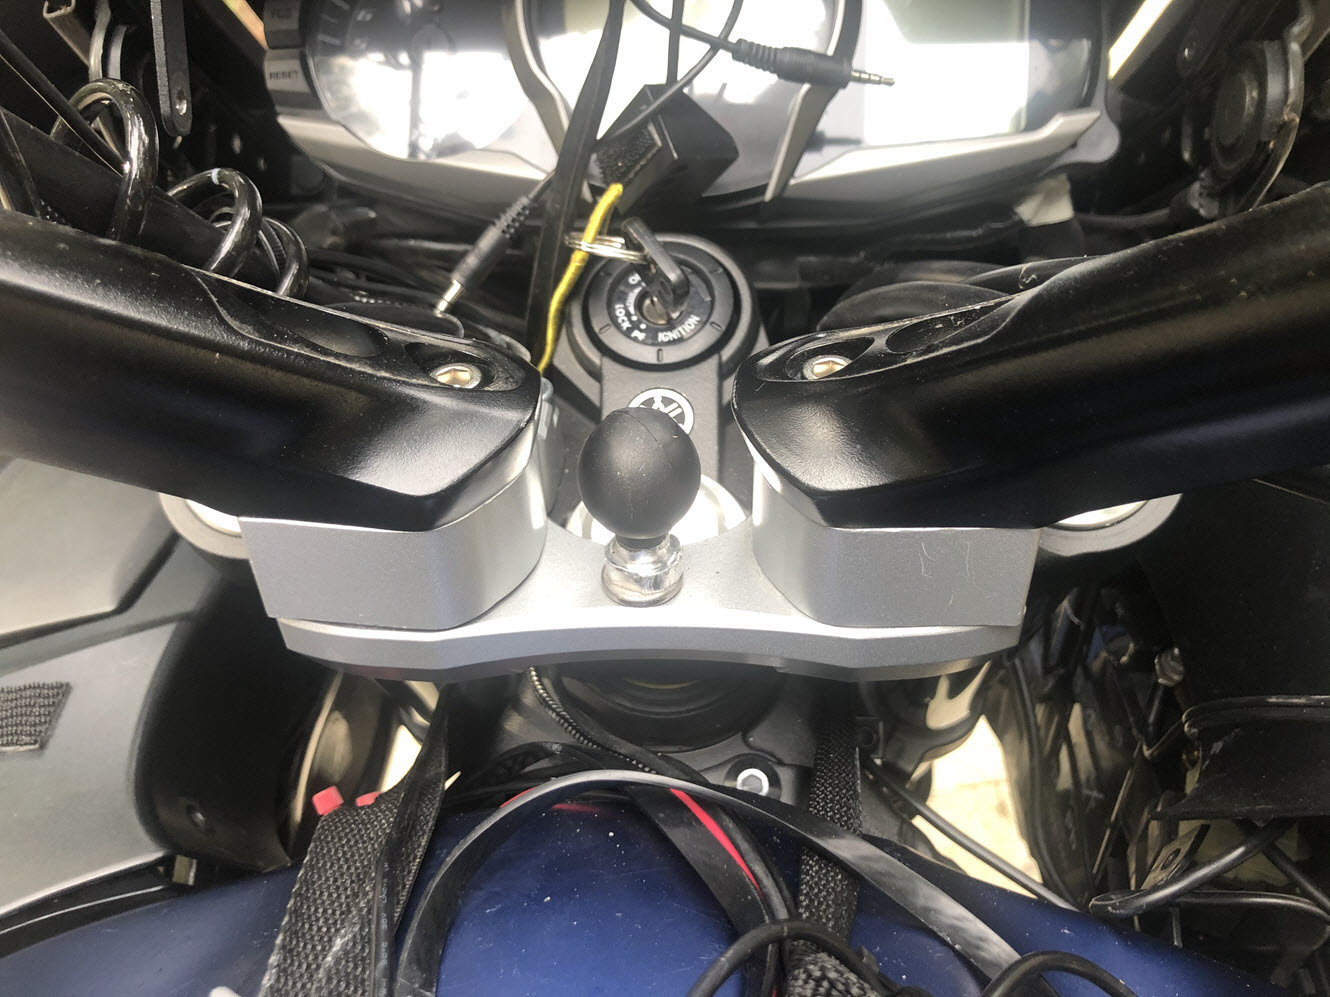
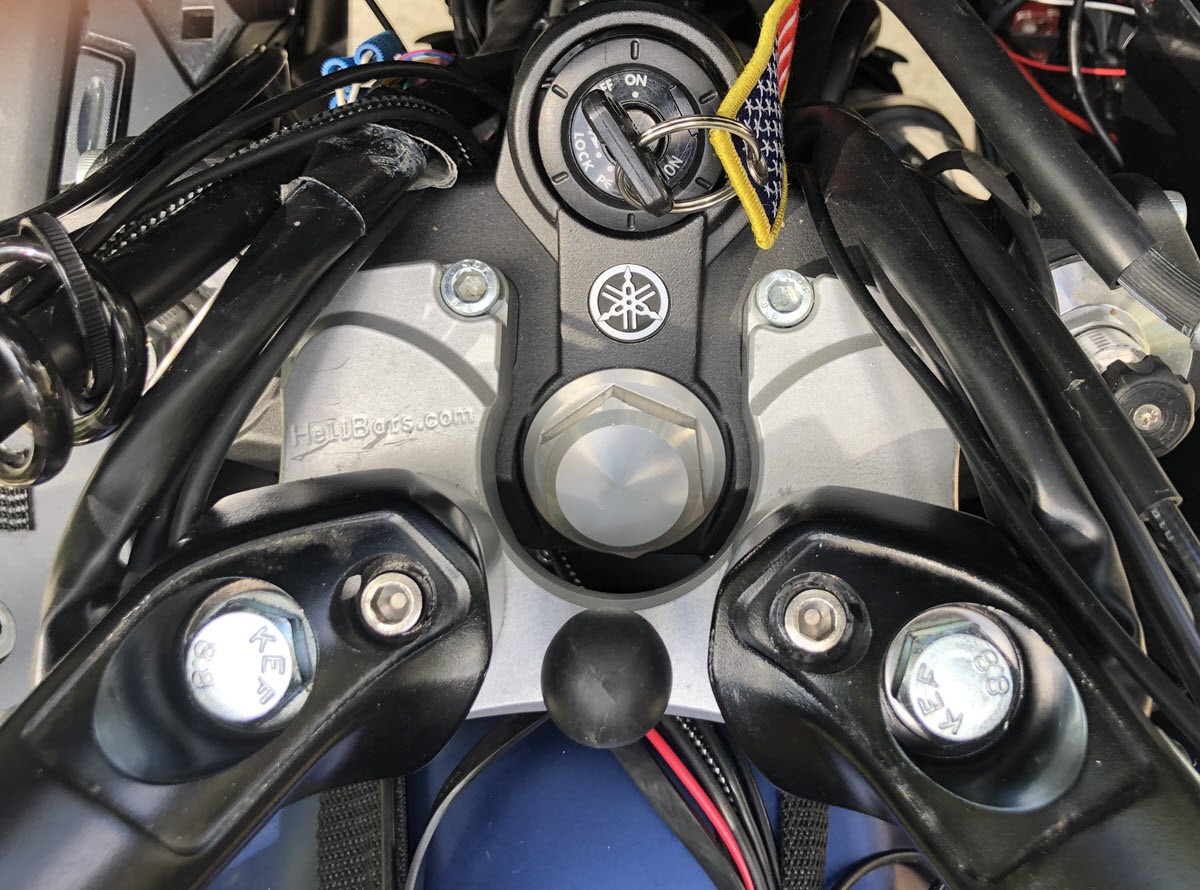
Helibar Risers
I installed the Helibar risers because they provide the most adjustment including the most backward placement of the handlebars. This really helps make riding the FJR more comfortable for me.
There is work involved in installing the Helibar risers and it takes two people to do the job. It takes about two hours to complete the work and requires removing the handlebars, throttle cables and the brake line.
Dasen One Inch Handlebar Risers
Installing the Helibar risers really helped provide me a more upright seating position for the FJR which is what I like best for long distance riding. I still had some reach to the handlebars and was still leaned over some but it was ok. When the Russell seat arrived I found that I needed to do something more to get me in a more upright seating position. I remembered back in the day we used to stack two sets of handlebar risers on Honda ST1300's to help improve the seating position so I thought why not do the same on my FJR. I ordered a set of one inch Dansen handlebar risers from Amazon for $35 and waited for them to arrive.
I was a little concerned if I would have enough cable length to work with stacking the two handlebar risers. The Helibar risers came with a brake line extension which I had already installed and I rerouted all of the cables when I installed the Helibar risers so I was hoping that would provide enough cable length to add these new one inch risers.
Well it worked and I really noticed the difference with the double stacked risers.
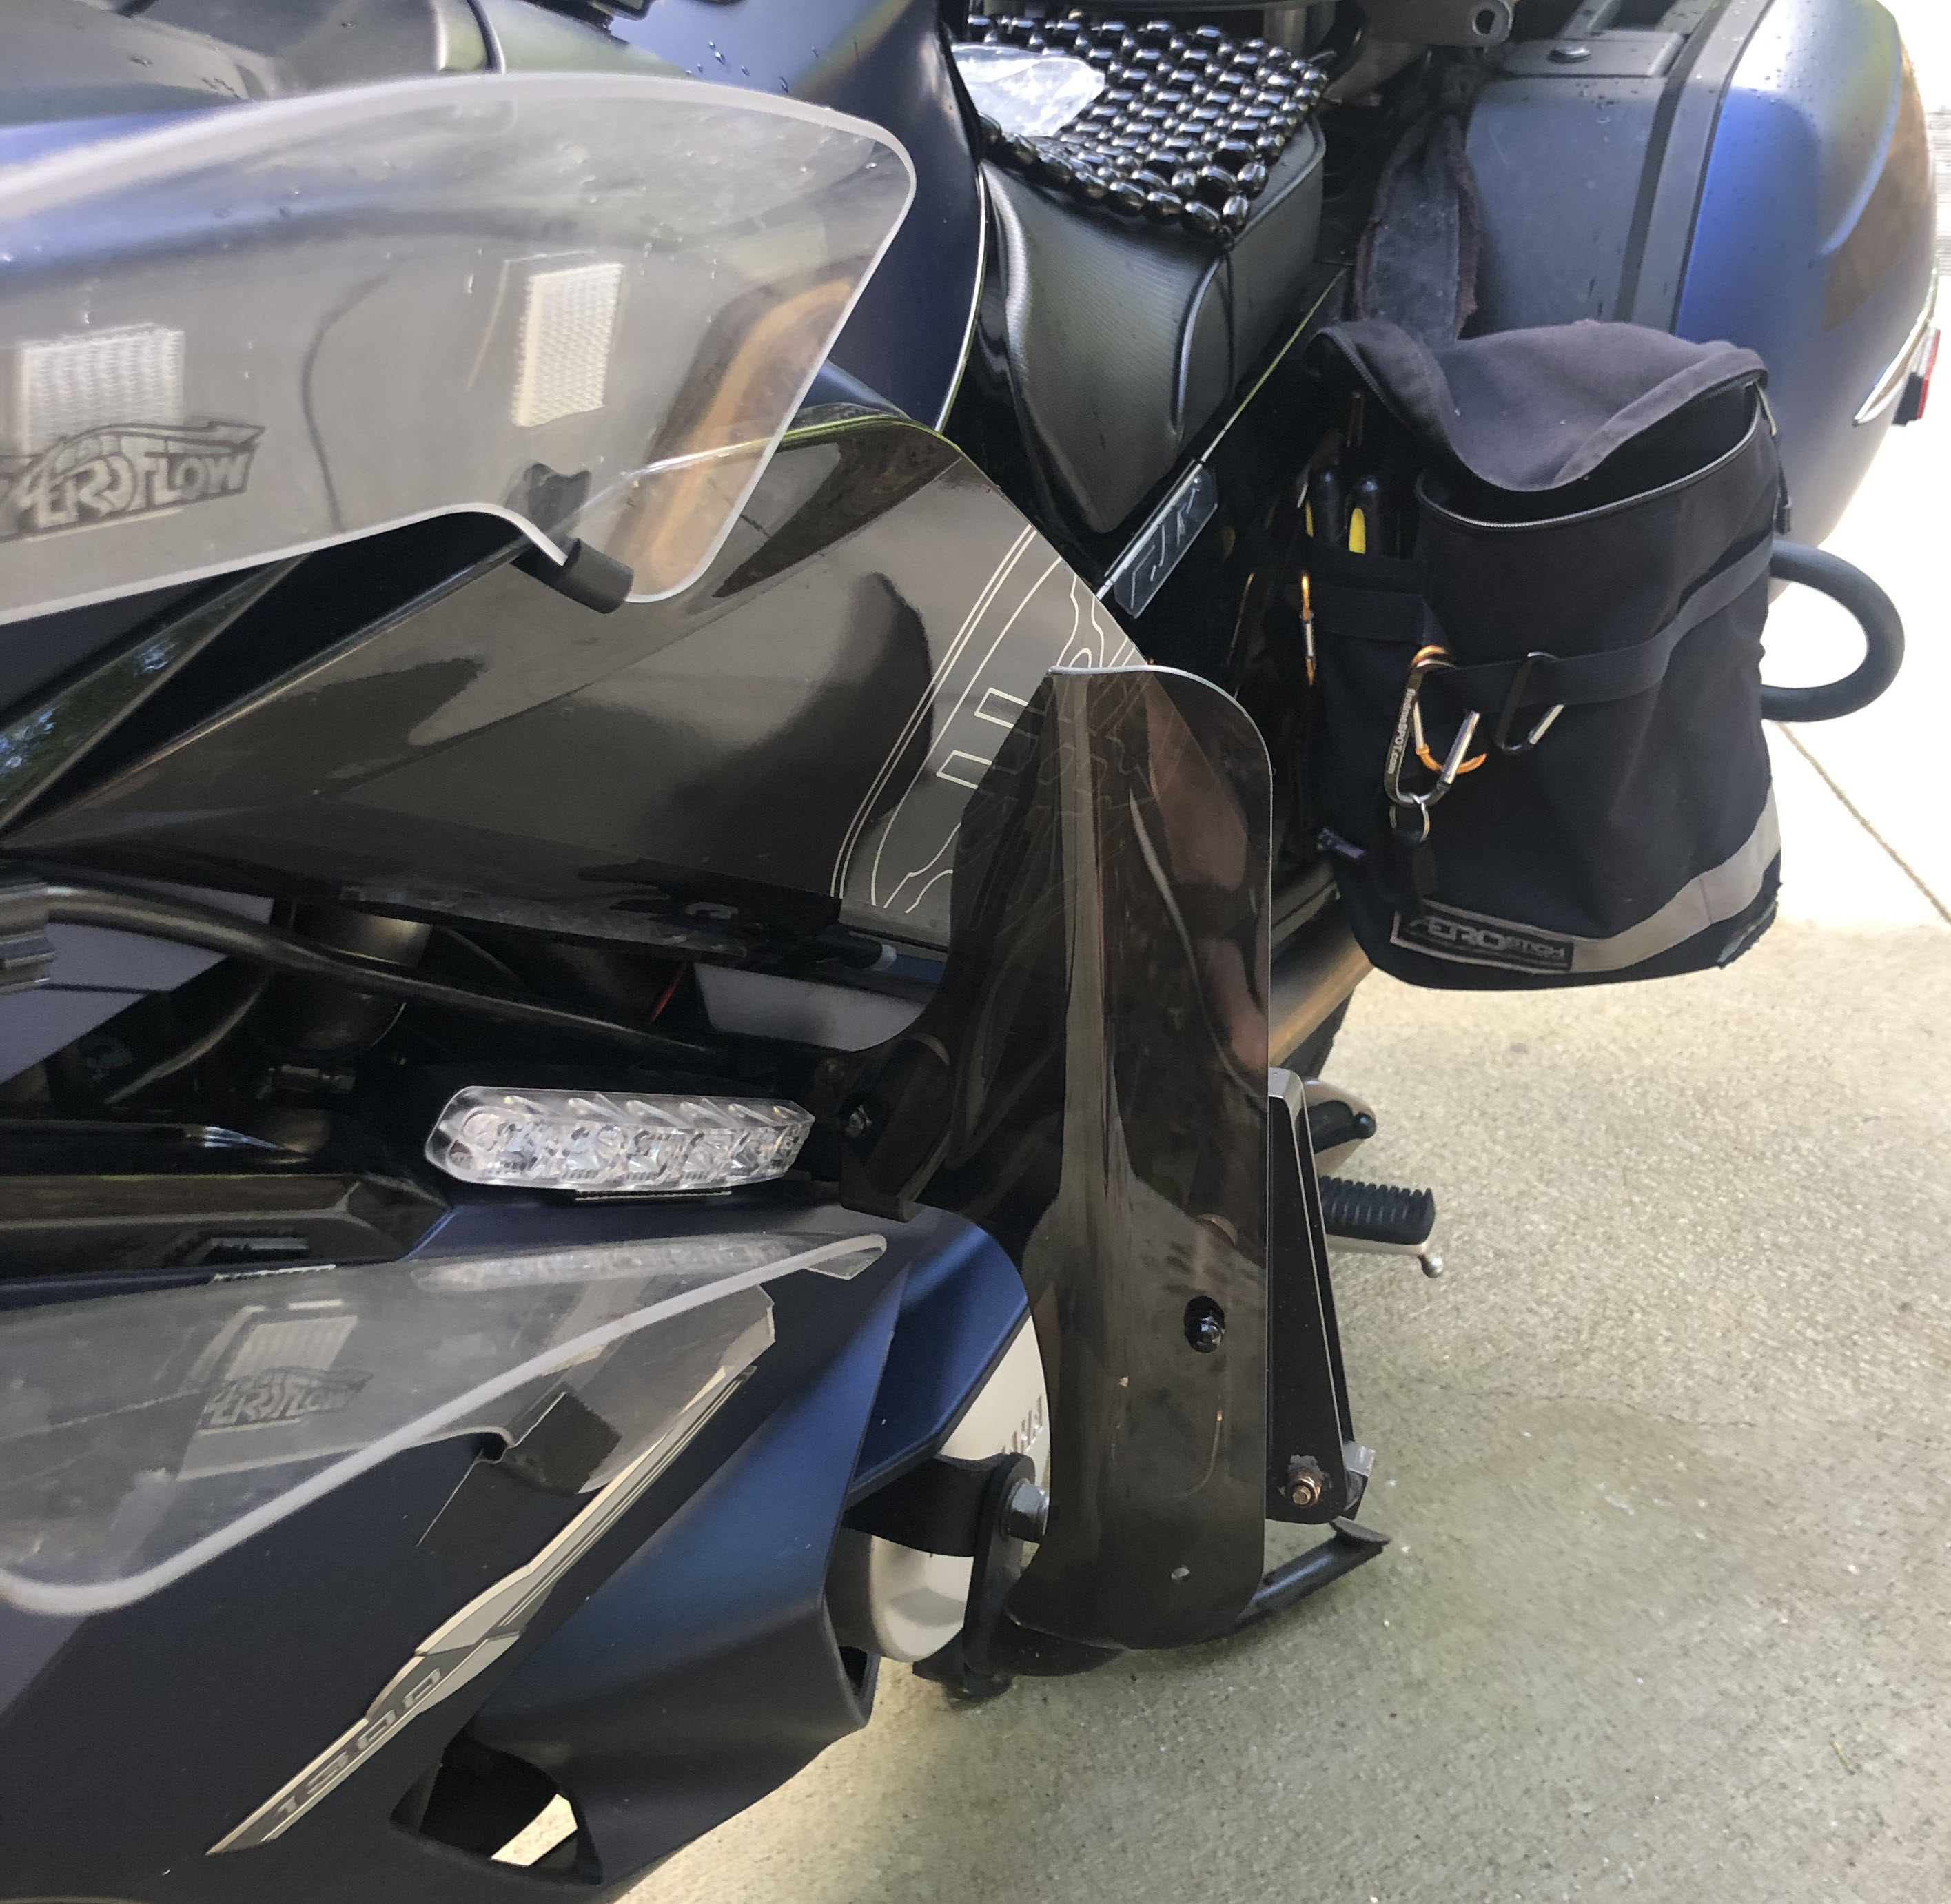
Lower Leg Air Deflectors
While riding the FJR noticed I was getting hit in the lower legs just about the top of my boots ( I wear TCX Gore-Tex Matrix boots that are 12 inches tall ) with road debris. On one of my BBG rides I was hit 3 times in the lower legs and one of the times it must have been by a rock as I had a bruise and swelling for over a week.
I never had this problem with the Gold Wings, BMW RT and my BMW GSA. they all had good lower leg protection from the fairing and the boxer style engine.
I decided to look into some type of air deflector to provide protection to my lower legs and since I rode Gold Wings for many years I knew there were some companies making lower leg air deflectors. I found that Baker Built Air Deflectors had a nice lower leg air deflector that mounts to the Gold Wing engine guards. since I have added engine guards to the FJR I thought they would work for me and mount to the FJR engine guards. Here is a link to where I purchased the lower leg air deflectors. http://bakerbuiltairwings.com/proddetail.php?prod=H18LW

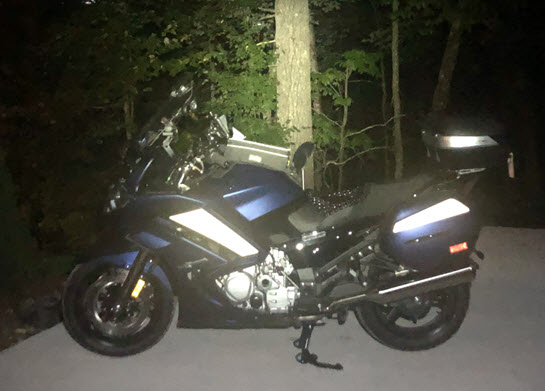
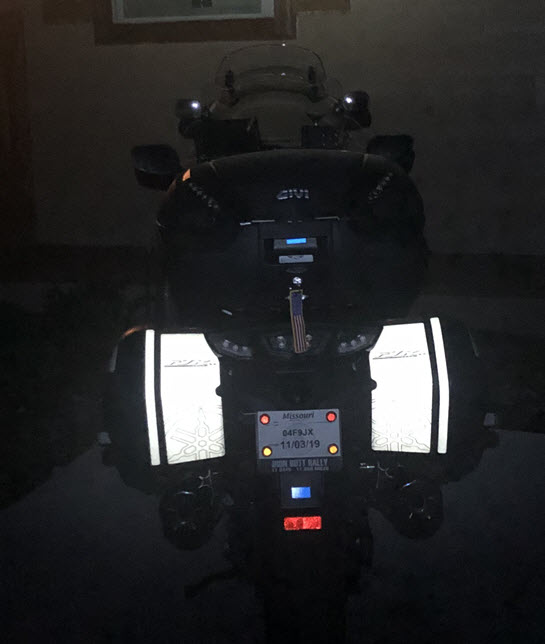
Real Time Industries Reflective Kit
One of the first farkles I ordered was the Real time Industries FJR full reflective kit. It really makes a difference at night.
Garauld TechWorks Hydration System
I do a lot of long distance riding and one of the key things while riding is to keep hydrated. I do this with a nice hydration kit from Garauld TechWorks. The kit mounts to the passenger foot peg and is easy to install. You can find his information on the FJR forum.
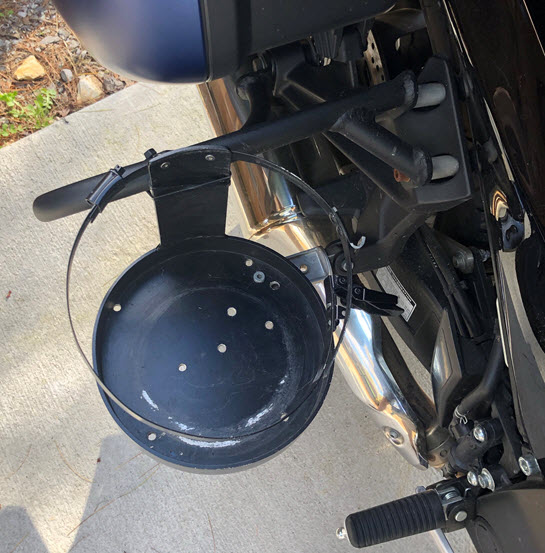
Click For Larger Image
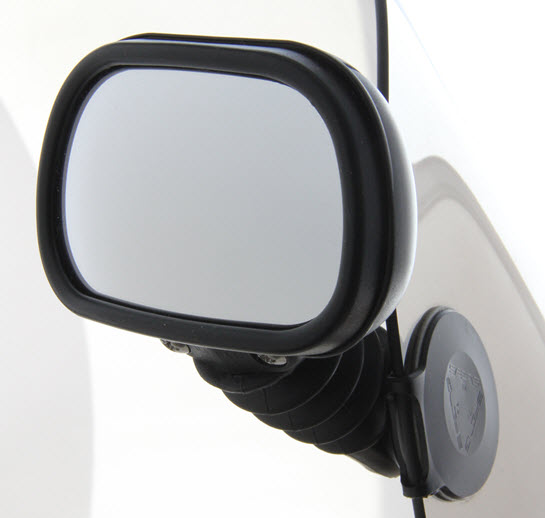
Saeng Quick Scan Mirrors
I have been using Saeng Quick Scan Mirrors for 16 years and really like the rear visibility they give me. I mount them so they are at the height that I can just give them a "quick scan" to see what is behind and beside me. With these mirrors I can see vehicles right next to me so I have no blind spots. The mirrors mount with 3M VIRB tape that works well over triple digits.
The mirrors have a lot of adjustability to allow them to work on many different windscreens.
The Saeng QuickScan mirrors are expensive ( $250 ) but they really make a big difference out on the road.
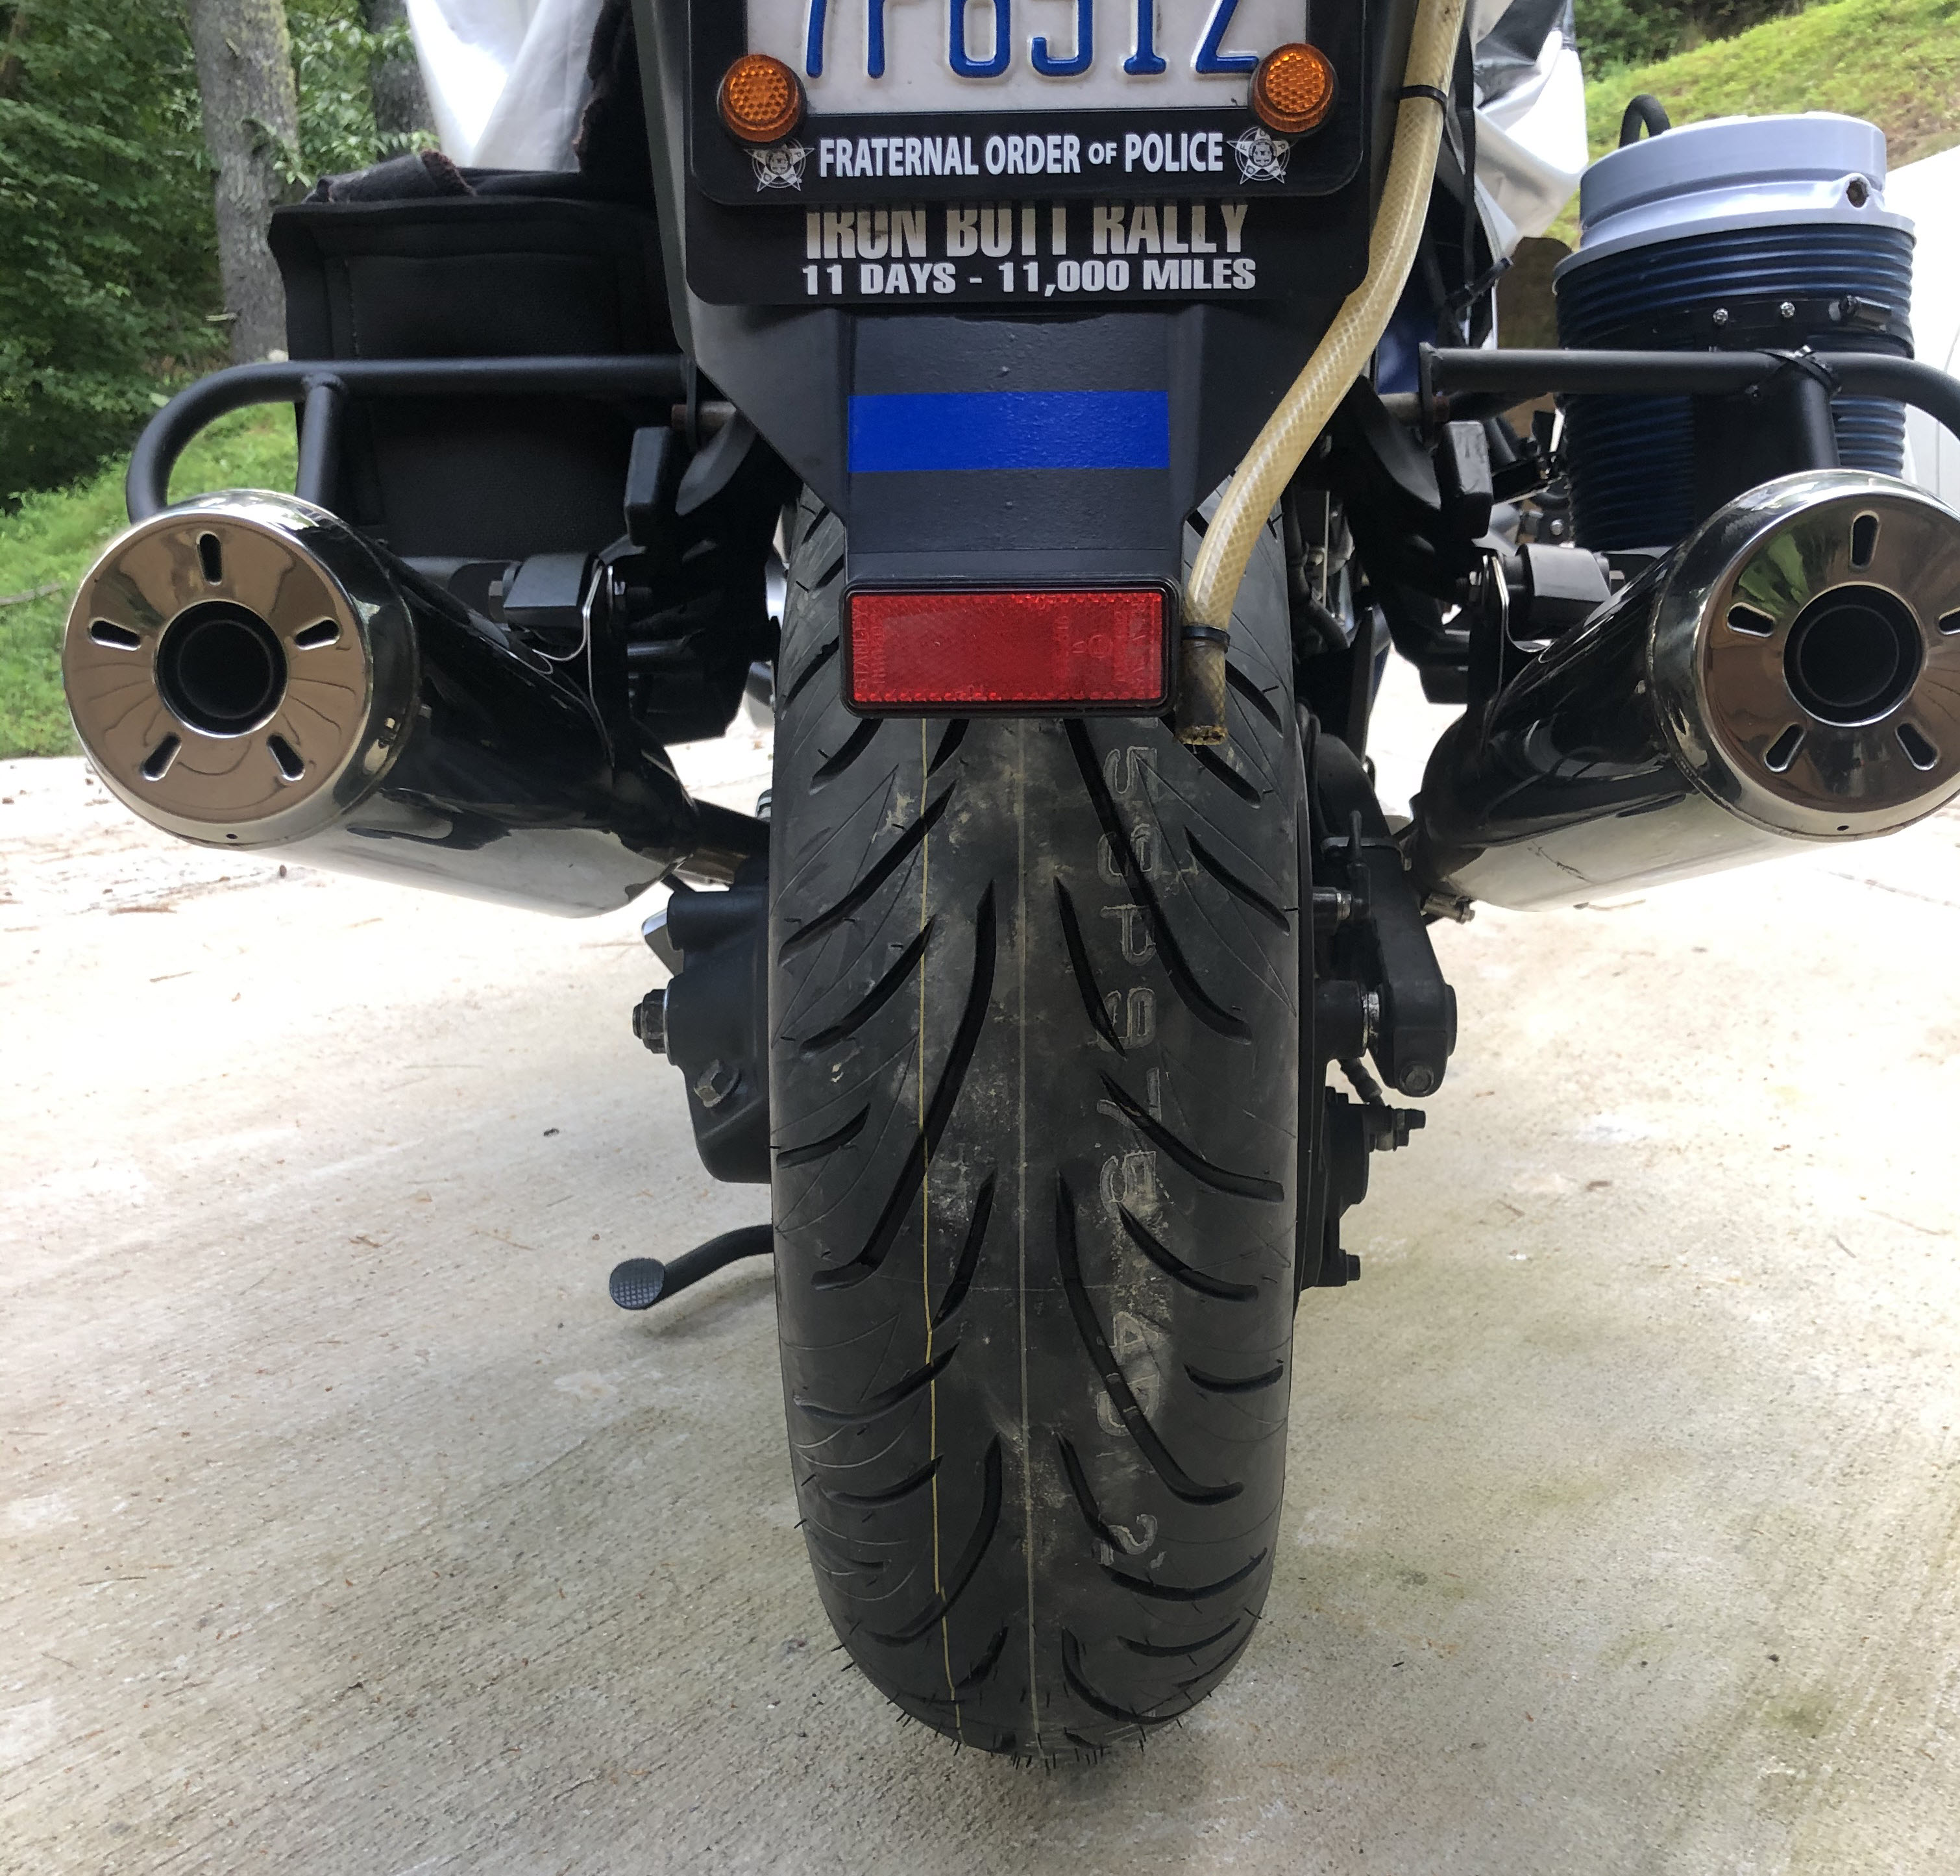
Tires - Including My Car Tire
I am not a peg scrapping canyon carving riders so tires are not as important to me as other farkles are on my FJR. It is important to have good safe tires with a lot of tread on them but I am not tied to one tire or another.
I started using car tires on my Gold Wings back in 2011 and on a Gold Wing a car tire works great. If you chose a good tire and a tire width that is not to wide a car tire can really get going in the corners. I also had a car tire on my 2016 BMW RT, I think the first on a RT. I was able to drag my foot pegs easily on the RT with a car tire. I have ridden over 200,000 miles on motorcycles with car tires.
I have a couple reasons I like to use car tires. I like the ability to carry a heavier load and more rubber touching the road for better braking and traction in the wet weather. I also like that I can get over 20,000 miles on a tire because some of my rides are more that 15,000 miles and it is nice to not have to worry about tire changes on rides to Alaska or in the Iron Butt Rally. Everybody is different and I respect their choices.
So one of the first things I did when I bought my new FJR was to order the same car tire I had I had been using my BMW RT as it was the same size as the FJR rear tire.
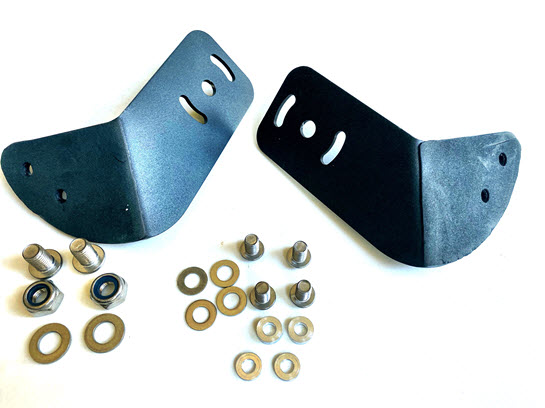
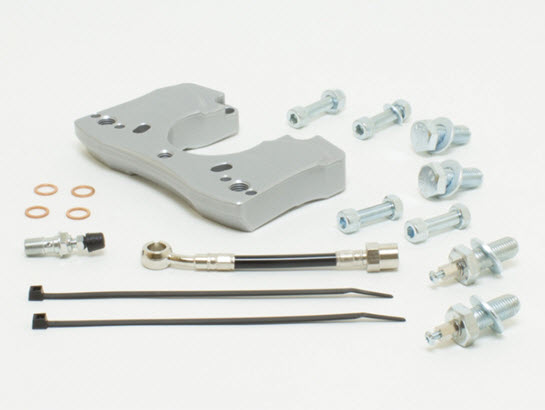
One of the things you need to do to mount a car tire is to replace the rear brake caliper linkage arm with a narrower one. I have a stainless steel part that was cut and drilled to match the original OEM part. It is just about a half inch narrower. This needs to be done because the car tire is wider than the motorcycle tire and would rub the linkage arm. You can see photos below of the original linkage arm and the replacement one.
I mounted the new rear Bridgestone T31 GT 190/55R17 ( see photo below ) and I am going to do some testing with this tire to see how it compares to the car tire. It is larger than the stock 180/55R17.

Original FJR Rear Tire ( 180/55R17 ) Compared To A 190/55R17
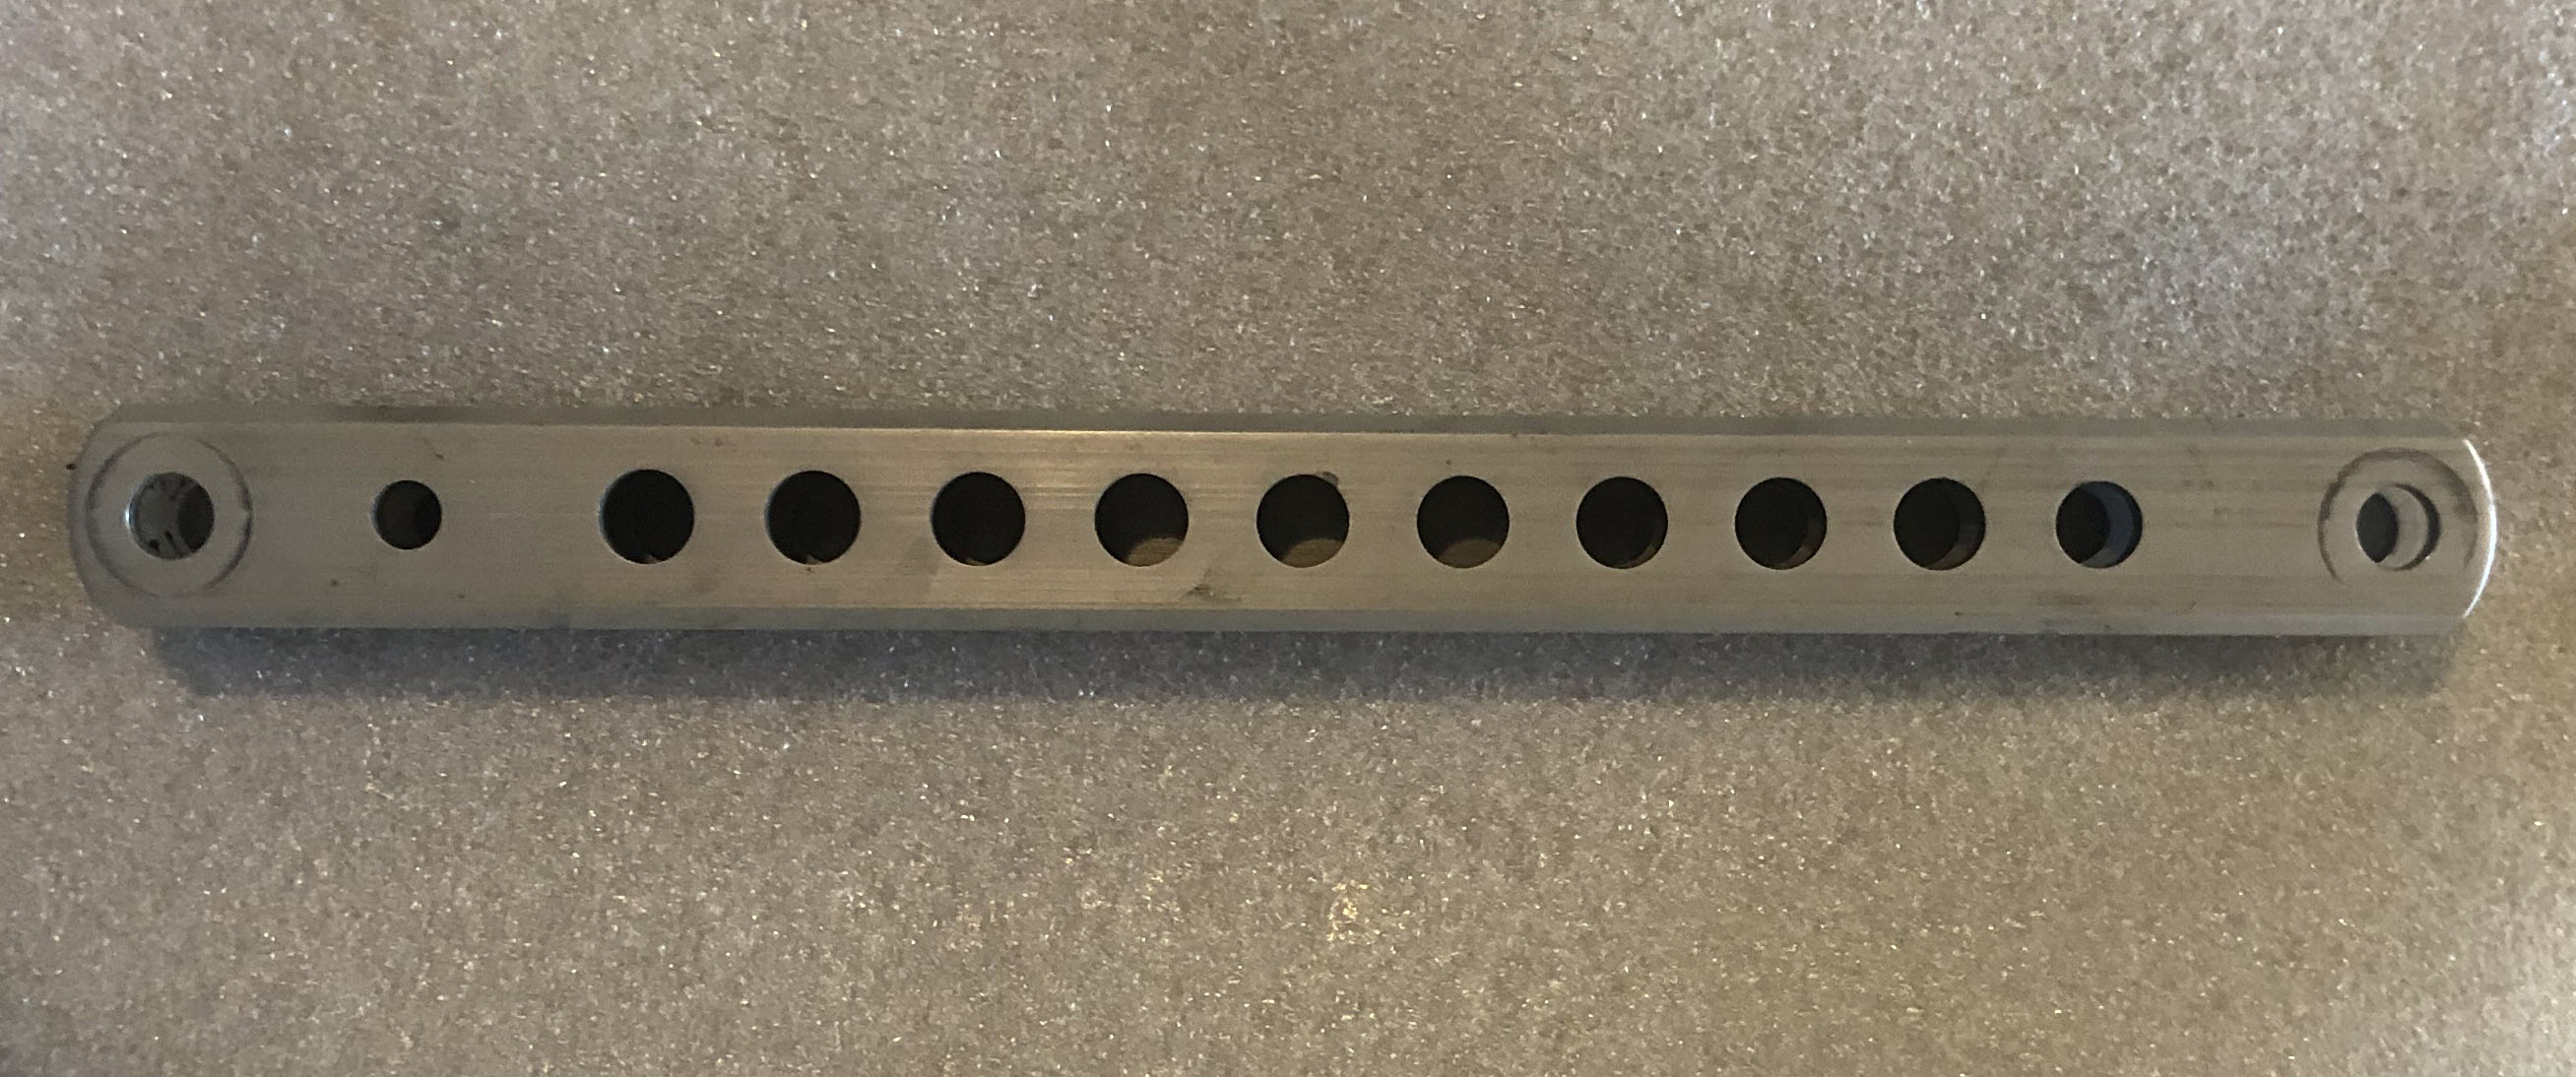
Original FJR Rear Brake Caliper Brake Linkage - Click For Larger Image
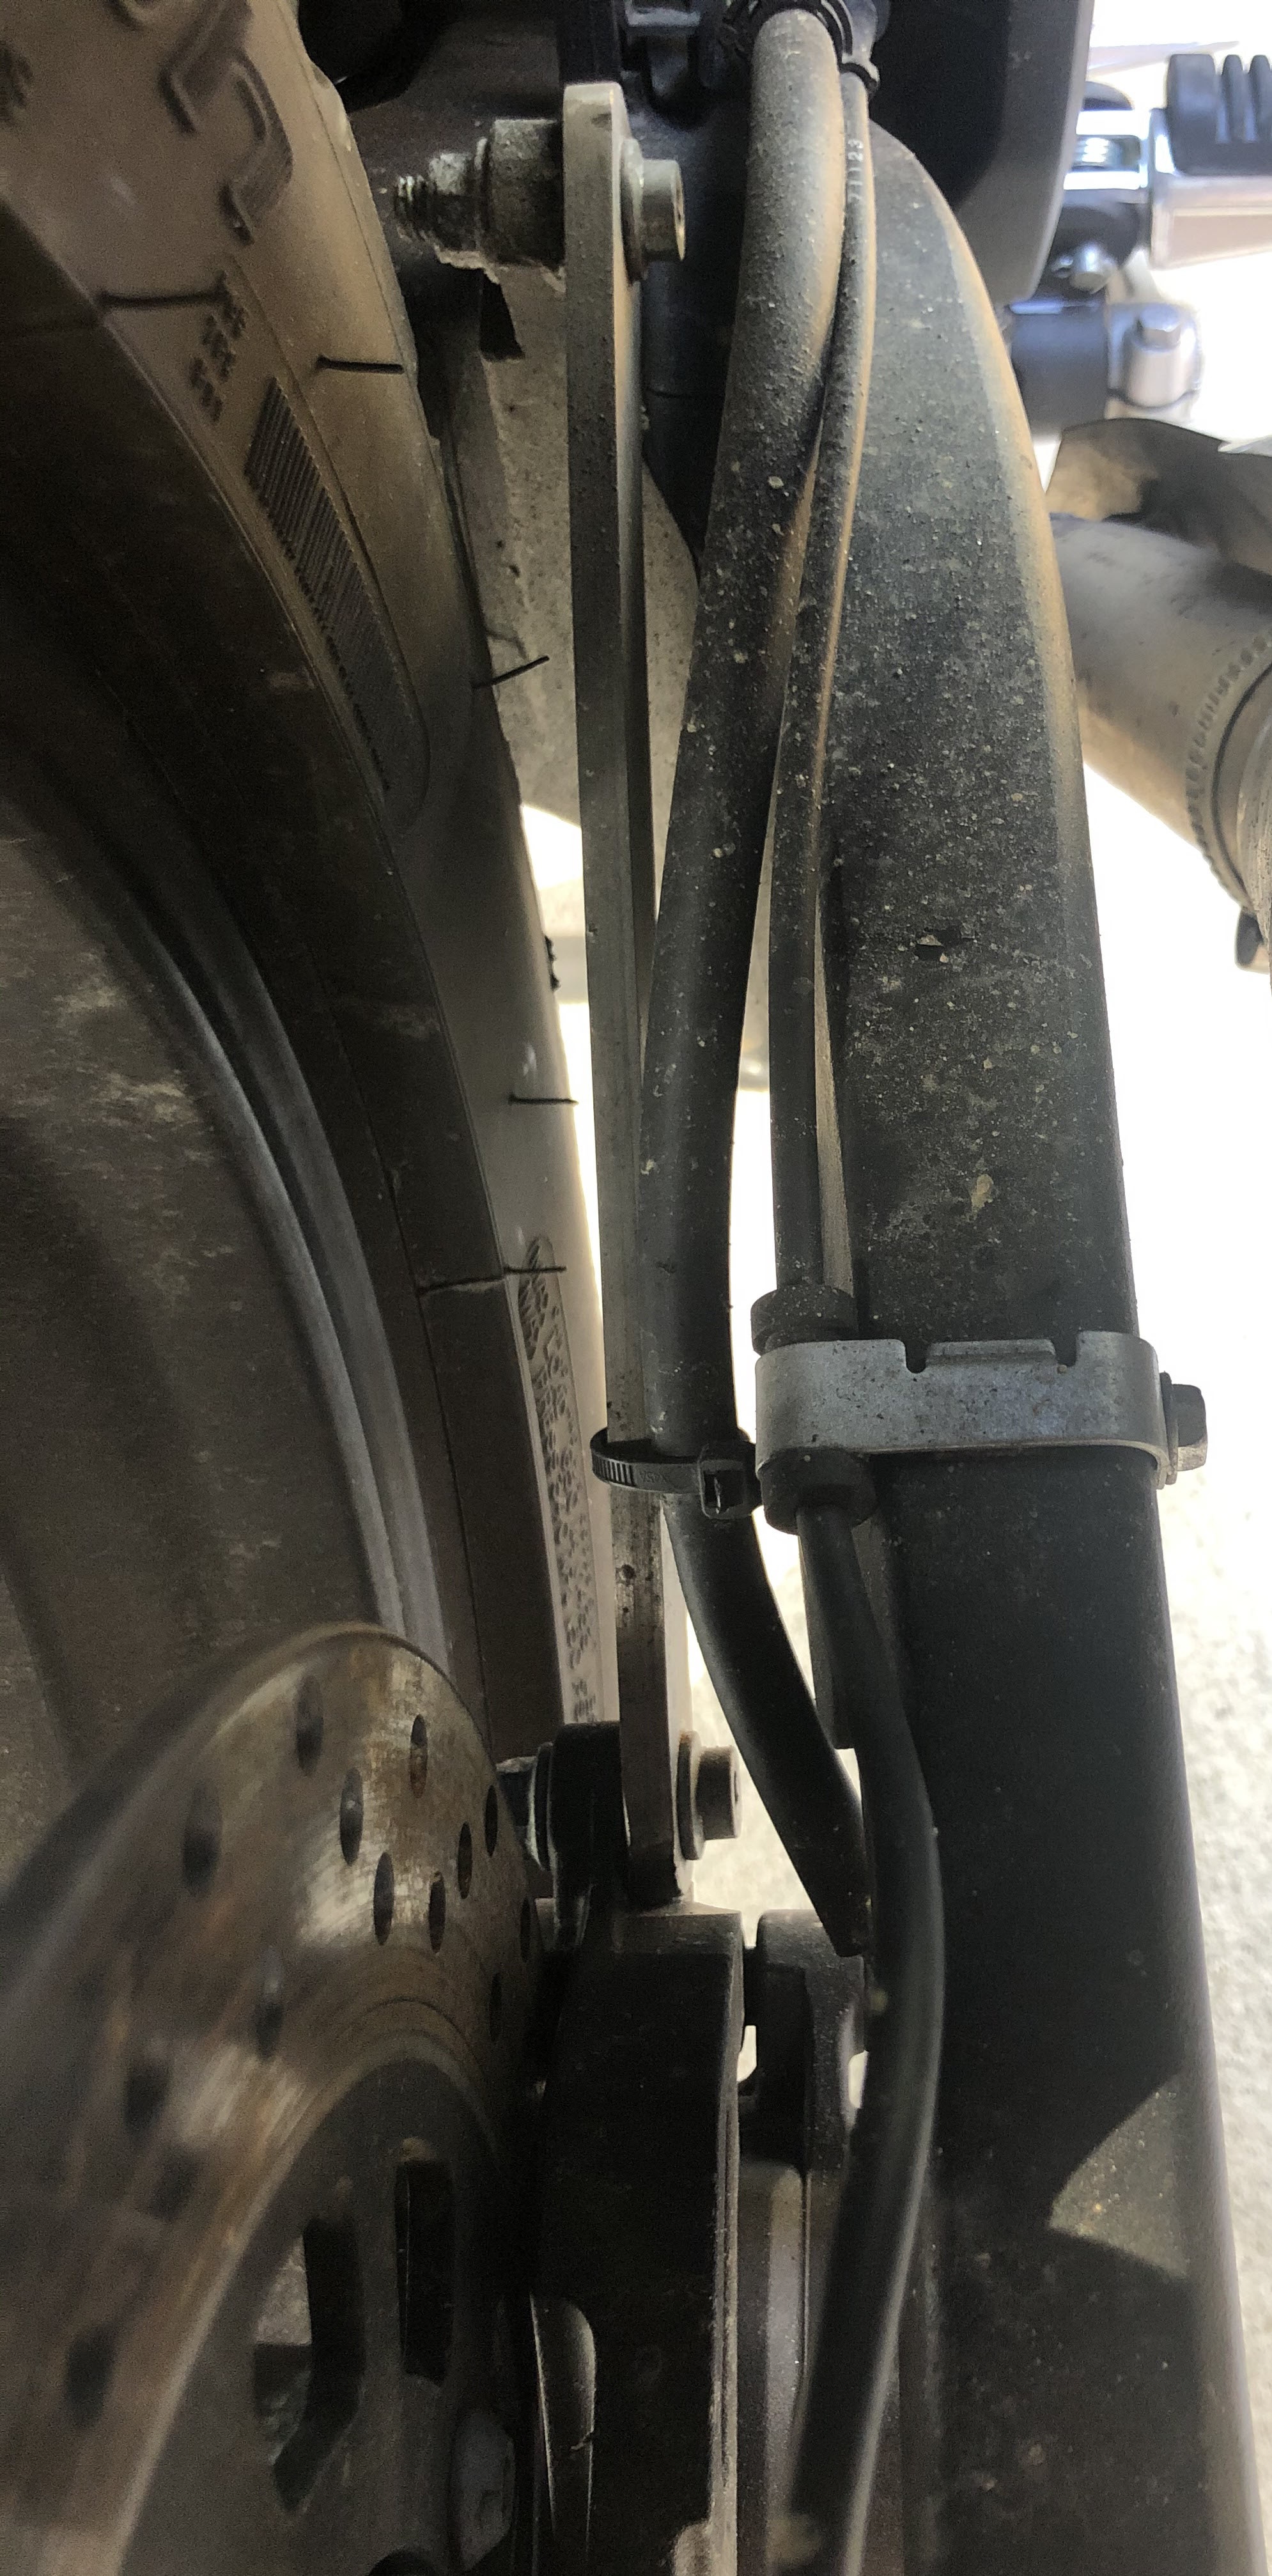
Replacement FJR Rear Brake Caliper Brake Linkage -Click For Larger Image
After 10,000 miles riding on the car tire I found the FJR harder to ride than my Gold Wing or BMW RT that had car tires. It takes more effort to make the FJR corner. I assume it is because the rake and trail are different and the weight ( center mass ) is in a different than the Gold Wing and BMW RT.
I am getting ready to tire a larger than OEM tire size on the FJR. The OEM rear tire size is 180/55/R17. I am going to mount a 190/55R17 tire and see how that feels.

Bridgestone T31 190/55/R17 -Click For Larger Image

Bridgestone And Car Tire Comparison -Click For Larger Image
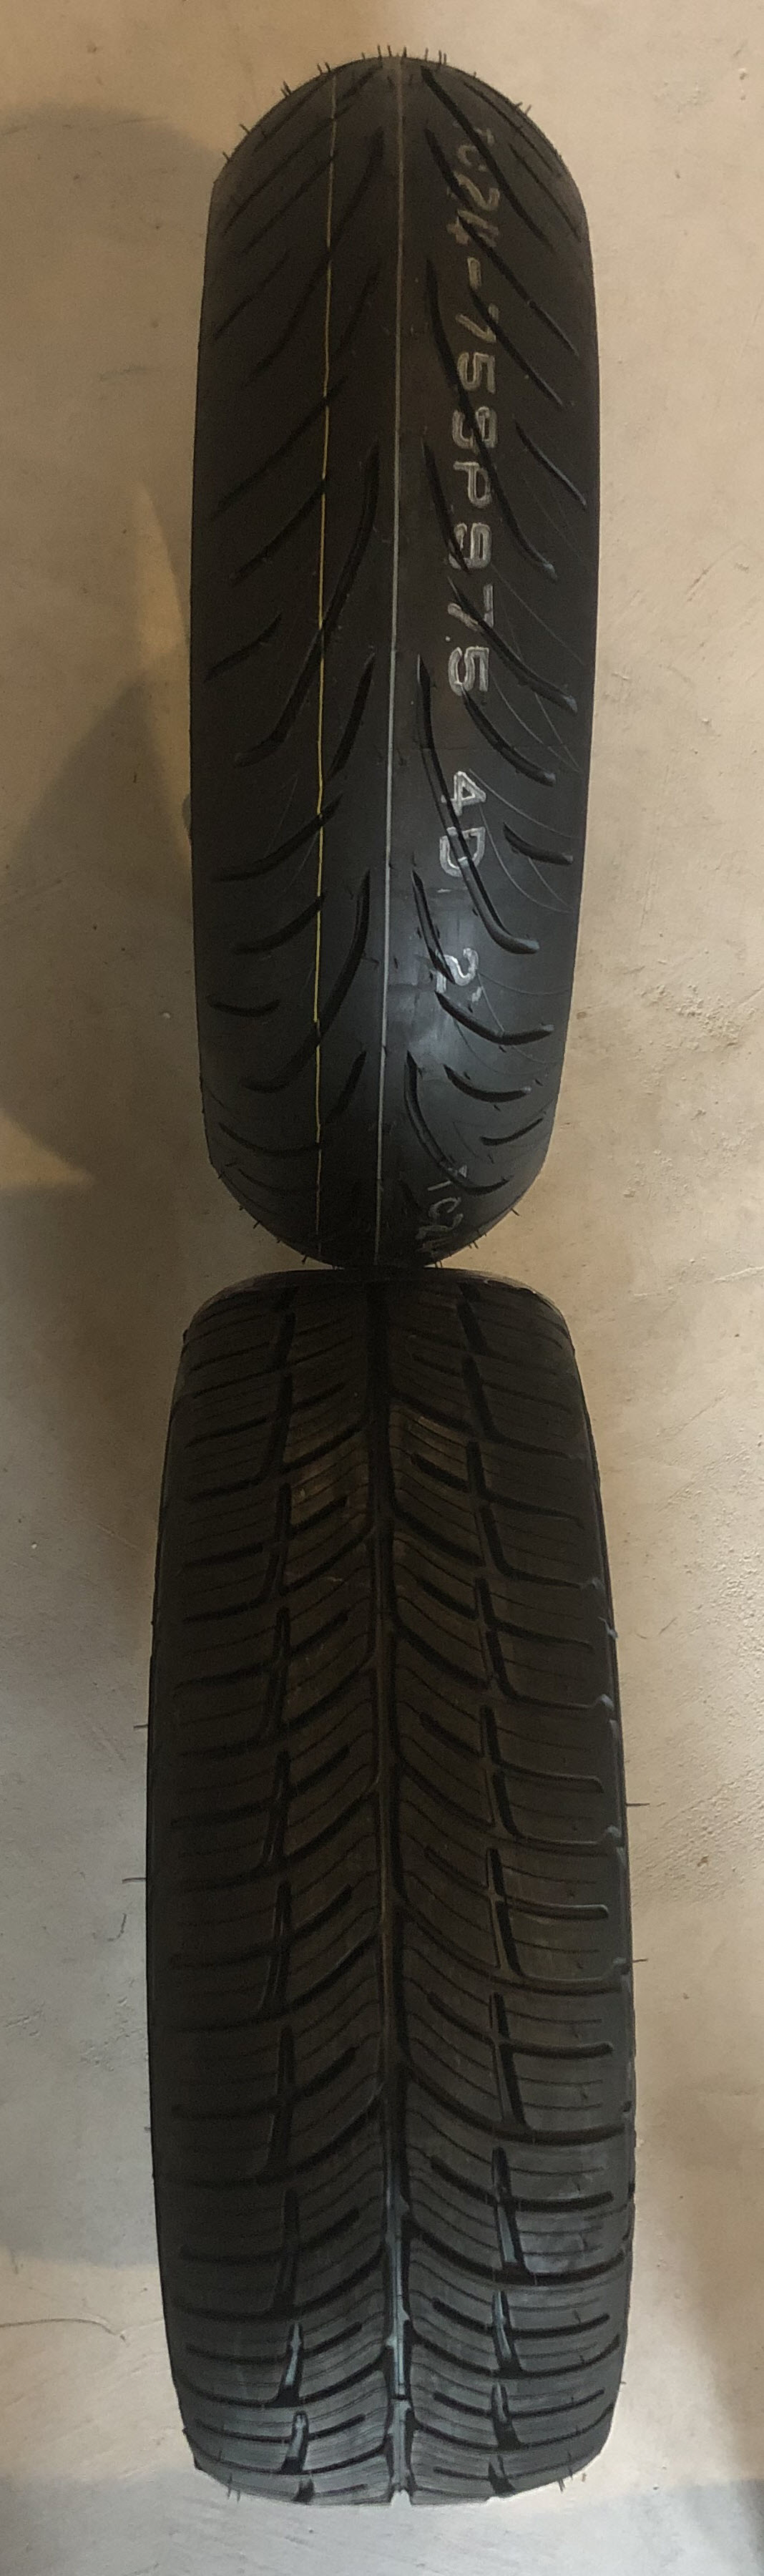
Bridgestone And Car Tire Comparison -Click For Larger Image
I mounted the new Bridgestone T31 GT 190/55R17
More information coming soon ...
![]()
![]()
![]()
2018 FJR
The 2018 Yamaha FJR1300 is a perfect motorcycle for long distance riding.
Miles Ridden
39,300